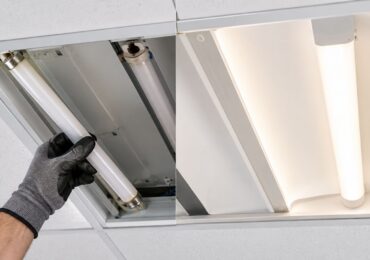
The inspection is tomorrow, and the exit signs are already on site. A few are mounted above doors, others are still boxed, and someone has noticed that a new display cabinet blocks the view down one corridor. The installation may look nearly finished, but “a sign is present” isn't the same as “the egress system will work during an outage.”
Emergency exit sign installation is a life-safety project involving route visibility, emergency power, mounting, testing, and records. A contractor can secure every housing neatly and still leave a building exposed if the battery fails, the sign can't be seen from the approach path, or nobody can prove that follow-up inspections occurred. The practical standard is simple: occupants must be able to identify and follow the exit route when normal lighting disappears, and the property team must be able to demonstrate that the system remains ready.
Understanding Life-Safety Code Requirements
Code compliance matters because an exit sign is only one visible part of a larger egress system. During normal operation, occupants may find their way from memory or follow ordinary lighting. During a power failure, the building needs illuminated routes, identifiable exits, and backup operation that continues long enough for people to leave safely.
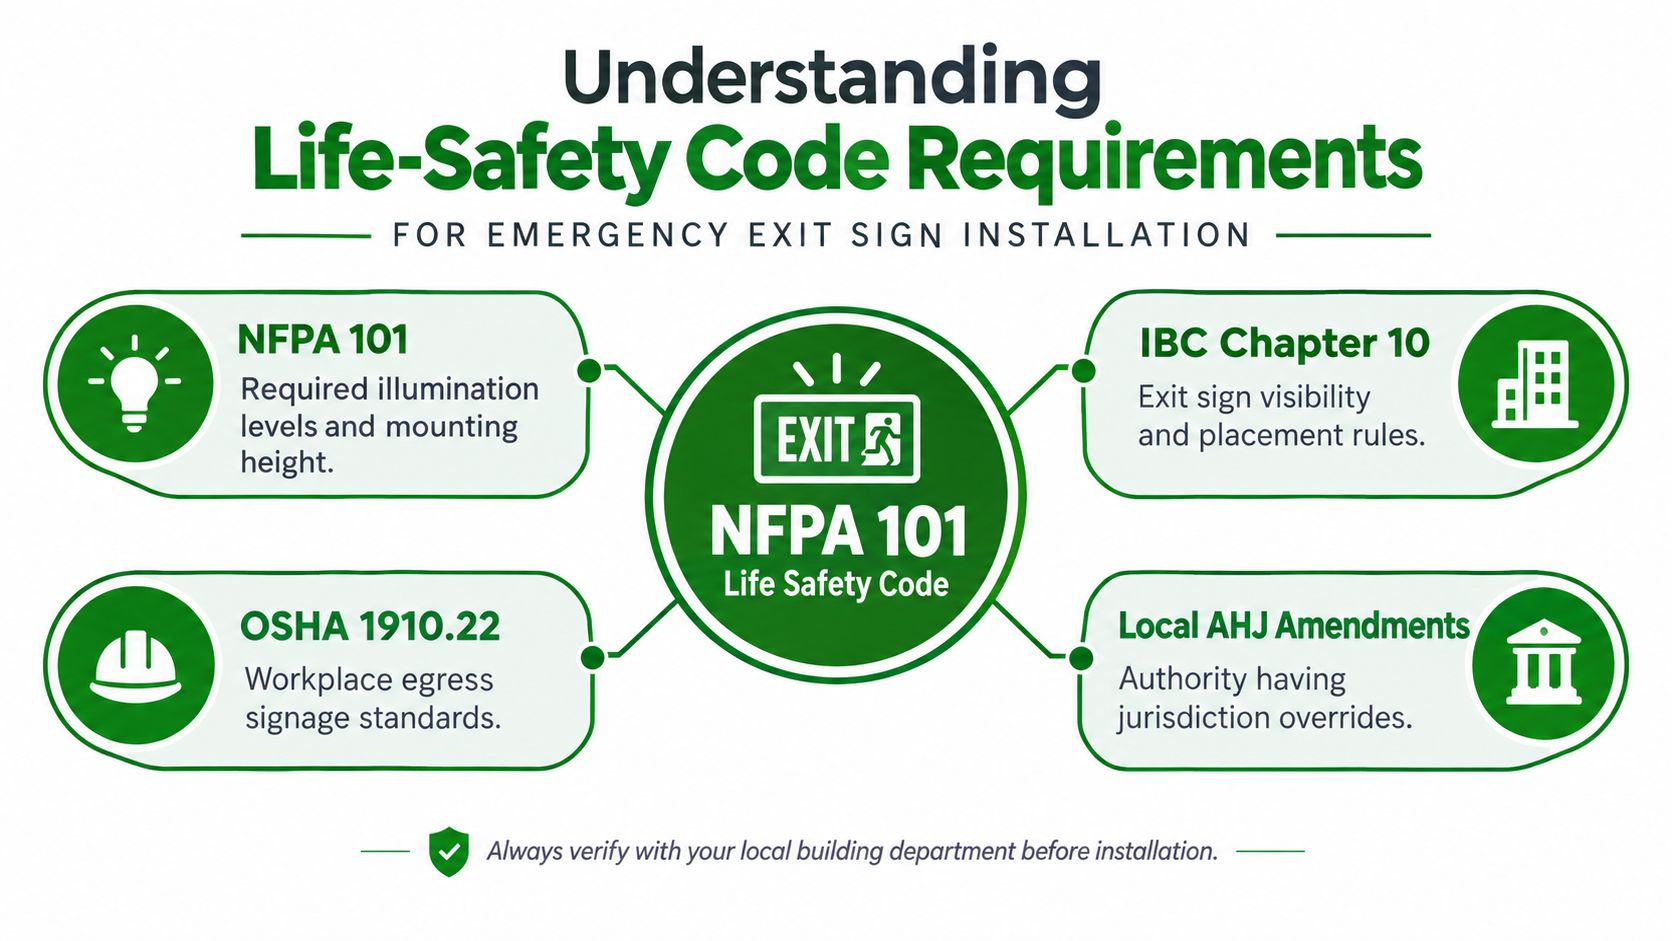
NFPA 101 requires emergency lighting in designated stairs, aisles, corridors, and passageways leading to an exit in occupancies including assembly, educational, hotel, mercantile, and business spaces. That emergency lighting must remain on for at least 90 minutes after normal power fails, as described in NFPA's Life Safety Code guidance. The same framework generally requires egress signage to be visible from exit-access directions and either internally or externally illuminated.
Treat the sign, power source, and route as one system
A sign mounted correctly but connected to the wrong circuit can fail when the building loses normal power. A battery unit that illuminates but points occupants toward a blocked route is also a failure in practical terms. The installation has to satisfy several connected conditions:
- Placement: The sign must occupy a position where occupants can identify the exit route.
- Illumination: The legend must remain visible under normal and emergency conditions.
- Backup operation: The emergency system must transfer quickly and sustain operation for the required duration.
- Inspection: The owner must keep checking the equipment after the installation crew leaves.
NFPA guidance identifies a useful physical milestone, the bottom of the exit sign should be not less than 80 inches above the finished floor, subject to the applicable code, listing, and local requirements. Illumination of exit markings must also be visually confirmed at intervals not exceeding 30 days, according to the same NFPA reference.
OSHA adds a workplace performance requirement. Exit signs in occupied workplaces must be illuminated by a reliable external light source providing at least 5 foot-candles on the sign surface, while internally illuminated signs are required in some occupancies where normal lighting may be reduced, as explained in OSHA's workplace exit-sign interpretation. The applicable building code, adopted edition, electrical code, fire code, and authority having jurisdiction still control the final design.
Confirm the adopted rules before ordering equipment
Model codes provide the starting point, not the complete permit answer. Local amendments can affect sign type, legend color, mounting details, low-level signage, and inspection procedures. Before ordering a large quantity, obtain the project specifications, confirm the adopted code editions, and ask the authority having jurisdiction, or AHJ, about local requirements.
Practical rule: Don't approve a product submittal until the sign's listing, viewing distance, face configuration, emergency power method, and test access match the actual egress layout.
The safest approach is to put the code decisions on the plan set. Mark every required sign, show directional arrows at turns, identify the emergency power source, and note the testing method. That record helps the installer work from a clear design and gives the inspector something concrete to review.
Planning Placement and Visibility Zones
A sign that hangs above a door but disappears behind a tenant display hasn't solved the egress problem. Placement begins with the route, not the wall or junction box. Walk the building as an occupant would, starting at each occupied area and following every available exit-access path toward the exit discharge.
Map the route before rough-in
Use the floor plan as a starting point, then verify it in the field. Mark doors leading into the egress path, changes in direction, intersections, stairs, and final exits. At each decision point, ask whether a person unfamiliar with the building can tell where to go without relying on a verbal instruction.
NFPA and IBC practice generally uses a maximum visible distance of 100 feet, or the sign's listed viewing distance, whichever is more restrictive, as summarized in this emergency-lighting design guidance. That isn't a license to place signs at measured intervals and stop looking. The route must also provide a clear line of sight from the actual approach direction.
Stand in the corridor, lobby, stair landing, and doorway approaches. Check the view from both sides where traffic can travel in both directions. A single-face sign may work on a wall with one-way approach, while a double-face sign is often appropriate where occupants approach from opposing directions. At a T-intersection, a flag-mounted sign can project the legend into the approach path more effectively than a flat wall-mounted unit.
Keep arrows tied to the final route
Directional arrows should be selected after the egress path and door swings are confirmed. An arrow that points toward a door but fails to show the next turn can create confusion during an outage. Don't apply chevrons from a generic room plan if partitions, tenant improvements, or door locations have changed.
Check these conditions during the field walk:
- Approach direction: Verify that the legend can be read from every direction occupants will use.
- Decision points: Add directional signage where the exit isn't immediately obvious.
- Obstructions: Look for shelving, décor, ductwork, soffits, suspended fixtures, equipment, and future display locations.
- Contrast and glare: Keep the sign readable against adjacent finishes and away from lighting or daylight glare that washes out the legend.
- Mounting height: Maintain the applicable height requirement, with NFPA guidance placing the bottom of the sign at least 80 inches above the finished floor.
- Viewing distance: Confirm that occupants can see a sign within 100 feet or the listed viewing distance, whichever is more restrictive.
Recheck after construction changes
Many visibility failures happen after the original installation. A tenant adds a storage rack, a hotel renovates a lobby, or a retail operator installs a promotional display. The sign remains powered and physically secure, but the route is no longer legible from the approach.
Mark the approved sign locations on the closeout plan and photograph the sightlines from the main approach points. During the final walkthrough, turn off normal lighting where the test procedure allows it and confirm that the legend and route remain identifiable. A clean installation is not enough if the person walking the path can't see what to do next.
Selecting the Right Power and Battery Options
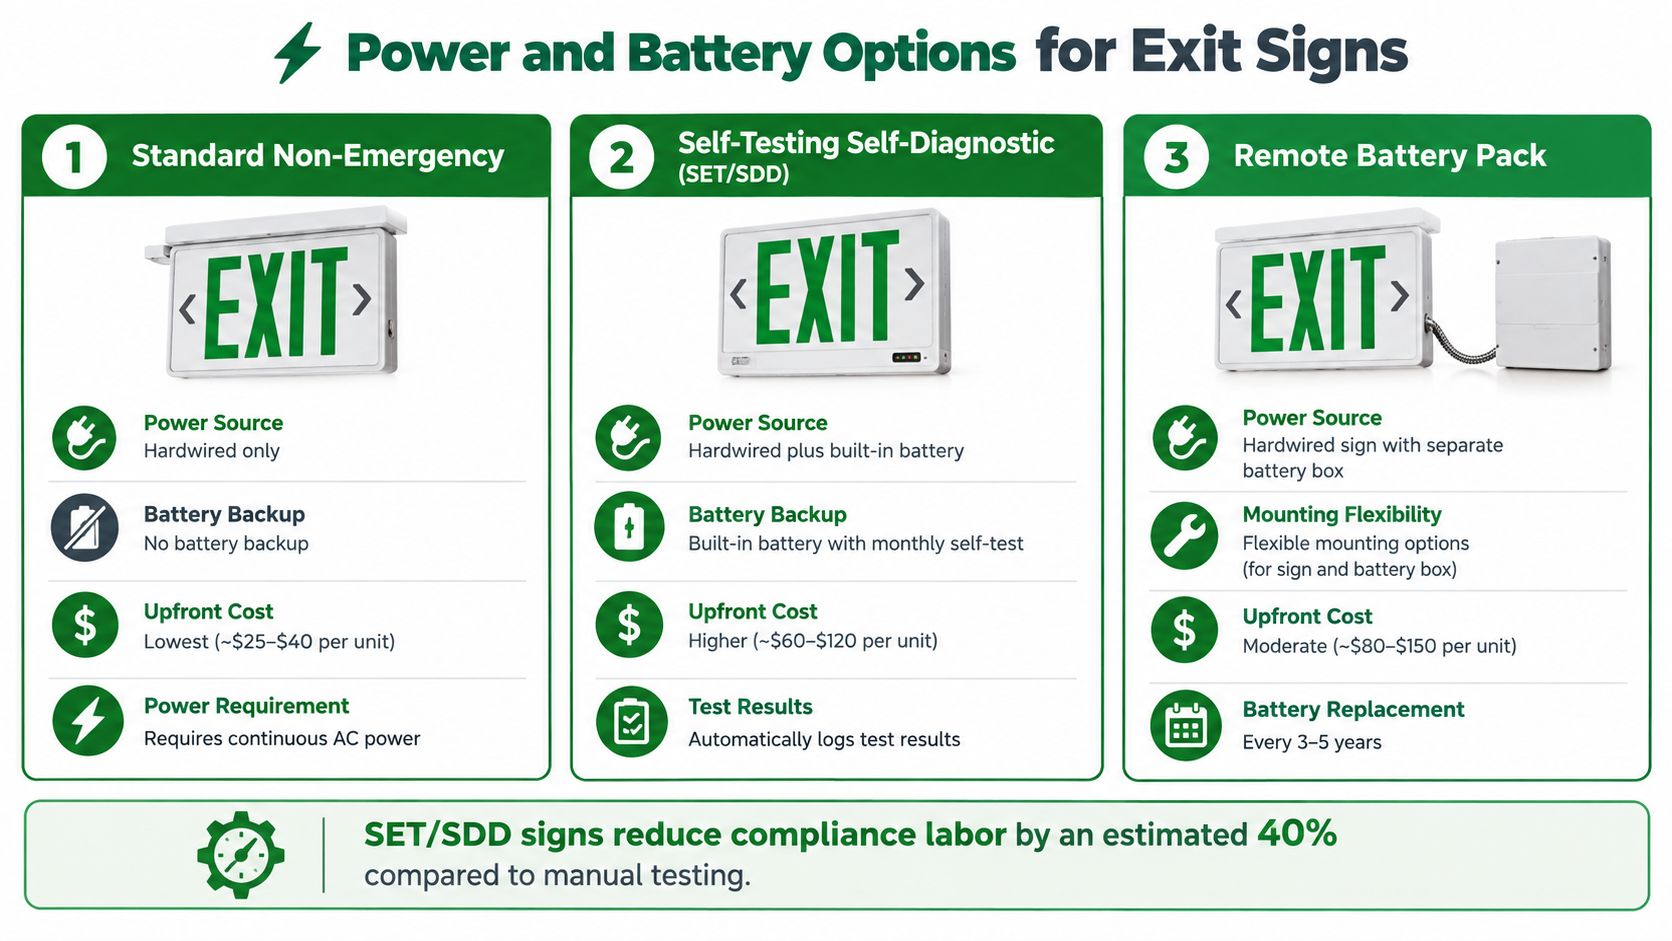
Power selection determines how the sign behaves during an outage and how much work the property team must perform afterward. The common choices include battery-backed self-contained signs, remote battery systems, hardwired signs without emergency backup where permitted for a specific application, and photoluminescent products that depend on continuous illumination during occupancy.
Battery-backup exit signs held a 55% market share in 2025, according to market coverage of emergency exit signs. That position reflects a practical advantage in many commercial retrofits: the sign contains its emergency source, so the installer doesn't have to route a separate battery circuit to every location. The trade-off is that each unit has a battery, a test point, and a future replacement decision.
Match the configuration to the building
For a typical retrofit, a self-contained LED exit sign with battery backup is often straightforward. It needs a reliable unswitched supply, correct branch-circuit identification, accessible test controls, and a maintenance plan. It also avoids dependence on a remote battery enclosure that may be difficult to reach above a hard ceiling.
A remote battery pack can make sense when several fixtures share an emergency power strategy or when the project already has a suitable central system. It can simplify some fixture layouts, but the battery enclosure, conductors, access, and coordination become part of the installation. Don't choose it solely because the sign housings look cleaner.
Photoluminescent signs have a different operating profile. They don't use an internal battery, but they require continuous charging illumination during occupancy and must be listed for the application. If normal lighting controls switch off the charging light, the sign may not deliver the expected visibility during a failure. The emergency lighting required for the egress path still has to be addressed separately.
| Configuration | Where it tends to fit | Main maintenance question |
|---|---|---|
| Self-contained battery backup | Commercial retrofits and distributed sign locations | Can staff reach and test every battery unit? |
| Remote battery system | Coordinated emergency-power designs and selected new construction | Is the battery enclosure accessible and documented? |
| Photoluminescent sign | Areas with dependable continuous charging illumination | Will lighting controls and layout changes preserve charging conditions? |
| Self-testing or monitored equipment | Properties with many units or limited inspection labor | Who reviews alarms and acts on failed diagnostics? |
Don't confuse smart monitoring with a maintenance program
IoT-enabled self-testing and centralized monitoring can reduce the chance that a failed unit sits unnoticed. They can report diagnostic conditions to a facility platform, but somebody still has to review the result, assign the repair, and retain evidence that the issue was resolved.
The exit-sign battery guidance from Access Electrical and Lighting is useful when evaluating replacement and backup decisions, but the equipment choice should still follow the project's adopted code and listed installation instructions. A low-maintenance product isn't automatically the right product if its test access is blocked or its power source isn't reliable.
Field observation: The cheapest sign often becomes expensive when the property has no practical way to test it, reach the battery, record the result, or schedule the repair.
Before purchase, review the cut sheet for listing information, face type, viewing distance, mounting options, battery arrangement, test switch location, status indicator, and replacement parts. For a multi-tenant property, also ask who owns the records. The best configuration is the one the building can consistently inspect and repair, not just the one with the lowest material price.
Executing the Commercial Installation Process
The physical work should follow the approved route plan and product instructions, not improvisation at each doorway. Confirm the sign type, face direction, arrow, mounting method, and power source before drilling. That short pre-installation check prevents a common rework cycle, where a sign is wired, finished, and then moved because the sightline was wrong.
Prepare the location and circuit
Start by isolating the circuit and verifying absence of voltage with an appropriate tester. Commercial work may involve multiple sources, emergency distribution, generator-backed circuits, or shared junction boxes, so lockout and verification procedures need to match the site safety plan.
Install the listed junction box, canopy, bracket, or recessed kit required by the manufacturer. Don't rely on unsupported drywall anchors for a fixture that will be inspected, serviced, and potentially exposed to vibration. Use fasteners suitable for the wall or ceiling substrate, and coordinate with framing, concrete, masonry, suspended ceiling systems, and rated assemblies.
The emergency supply should be unswitched where the product instructions and project design require continuous charging. Label the circuit and identify it in the panel schedule or facility documentation. A sign that receives power only when someone turns on a local switch won't be ready when the building is occupied and normal lighting fails.
Mount with service access in mind
Set the mounting height and level before tightening hardware. Keep the legend clear of beams, soffits, sprinklers, ductwork, lighting fixtures, and finish elements. If a ceiling mount is used, verify that the face is oriented toward the approach path and that the suspension or support method is listed for the assembly.
For double-face units, check both legends. The housing may be physically secure while one face points away from the route or carries an incorrectly oriented arrow. For single-face wall installations, stand at the farthest approach and confirm the sign remains readable before accepting the position.
Complete the electrical connections carefully
Follow the manufacturer's wiring diagram for line, neutral, ground, remote test connections, and any battery or monitoring conductors. Keep splices inside an approved enclosure, secure conductors so they don't pull on terminals, and maintain separation from wiring systems where the applicable code requires it.
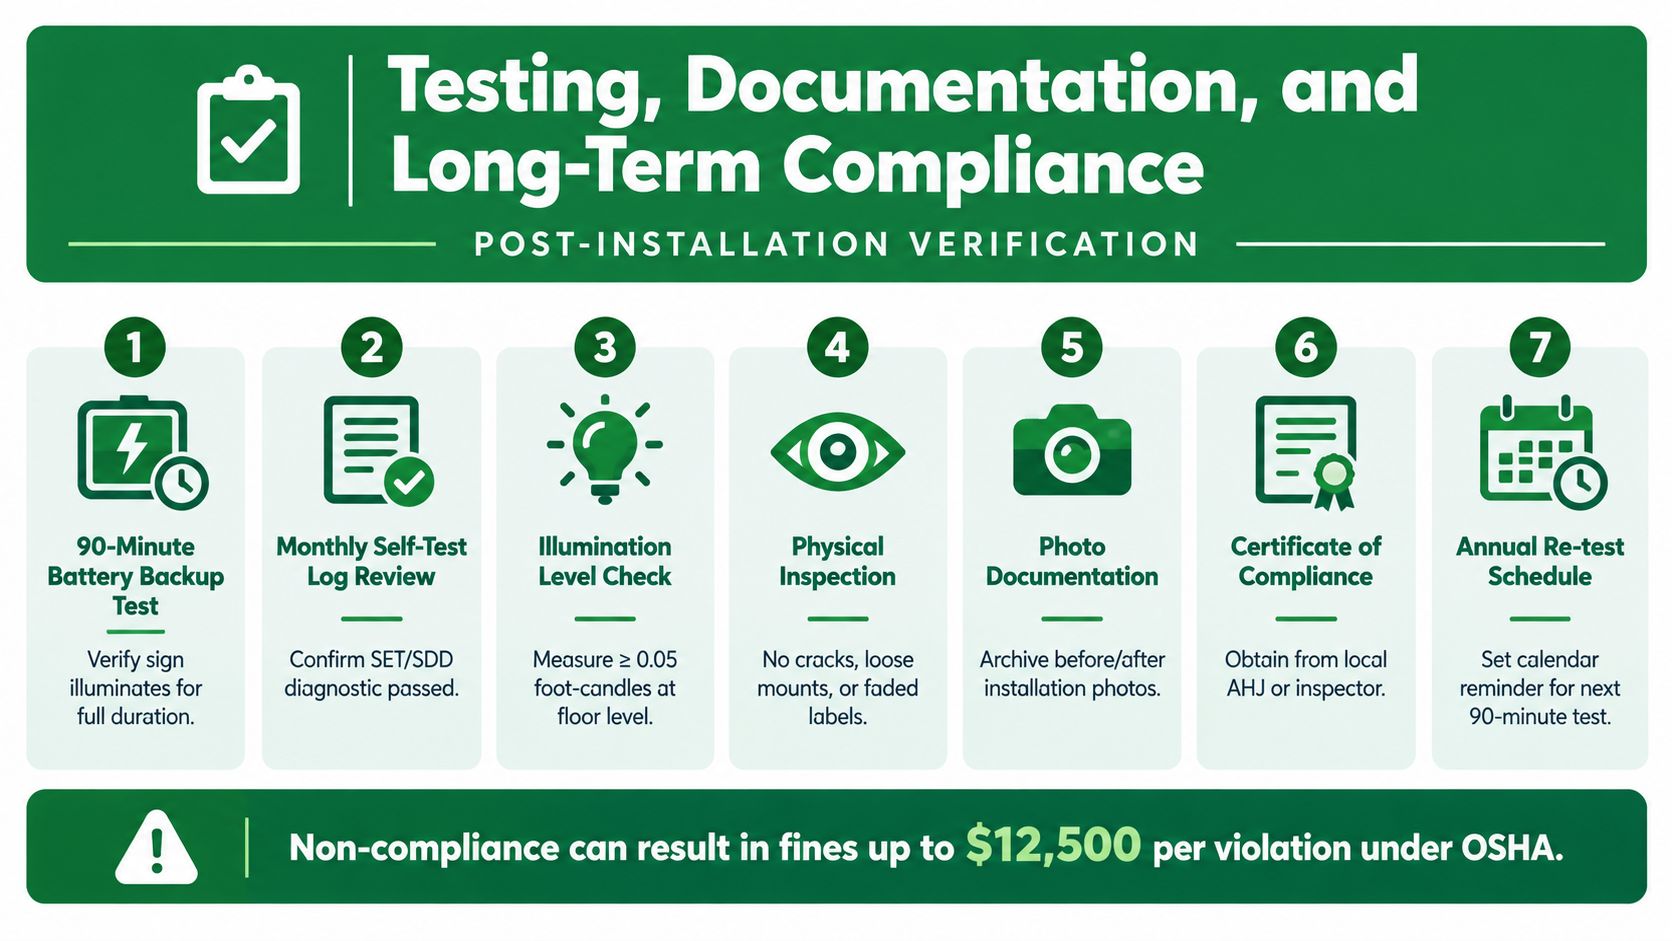
After energizing, confirm the charge indicator, push-to-test function, and normal illumination. Then verify the emergency operation under a controlled loss of normal power. The emergency-lighting system is commonly expected to activate within 10 seconds of normal-power loss, remain operating for at least 90 minutes, and provide an average of 1.0 foot-candle along the egress path with a minimum of 0.1 foot-candle at the walking surface, based on the cited egress and emergency-lighting performance guidance.
A professional closeout includes more than a photo of the mounted sign. Record the circuit, fixture location, model, face configuration, test result, and any field adjustment. If construction changed the route or introduced an obstruction, correct it before the inspection rather than leaving a note for the owner.
Testing, Documentation, and Long-Term Compliance
The installation is incomplete until the owner can prove that the system works after the crew leaves. This is the point where many properties lose control. The signs passed the initial walkthrough, but the batteries age, a circuit gets modified, a test switch becomes inaccessible, or nobody records the monthly check.
Independent guidance and product instructions commonly call for monthly functional testing for at least 30 seconds and annual 90-minute endurance testing, including the manufacturer's exit and emergency-lighting instructions. The exact procedure must follow the adopted code, AHJ direction, and equipment listing, but the operational principle is consistent: test routinely, document the result, and repair failures promptly.
Build a record that another person can use
A maintenance log should identify each fixture by location rather than by a vague description such as “hallway signs.” Include the date, technician or inspector, test type, result, defects found, corrective action, and next scheduled test. Keep commissioning documents, product cut sheets, listings, circuit information, photos, and inspection reports together in the facility's life-safety file.
For larger properties, use a fixed asset register or work-order system. Assign every sign a location code, then tie that code to the monthly visual inspection and annual endurance test. Self-testing equipment can generate useful diagnostics, but the log still needs a human review and a documented response when a unit reports a problem.
Measure the route, not only the sign
A sign can remain bright while the floor-level egress lighting fails. During the broader emergency-lighting performance test, verify transfer behavior, emergency duration, and illumination along the walking surface. The cited guidance identifies a maximum-to-minimum illumination ratio of 40:1 for relatively even coverage, so a design that looks bright near a fixture may still have a weak area farther along the route.
Walk the entire path under outage conditions. Look for signs hidden by newly installed décor, doors that open into the view, equipment placed in corridors, and arrows that no longer match the final route. Replace failed batteries, repair loose housings, restore missing legends, and correct circuit problems before closing the work order.
The emergency-lighting testing service information from Access Electrical and Lighting reflects the operational side of this work, including testing, maintenance, and repair for commercial emergency-lighting systems. Whether testing is handled internally or by a contractor, assign ownership clearly and retain the evidence.
The liability usually appears after installation. A missing test record, an ignored battery warning, or an undocumented repair can undermine an otherwise correct installation during an inspection.
Schedule the monthly visual check and the annual endurance test before the project closeout. Review records after tenant improvements, lighting-control changes, electrical work, or alterations to corridor furnishings. Long-term compliance depends on treating exit signs as maintained life-safety equipment, not permanent decorations mounted on the wall.
Access Electrical and Lighting installs, tests, maintains, and repairs emergency exit signs and battery-backup systems for commercial, retail, office, multifamily, and hospitality properties. If your building needs a documented installation review, route visibility check, emergency-lighting test, or corrective repair, visit Access Electrical and Lighting to discuss the scope and schedule the work.