
A property manager usually notices a parking lot lighting problem in stages. One fixture goes dark, a driver reports glare near the entrance, or a tenant points out a dark area between two poles. Then an inspection reveals something less visible: corrosion at the base, loose anchor hardware, or an aging electrical circuit that was never designed for the next upgrade. Parking lot lights with pole systems are not just fixtures above pavement. They're safety, structural, electrical, and energy infrastructure working together.
The right design balances illumination, uniformity, glare control, pole integrity, maintenance access, and future requirements such as adaptive controls or EV charging. The most reliable project starts by understanding how those decisions interact, rather than choosing a fixture by wattage or lumen output alone.
Understanding What Parking Lot Lighting Actually Controls
At dusk, a driver turns into a busy parking lot and sees a bright fixture ahead. A few seconds later, a pedestrian steps from a darker area between two poles. The fixture may be working exactly as installed, yet the system still fails to provide consistent visibility. Pole-mounted parking lighting controls three connected outcomes: illumination, uniformity, and glare.
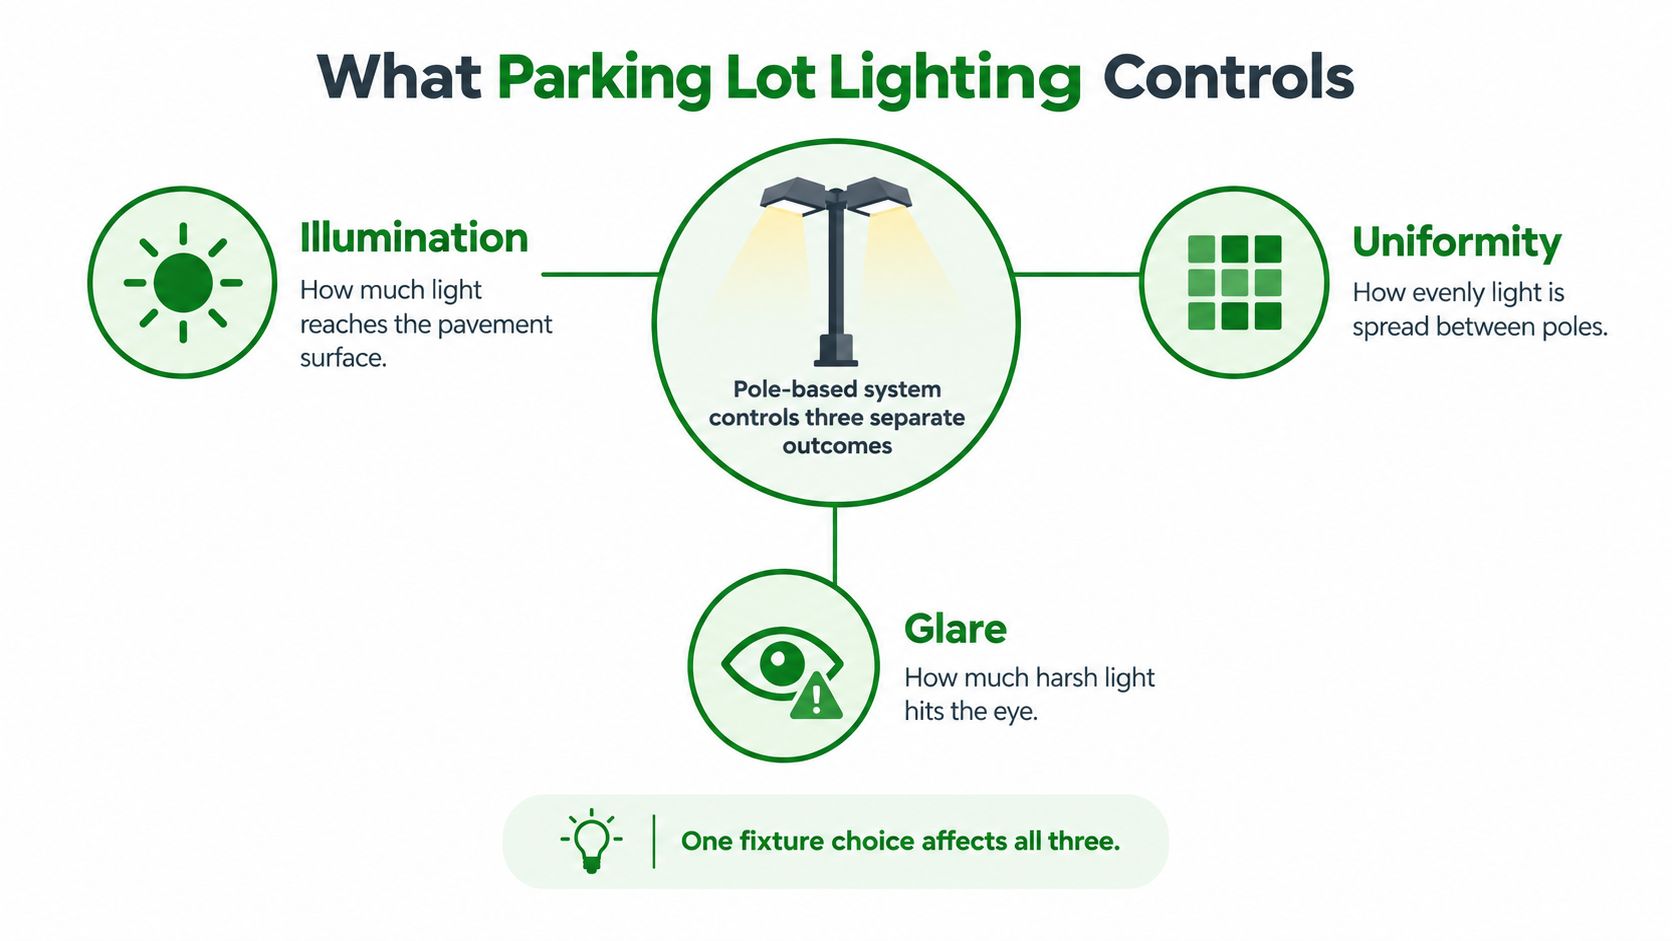
Illumination measures how much light reaches the pavement. Commercial parking areas are commonly designed around a maintained average of about 1 to 2 foot-candles. Traffic-safety guidance also identifies a maximum-to-minimum uniformity ratio of no worse than 20:1 for relevant parking applications, as described in the Department of Energy parking lot lighting guide. Local code or the project standard may set a different requirement.
Uniformity measures how evenly that light is distributed. A lot can record a strong average while still containing dark pockets between poles. Those changes in brightness work like steps in a path: the eye needs time to adjust before a driver or pedestrian can recognize a person, object, or moving vehicle. Good design therefore coordinates optical distribution, pole position, mounting height, and spacing.
Practical rule: More lumens cannot repair a poor layout. The optical distribution, pole position, mounting height, and spacing must work as one system.
Why pole-mounted systems matter
Pole-mounted fixtures suit large commercial lots because they spread light across broad pavement without placing equipment in every pedestrian area. Height increases coverage, but it also magnifies the effects of poor aiming, excessive glare, wind loading, and structural deterioration. A lighting review that stops at fixture output can miss those risks.
The pole also provides a useful platform for future infrastructure. Electrical capacity, mounting space, and access can affect later additions such as adaptive controls, sensors, communications equipment, or EV charging. Planning those interfaces early can prevent a lighting upgrade from creating a future structural or service limitation.
Energy use gives the decision wider significance. The U.S. Department of Energy estimates that parking lots consume about 22 TWh of electricity annually in the United States, while parking structures consume about 28.1 TWh. A DOE adoption report recorded an approximately 21% reduction in parking-lot lighting energy consumption from 2016 to 2018, as LEDs reached 54.0% of the application by 2018, as documented in the DOE and PNNL outdoor lighting report.
Effective design prioritizes dependable visibility, controlled spill light, efficient operation, and long-term structural safety. Owners evaluating parking lot lights with pole should assess the entire system, including what supports the fixture and what the site may need later.
Choosing the Right Parking Lot Light Poles
A parking lot pole does more than hold a fixture above the pavement. It carries the luminaire, resists wind, transfers forces into the foundation, and remains exposed to vehicle impacts, moisture, salts, and maintenance work. A new LED head can improve visibility while leaving an unsuitable, corroded, or weakened support structure in service.
Compare materials and configurations
Steel is common in commercial installations because it combines useful strength with many shaft shapes and mounting options. Protection against corrosion still matters, especially around the base, handholes, welds, anchor hardware, and points where water collects. Aluminum can resist many corrosion conditions and reduce overall weight, but the design must account for its structural behavior, connection details, and fixture load.
Concrete poles and concrete foundations serve different functions. A concrete pole is the structural pole itself. A concrete base anchors a steel or aluminum pole and can raise the vulnerable connection above surrounding pavement. The appropriate configuration depends on wind exposure, soil conditions, local corrosion, access requirements, and the likelihood of vehicle impact.
| Pole Material and Configuration | Best For | Durability Notes | Maintenance Risk |
|---|---|---|---|
| Steel pole with anchored base | Commercial lots, retail centers, and broad retrofit programs | Strong and adaptable, but exposed steel and the base require corrosion attention | Metal loss, rust at the base, loose anchor hardware, and impact damage |
| Aluminum pole with engineered base | Sites where corrosion resistance and lower structural weight are priorities | Material selection and connection details must match the fixture and environmental conditions | Connection wear, impact damage, and inspection of dissimilar-material interfaces |
| Concrete pole | Sites requiring a durable permanent structure | Resistant to some impact and corrosion concerns, though cracks and embedded hardware still matter | Cracking, vehicle damage, hardware deterioration, and difficult replacement |
| Pole on a curb-protected island | Lots where the layout can keep vehicles away from the foundation | Physical separation lowers knockdown exposure | Base, curbs, and bollards still need inspection after collisions |
| Pole within a parking row at a stall junction | Lots where row geometry makes island placement impractical | Correct positioning can reduce conflicts with doors and vehicles | Higher exposure to vehicle strikes, requiring careful base protection |
Pole height and placement should be selected as one structural decision, not as separate fixture and civil-work choices. Taller poles may cover more pavement, but they also increase wind exposure, foundation demands, maintenance access requirements, and the consequences of a failed anchor or damaged shaft. Islands or areas behind curbs can reduce collision exposure where the site layout allows. If a pole must sit within a parking row, a stall junction and a properly raised concrete base can reduce conflicts with vehicles and doors. See this guidance on commercial light-pole installation and safety when coordinating placement, electrical work, and site protection.
The pole should also be treated as future site infrastructure. Confirm available space, access, electrical routing, and connection capacity before adding sensors, adaptive controls, communications equipment, or other smart-pole devices. A support selected only for today's fixture may limit tomorrow's equipment or create a new structural review requirement.
Before approving a replacement, inspect the existing shaft, base, anchor bolts, welds, handhole, conduit entry, and foundation. Compare the new fixture's weight and effective wind area with the old unit. That inspection can reveal whether the project is a simple head replacement or a pole, foundation, and electrical upgrade.
Designing Spacing and Height for Uniform Coverage
Pole height determines how far a fixture can distribute light, but it doesn't determine coverage by itself. The beam shape, tilt, mounting arm, pavement geometry, building edges, trees, signs, and neighboring properties all influence the result. A taller pole may reduce the number of foundations, yet it can create glare or weak pavement levels if the optical pattern isn't suited to the site.
Start with the site rather than the product catalog. Measure the lot, mark drive aisles and pedestrian routes, identify property lines, and record existing pole locations. Then divide the lot into functional zones, such as general parking, entrances, exits, accessible routes, loading areas, and perimeter edges. Each zone may have different visibility and spill-light concerns.
Work through the layout in sequence
Set the maintained lighting target. Decide what the pavement must receive after accounting for expected depreciation and maintenance. Don't design around the initial output of a clean, new fixture.
Check the height limit. A local ordinance, site plan, or neighboring-property condition may limit pole height. That restriction affects fixture output, optical distribution, foundation design, and the total pole count.
Select the distribution for each position. A perimeter pole usually needs an asymmetric forward-throw pattern aimed into the lot. An interior pole may need a more symmetrical pattern to serve multiple directions. Using one optic everywhere often sends light where it isn't needed while leaving other areas weak.
Test spacing with photometric calculations. A photometric plan shows average illumination, minimum points, uniformity, glare risk, and property-line spill. It also reveals whether a tree canopy, sign, or building will block the intended pattern.
Taller isn't automatically better
Higher mounting can cover a larger area, but the light has farther to travel before it reaches the pavement. That makes optical control and aiming more important. Lower poles can support tighter control in areas with heavy pedestrian movement, low buildings, or strict limits on light trespass.
Fewer tall poles may reduce excavation, conduit runs, and foundation work. More closely distributed shorter poles may produce smoother coverage and reduce harsh transitions between bright and dark areas. The right answer depends on the lot's shape and operating conditions, not on a universal spacing formula.
A layout that looks economical from above can feel uncomfortable at ground level if pedestrians move through alternating bright and dark zones.
Treat the photometric plan as a performance document, not just a permit attachment. Ask the designer to show maintained values, fixture orientation, pole heights, property-line conditions, and the assumptions used for depreciation. That information gives the maintenance team a reference when future fixture changes alter the original distribution.
LED Retrofits and Real Energy Savings
A parking lot can look brighter after a retrofit and still deliver disappointing savings if the operating schedule, controls, or pole-mounted equipment were overlooked. LED retrofits replace high-wattage discharge equipment with lower electrical input while maintaining useful pavement illumination. Savings depend on fixture wattage, operating hours, control strategy, and maintenance requirements, not on the LED label alone.
A federal case study replaced twelve 1,000-watt HID fixtures with twelve 120-watt LED fixtures. The installation reduced energy use by 85%, saved about 62,000 kWh annually, and produced about $4,000 in yearly cost savings, with a simple payback of 4.4 years, according to the PNNL federal LED retrofit case study.
A separate DOE demonstration at the Naval Air Warfare Center reduced lighting power from 10.88 kW to 2.81 kW, a 74% drop. Annual energy consumption fell from 11,968 kWh to 3,091 kWh, using the same case-study source. Treat these results as reference points rather than guarantees. Utility rates, operating hours, fixture count, ballast losses, control settings, and the design of the replacement system all affect the outcome.
Read the retrofit numbers correctly
| Old System | New LED System | Energy Reduction | Annual Savings |
|---|---|---|---|
| Twelve 1,000-watt HID fixtures | Twelve 120-watt LED fixtures | 85% | About 62,000 kWh and about $4,000 annually |
| 10.88 kW lighting system | 2.81 kW LED system | 74% power reduction | Annual use fell from 11,968 kWh to 3,091 kWh |
The table uses the documented retrofit examples cited above. Before applying them to your property, inventory the existing system. Record fixture and ballast wattage, operating hours, circuit behavior, control settings, and the number of units that run overnight. Those details form the electrical baseline, much like checking a vehicle's fuel use before judging a new engine.
A retrofit may also reduce relamping work and lift-truck or boom access. Confirm that the replacement fixture suits the existing pole and site conditions. Check mounting dimensions, electrical characteristics, surge protection, aiming adjustment, environmental rating, and compatibility with photocells or network controls. Pole condition matters too. A new fixture does not correct a corroded arm, weakened connection, or foundation problem.
A lower-wattage fixture that leaves dark zones has failed its practical purpose. Use a parking lot LED retrofit assessment to compare existing conditions with a maintained design, then weigh utility savings, maintenance reduction, pole readiness, and future control compatibility together.
Smart Controls and Lighting Intelligence
A photocell answers one question: is it dark enough to turn the system on? A smart parking lot system can answer more useful questions, such as whether a zone is occupied, whether the scheduled operating mode has changed, whether a fixture has stopped responding, or whether output should be reduced during quiet periods.
Choose the control layer deliberately
Basic control uses a photocell, time clock, or lighting contactor. It is straightforward and may suit a small site with stable operating hours, but it gives the maintenance team limited visibility into individual fixture performance.
Zone-based control divides the lot into areas such as entrances, building edges, pedestrian paths, and remote parking. Each zone can follow a different schedule or dimming level. This approach improves flexibility without requiring every pole to communicate independently.
Networked adaptive control adds connected sensors, remote scheduling, fault alerts, and gradual output changes. It can help a team identify failed fixtures without waiting for a tenant complaint and can coordinate lighting behavior with occupancy patterns or future site systems.
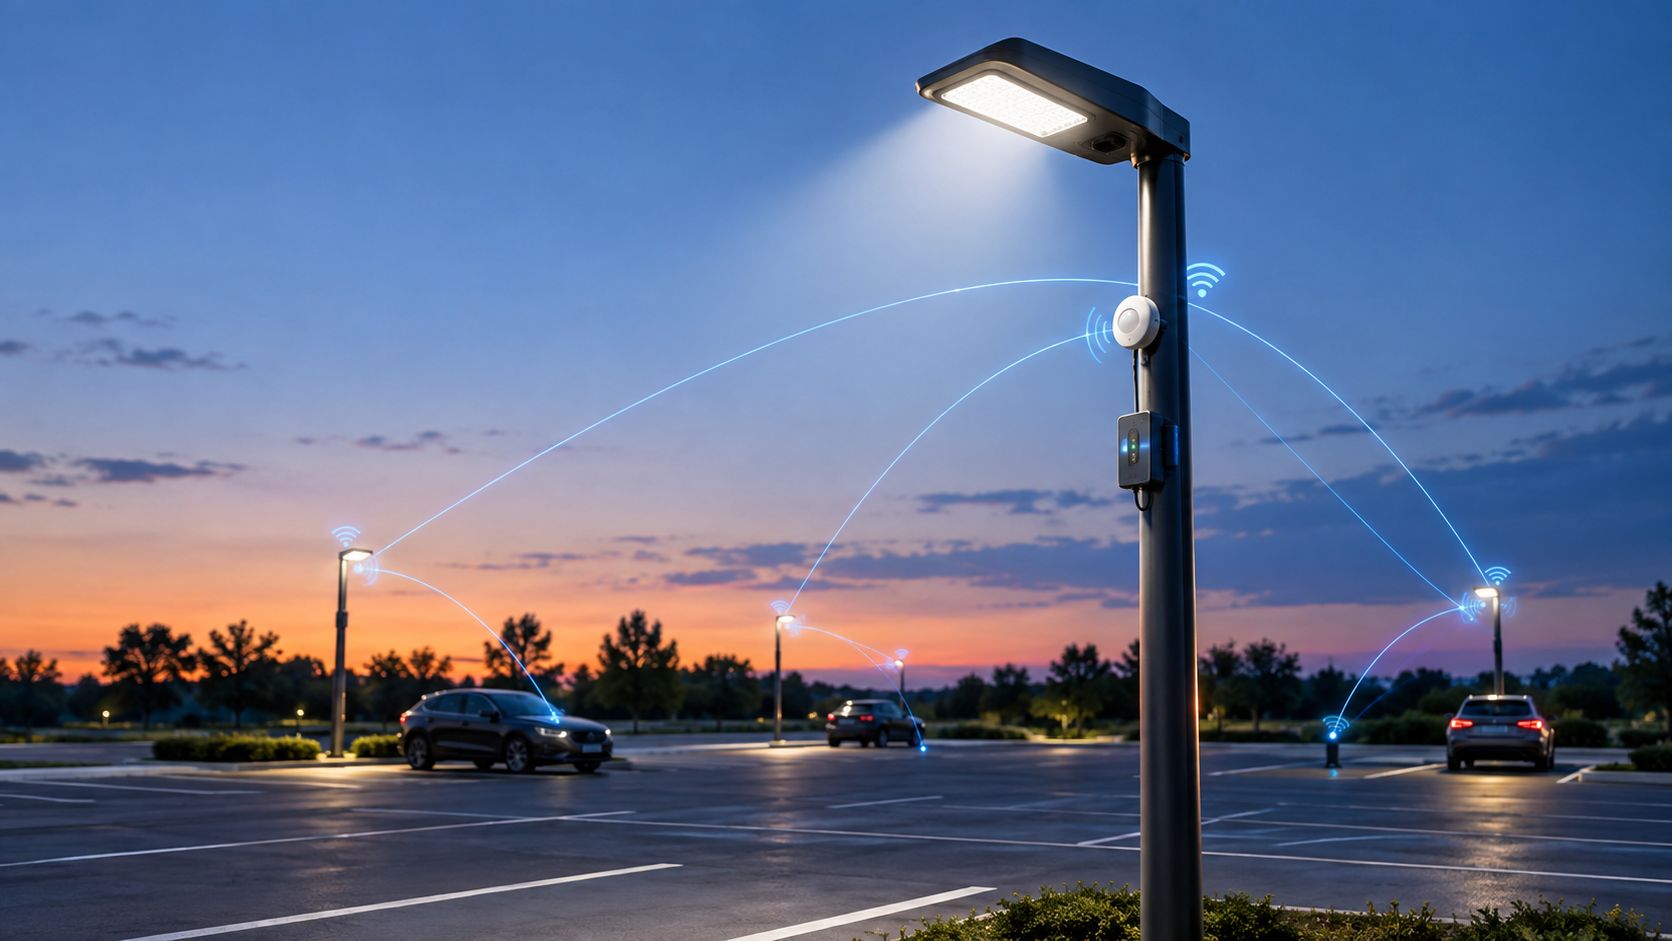
Recent industry coverage identifies up to 70% energy reduction as a potential result of networked adaptive dimming, while also connecting smart poles with EV charging, 5G small cells, solar resilience, and dark-sky requirements. Those are system possibilities, not guaranteed project results. The parking-lot pole technology overview is useful for understanding why a pole may become a platform for more than one site function.
Plan for maintenance and expansion
Connectivity changes the maintenance workflow. A technician can use an alert history to distinguish a failed driver from a communication problem, while an owner can compare scheduled output with actual operation. The network still needs a documented device inventory, cybersecurity review, replacement plan, and a clear process for failures when communications are unavailable.
Don't install advanced controls without deciding who will use them. If the property team only needs dusk-to-dawn operation, a simpler system may be more practical. If the lot has variable occupancy, strict light-pollution requirements, planned EV infrastructure, or multiple operating zones, adding conduit pathways and compatible control hardware during the lighting project can avoid disruptive work later. Automated lighting control services can be evaluated alongside the fixture and electrical design rather than treated as an afterthought.
Pole Integrity and Maintenance You Should Not Skip
A parking lot can remain adequately illuminated while its poles become unsafe. Corrosion often starts where the shaft meets the base, around fasteners, inside handholes, or at points where water and debris remain trapped. Vehicle impacts may bend a shaft or damage the foundation without immediately causing an outage.
Structural maintenance needs its own inspection process. A neutral inspection guide identifies material, environmental exposure, traffic conditions, manufacturer guidance, severe weather, vehicle impacts, visible movement, and fixture changes as factors that should influence the inspection decision. A maintenance manual warns that undetected metal loss can result in collapse, property damage, or injury, and notes that inspection frequency may range from every five years in mild conditions to annual checks in harsher environments, as summarized in this parking-lot pole inspection guidance.
Look for more than surface rust
A competent inspection should examine:
- The shaft and base: Look for pitting, bulging, cracking, deformation, or a change in the metal profile.
- Anchor hardware: Check exposed threads, nuts, washers, grout, leveling arrangements, and signs of movement.
- Handholes and wiring: Inspect covers, gaskets, conductors, grounding, and evidence of water entry.
- The foundation: Look for cracks, settlement, spalling, exposed reinforcement, or impact damage.
- The fixture connection: Check mounting bolts, arms, welds, tilt, and any movement during wind.
- The surrounding pavement: A damaged curb or island may no longer protect the pole from vehicles.
A deeper structural check is appropriate after a severe storm, vehicle collision, visible leaning or movement, a major fixture replacement, or any change that increases wind loading. Don't assume that a new LED fixture automatically makes an old pole safe. The pole, foundation, fasteners, and electrical conductors must be assessed as a connected assembly.
Keep photographs, inspection dates, repair decisions, test results, and fixture changes in the property record. That documentation helps maintenance teams identify recurring problems and gives owners a defensible process when safety questions arise. It also prevents a common failure pattern, where teams track lamp replacement carefully but have no record of structural condition.
Building a Practical Decision Checklist
A sound parking lot lighting project begins with a site inventory and ends with a maintenance plan. Use the following sequence before requesting final pricing:
Document the site. Record pole locations, heights, foundations, circuits, property lines, trees, signs, pedestrian routes, and areas with reported glare or darkness.
Confirm the performance target. Define maintained illumination, uniformity, glare control, spill-light limits, and any local requirements before selecting fixtures.
Verify the pole condition. Inspect shafts, bases, anchors, handholes, foundations, and evidence of impact. Decide whether each pole should be reused, repaired, reinforced, or replaced.
Select the optical layout. Match perimeter and interior distributions to the geometry. Require a photometric plan using the proposed fixture file.
Compare retrofit economics. Use actual wattage, operating hours, utility rates, control settings, maintenance access, and available incentives rather than a generic savings claim.
Specify the control pathway. Choose basic scheduling, zone control, or networked operation based on the property's staffing, occupancy, compliance needs, and future EV plans.
Schedule acceptance and records. Capture aiming, circuit labeling, control settings, test results, warranties, and inspection recommendations after installation.
The best design is the one that remains measurable and serviceable after the contractor leaves. Lighting performance, pole safety, electrical reliability, and future capacity belong in the same project file.
Frequently Asked Questions About Parking Lot Poles and Lighting
When does a retrofit make financial sense?
Start with the existing fixture inventory and operating schedule. A retrofit deserves closer analysis when HID equipment consumes substantial power, relamping requires high-access work, light quality has deteriorated, or controls can reduce unnecessary operation. Compare the proposed photometric result with utility and maintenance costs, rather than judging the project by wattage alone.
How often should poles be inspected?
There isn't one interval for every property. Material, coastal exposure, weather, traffic, manufacturer guidance, and pole age all matter. Arrange an additional inspection after severe weather, a vehicle impact, visible movement, or a fixture change that affects loading. Harsh environments may require more frequent checks than mild ones.
Are taller poles always better?
No. Taller poles can cover more pavement, but they may increase glare, wind loading, foundation demands, and the need for precise optical control. Lower poles may provide better control in pedestrian-heavy areas or locations with height restrictions. A photometric layout should resolve the tradeoff.
Can lighting upgrades happen while the property remains open?
Yes, with a documented work plan. Separate the lot into work zones, maintain temporary illumination where needed, coordinate boom-truck access around business activity, and schedule circuit shutdowns with property management. The contractor should also control pedestrian routes and protect open foundations during the work.
What should owners request at closeout?
Request the final photometric design, fixture and pole schedules, circuit information, control settings, inspection records, warranty documents, and photographs of completed work. Those records make future troubleshooting and structural inspections more efficient.
Access Electrical and Lighting provides commercial lighting installation, LED parking-lot retrofits, pole integrity testing, repairs, replacements, controls, electrical troubleshooting, and high-reach service for raised fixtures and poles. If your property needs a documented assessment or a safer, more efficient parking lot lighting plan, visit Access Electrical and Lighting to discuss the site.