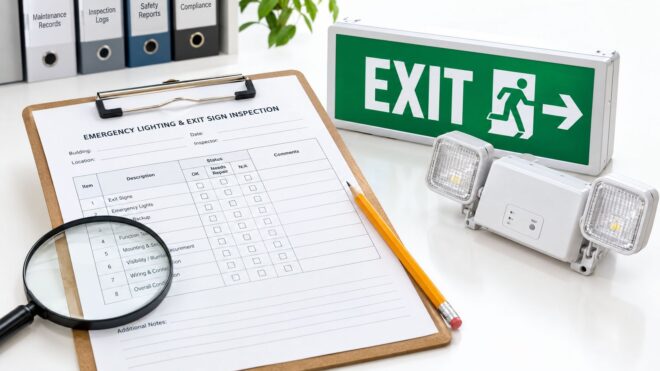
The fire marshal is walking the exit routes, and a property manager is searching through a folder of maintenance notes. The lights appear to work, but there's no clear record of which fixtures were tested, when they were tested, or what happened to the unit that failed last time. A working lamp can't answer those questions. A well-kept emergency lighting inspection form can.
The useful form isn't just a sheet of pass-or-fail boxes. It connects each fixture to a testing method, a result, and any repair or retest that follows. That record helps a facilities team manage routine work and show an inspector what was checked.
What an Emergency Lighting Inspection Form Actually Does
A structured form has three practical jobs: prompt the right test, capture useful evidence, and preserve a record that can be reviewed later. If it only asks whether a fixture passed, it may not show whether the technician performed a short functional test or a longer battery-duration test. It also won't explain what “failed” means or whether the defect was repaired.
A checklist can remind a technician to look at an exit sign or press a test button. A true inspection record connects the observation to an identifiable device and a follow-up. It should show the fixture's location, the test date and method, the result, who performed the work, and what happened if the fixture didn't operate correctly.
That distinction matters during an inspection. A fire official or other authority having jurisdiction (AHJ) may need to understand whether a particular exit route is adequately illuminated and whether a reported problem remains open. OSHA identifies exit lighting as an emergency safeguard and requires exit routes to be adequately illuminated so employees with normal vision can see along them. The form should help the property team demonstrate both the condition observed and the maintenance response.
Practical rule: If a person who didn't perform the test can't identify the fixture, understand the result, and find the repair record, the form isn't doing its job.
The form also needs to fit the equipment. A manually tested battery unit, a self-diagnostic fixture, and a networked system don't produce records in the same way. The central log should make those differences visible rather than forcing every device into one generic checkbox.
Field-by-Field Anatomy of a Compliant Form
Build the form around the information someone will need to find and verify a fixture later. A clear sequence reduces ambiguous entries and gives the technician a place to record what happened.
Start with property and asset identification. Record the building, floor, zone or exit route, and a fixture ID that matches the label on the equipment. Use a consistent naming convention across the property, such as building and floor followed by a device number. “North stair, level two, unit 04” is more useful than “hall light.” If the property has several buildings, include the building identifier in every record rather than relying on a folder name.
Next, capture equipment and test details: fixture type, power source or battery-backed status, test method, date, and tester. Record normal-power status before triggering the emergency function. Then enter whether the unit activated, whether illumination appeared adequate, and whether there were visible defects such as a damaged lens, loose housing, obstructed sign, or abnormal indicator.
Battery information needs context. If the form includes a battery age or replacement date, identify how that information was obtained. Don't guess an age because a label is missing. Record an unknown value as unknown, then assign a follow-up if the condition needs investigation. During a duration test, log the start and end times and whether the fixture remained illuminated for the required test period.
Finally, make room for a specific failure description and corrective action. “Failed” doesn't tell the repair technician whether the lamp stayed dark, the battery dropped out, or the exit sign was blocked. Include the action owner, repair date, and retest result so the original finding can be closed without losing its history.
A useful record has enough space for a real finding. If technicians routinely write “see notes” because the form has no field for duration, fault status, or repair details, revise the form rather than asking them to squeeze the missing information into the margins.
Testing Frequencies and the Cadence Behind Each Field
For battery-powered emergency lights, NFPA guidance calls for a manual monthly test lasting at least 30 seconds and an annual test lasting at least 90 minutes. The short test checks immediate operation when normal power is interrupted. The longer test checks whether the battery can sustain illumination through the full emergency operating period. Record each test distinctly so the monthly function check can't be mistaken for an annual endurance test. (NFPA guidance on emergency lighting testing)
| Test type | Duration | Frequency | What it verifies | Form field |
|---|---|---|---|---|
| Functional test | At least 30 seconds | Monthly | Activation on emergency power and basic battery function | Test method, activation result, observed illumination |
| Endurance test | At least 90 minutes | Annually | Sustained battery operation | Start and end times, duration result, defects, corrective action |
Those intervals affect form design. A fixture record needs space for recurring short tests as well as a separate annual entry that captures elapsed duration. For a property with 100 emergency units, the annual schedule can involve up to 1,200 monthly checks and 100 annual 90-minute tests, assuming every fixture is included in each cycle. A single annual sign-off for an entire building won't show which units were tested or which ones need attention.
Minnesota state guidance allows a practical monthly interval of at least three weeks and no more than five weeks between tests, accounting for weekends and holidays while maintaining regular testing. The log should therefore use actual test dates, not just month labels, so the team can spot a delayed check. For further practical context on recurring checks, see this guide to emergency lighting testing.
Choosing the Right Testing Pathway
The equipment determines what the technician must do and what the record must prove. A single pass checkbox can't distinguish a manually performed test from an automatic diagnostic result.
| Testing pathway | What happens | What the form should capture |
|---|---|---|
| Manual | A technician initiates the test and observes the fixture. | Test date, tester, method, activation result, duration where applicable, defects, and corrective action |
| Self-testing or self-diagnostic | The fixture performs scheduled checks and displays or stores a result. | Equipment type, automatic-test result, fault indication, visual-inspection result, and any unresolved fault |
| Computer-based or networked | A system collects test histories and device-level status. | System or device ID, recorded test history, failure details, human verification, and repair or retest status |
For manual equipment, the inspection log is the record of what the technician did and saw. For automated equipment, the built-in result can supply evidence, but the property still needs a way to identify the fixture, review the test history, note visible conditions, and track unresolved faults. A reported pass doesn't necessarily tell the reviewer whether a duration test was completed or whether a communication issue interrupted reporting.
Treat the central form as the human-readable index to the underlying system record. Note where the detailed history is stored, identify the device or circuit, and record what the technician verified in the field. NFPA guidance recognizes manual, self-testing or self-diagnostic, and computer-based testing approaches, with different recordkeeping implications. Minnesota's life-safety-code guidance on automatic testing and documentation is useful when setting up records for automated equipment.
A Completed Inspection Form Example
A useful example shows how separate fixtures get separate entries and how a failure stays linked to its repair. The sample below is illustrative, not a record of an actual property.

| Form entry | Battery-backed exit sign | Unit-equipment emergency light |
|---|---|---|
| Location and ID | West stair, level two, ES-W2-01 | East corridor, level one, EL-E1-03 |
| Equipment and method | Exit sign, manual test | Emergency light, manual test |
| Normal power | Present before test | Present before test |
| Emergency result | Activated; sign remained illuminated | Activated, then lamp output dropped during test |
| Observation | Sign face visible; no lens damage noted | Battery failed to sustain illumination |
| Corrective action | None required | Battery replacement assigned; original failure retained |
| Repair and retest | Not applicable | Repair date and retest result entered against EL-E1-03 |
The first row is complete because it ties a result to a unique location and records what the technician observed. The second doesn't get a pass just because the lamp activated initially. The technician records the loss of output as a failure, assigns a repair, and leaves the original test entry intact.
When the repair is complete, add the repair date and retest result to the same asset history. Don't erase the failed result or replace it with a clean pass entry. Keeping both records shows what was wrong and how the team verified the correction.
Field Procedure for a Functional Test
Before testing, identify the fixture and confirm that the form has the correct location and asset ID. Check the visible condition, confirm the unit is on normal power, and make sure the planned test can be performed without disrupting building operations or creating an unsafe route.
Then initiate the emergency mode using the approved test switch or method. Start the timer, observe whether the unit activates, and check for dimming, flicker, abnormal sound, or a visible fault indication. Record the activation result and any defect while you're at the fixture. For a monthly functional test, document that the light operated for the required period.
During the annual endurance test, record the start time and monitor the fixture through the full test. If the unit dims or goes out before the required duration, record the elapsed time as observed and mark the test failed. Don't record the target duration as completed when the fixture didn't sustain illumination.
Reset the test and confirm normal operation returns. If a failure occurs, enter the defect, identify who will handle the repair, and leave the record open until a retest confirms the correction. A test that isn't documented before the technician leaves is easy to remember incorrectly later.
Verifying Illuminance Along the Exit Path
A fixture can turn on and still leave a route difficult to use. OSHA requires exit routes to be adequately lighted so employees with normal vision can see along them, and exit signs must remain visible and illuminated. The sign illumination requirement is at least 5 foot-candles (54 lux) from a reliable light source. (OSHA emergency-safeguard maintenance requirements)
OSHA's emergency-illumination checklist also identifies floor-level verification benchmarks of 1 foot-candle at any point and 0.1 foot-candle along the exit path, a maximum-to-minimum uniformity ratio of 40:1, and at least 1.5 hours of operation. These are verification criteria to confirm against the adopted building, fire, and electrical codes and project specifications for the property. (OSHA emergency-illumination checklist)
A form that records illuminance should identify the route or zone, measurement location, operating mode, instrument reading, and unit. Use lux or foot-candles consistently, and make clear whether the measurement was taken at floor level or at the sign. Include fields for blocked sightlines, obstructions, damaged lenses, or missing directional signs. For technique and measurement context, consult this guide to measuring foot-candles.
Code Cross-Reference for the Inspection Record
One form may support several compliance tasks, but it shouldn't claim that one test automatically satisfies every requirement. The applicable rules depend on the property, adopted codes, system design, and jurisdiction. A practical form can make review easier by naming the requirement or inspection purpose associated with each record.
| Reference | What the record should help demonstrate |
|---|---|
| NFPA 101 guidance | The applicable test method, recurring test history, results, and unresolved failures |
| OSHA 29 CFR 1910.37(b)(1) | Exit routes are adequately illuminated for employees with normal vision |
| OSHA emergency-lighting checklist | Illuminance and operating-duration criteria are checked against applicable requirements |
| Local building and fire codes, including adopted IFC provisions | The property's adopted requirements are identified and verified with the AHJ |
| California Title 24, where applicable | Acceptance testing and required documentation are distinguished from ongoing maintenance records |
OSHA requires exit routes to be adequately illuminated, while NFPA guidance informs the testing cycle described earlier. Keep those records linked to the specific devices and routes rather than treating a general building-wide signature as evidence for every fixture. For a practical overview of applicable emergency lighting code requirements, verify the relevant code edition and local amendments with the authority responsible for the property.
In Southern California, Title 24 acceptance testing and continuing maintenance documentation can overlap, but they aren't interchangeable records. Keep commissioning or acceptance documentation with the project file and retain ongoing inspection entries in the maintenance history. If the AHJ asks for a record, the team should be able to show which test was performed and what requirement it was intended to verify.
Corrective Actions and Closing the Documentation Loop
A failed result should create a trackable repair, not a vague note at the bottom of the form. Record the defect, asset ID, responsible person or work-order reference, repair date, and retest outcome.
Distinguish the work performed. A battery replacement isn't the same as a lamp or LED-module repair, and neither should erase the original failure. Keep the initial result visible, then add the correction and verification as linked entries.
An unresolved failure is better than a missing record. It tells the AHJ and the property team that a problem was found and still needs action.
Storing Records by Building, System, and Portfolio
Organize records so staff can search first by property, then by system or route, and finally by fixture ID. Use consistent asset labels across paper forms, digital logs, work orders, and any self-test platform. A portfolio view should surface failed fixtures, overdue checks, and open corrective actions without requiring someone to open every building's file individually.
Define who can enter results, who can close repairs, and how digital approvals are recorded. Set record-retention rules with the applicable code requirements, property policy, and AHJ direction; don't assume a generic retention period applies everywhere.
Keep the detailed system history available alongside the summary log. When an inspector or insurer requests documentation, the team should be able to retrieve the inspection entry, the supporting automated-test record if relevant, and the repair and retest history together.
Quick-Reference Card for the Maintenance Closet
Test cadence: Manual battery-powered units need a monthly functional test of at least 30 seconds and an annual test of at least 90 minutes, following applicable requirements.
Route checks: Record exit visibility, obstructions, and any required illuminance readings against the adopted criteria.
Each form row: Include property, location, asset ID, equipment type, method, date, tester, normal-power status, result, defects, and corrective action.
Before signing, follow four checks: identify the fixture, initiate and time the test, record what happened, and assign any repair or retest. Never mark a target duration complete when the unit failed early.
Why Automated Test Results Still Need a Real Form
A self-test indicator can be useful, but it isn't the whole inspection record. A reviewer may still need to know which fixture produced the result, when the test ran, whether the device reported a fault, and whether anyone checked the fixture's visible condition. A digital “pass” without a device-level history or clear link to the asset can leave those questions unanswered.
For networked systems, retain the underlying inspection and test histories and make failure information available for review. The master log should identify the equipment and testing pathway, note the latest result and any unresolved fault, and point to supporting records. Manual tests still need their own dated entries, and a successful automatic check doesn't document a repair that hasn't happened.
A fire marshal needs a record that can be read and traced, not merely an indicator light on a fixture. Build the form around evidence, and connect every failure to its follow-up.
Access Electrical and Lighting provides emergency lighting and exit-sign testing, maintenance, repair, and battery-backup services for commercial, retail, office, and multifamily properties in Southern California. If your inspection records need to connect fixture testing with documented corrective work, contact Access Electrical and Lighting to discuss support for your property.