A facility manager usually finds this topic when a lighting package doesn't line up on paper. The photometric plan calls for a target in footcandles. The fixture submittal shows lumens. The budget only pays for one answer.
That gap is where a lot of projects go sideways. A simple footcandle to lumen conversion gets you started, but it doesn't tell you whether the fixtures will deliver that light on the floor, the rack face, the drive lane, or the corridor after optics, mounting height, and system losses take their share.
Why Footcandle to Lumen Conversion Matters on Real Jobs
On a real commercial job, nobody buys “footcandles.” They buy fixtures, circuits, controls, lifts, labor, and time. But the lighting target on the plan is often written in footcandles, while the fixture cut sheet is written in lumens. If you can't move cleanly between those two, you can't check the design.
That matters fast on tenant improvements, warehouse retrofits, parking structure relamps, and retail refreshes. A low reading in a parking deck creates safety and liability concerns. Too much light on a sales floor can waste energy and create glare. In both cases, the bad decision usually starts with treating conversion like a one-line calculator instead of the first step in a layout.
What the conversion actually gives you
The practical starting point is simple:
- Footcandles tell you illuminance on a surface
- Lumens tell you total light output
- Area connects the two
If you know the target illuminance and the floor area, you can estimate the total lumen budget for that space. That's the working bridge between design intent and fixture quantity.
Practical rule: Start with the surface that actually matters. In a corridor, that may be the floor. In an office, it may be the workplane. In a parking deck, it's the driving and walking surface.
The problem is that many people stop there. They'll multiply target footcandles by square footage, then assume the fixture package is done. It isn't. That number is only the raw light needed at the surface before real-world losses get involved.
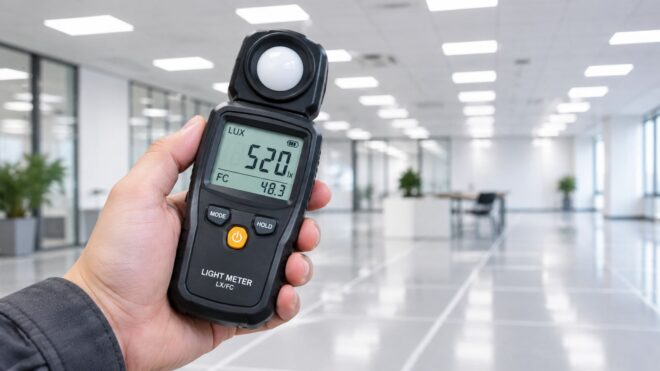
If you need a refresher on field measurement before reviewing a plan, Access has a practical guide on how to measure foot candles. It helps when you're comparing a submittal package to what a meter will read after installation.
The Core Units Behind the Conversion
Before you trust any footcandle-to-lumen math, get the units straight. On a real job, that keeps a quick estimate from turning into an underlit deck, a patchy retail floor, or a corridor full of glare complaints.
Footcandle
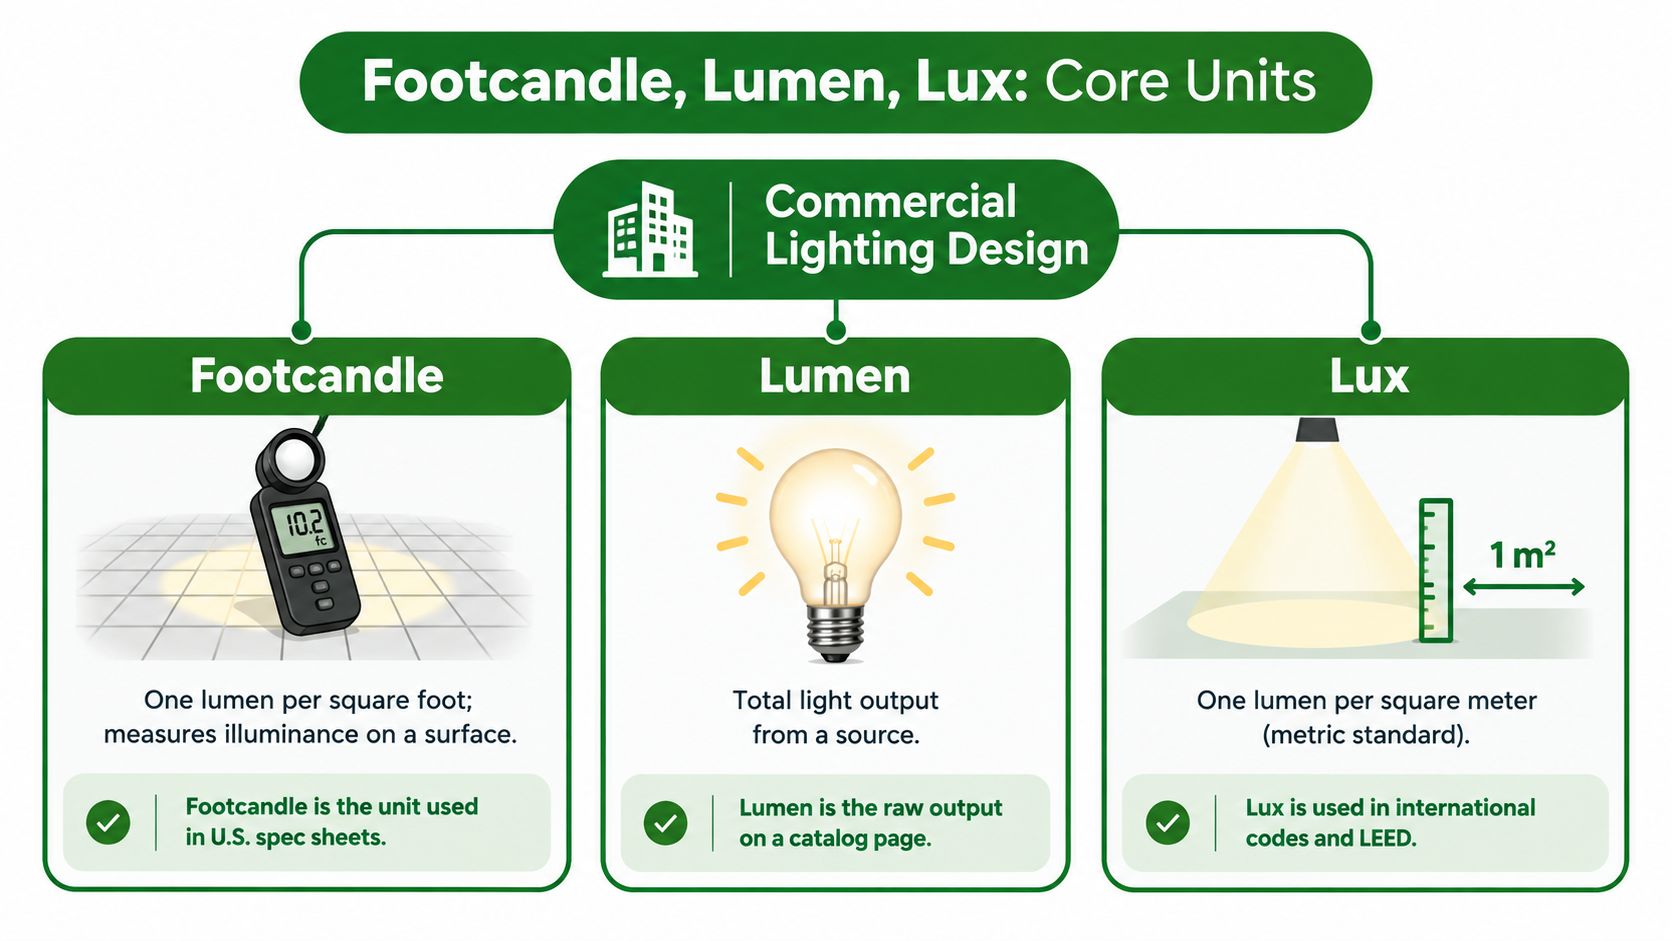
A footcandle is one lumen falling on one square foot. The standard unit definition is summarized in the foot-candle definition.
That matters because footcandles describe what the surface receives. In the field, that surface might be the slab in a parking deck, the sales floor in retail, or the workplane in an office. If the spec calls for 20 fc average, the question is not how many lumens the fixture can produce in open air. The question is how much light reaches that target surface after distribution and losses.
Lumen
A lumen is total light output from the lamp or luminaire.
This is the number contractors and facility teams usually see first on a cut sheet. It helps with fixture comparisons and rough budgeting, but it does not tell you by itself whether the installed system will hit the design target. A 20,000-lumen fixture can perform well in one layout and miss badly in another if spacing, mounting height, optics, or surface reflectance work against it.
That is where simple conversion articles usually stop too early.
Lux
A lux is one lumen per square meter. It is the metric illuminance unit used on many international datasheets, code references, and manufacturer reports.
The direct relationship is:
- 1 fc = 1 lm/ft²
- 1 fc ≈ 10.7639 lux
- 1 lux ≈ 0.0929 fc
If a plan set mixes imperial targets with metric photometric data, this is the conversion that keeps the review clean.
The formula that starts most takeoffs
For a first-pass surface lumen budget, use:
Lumens = Footcandles × Area in square feet
That gives the raw lumens needed at the surface.
For example, 30 fc across 1,000 square feet = 30,000 lumens at the task area. That is not the same as 30,000 fixture lumens to purchase. Once you account for coefficient of utilization and light loss factor, the required fixture package usually goes higher, sometimes much higher in dirty environments, high ceilings, or wide-spacing layouts.
That trade-off is the whole job. The unit conversion is simple. Getting those lumens onto the floor after optics, mounting conditions, dirt depreciation, and room geometry is the engineering part.
Worked Examples for Parking, Retail, and Corridor Lighting
A facility manager usually asks the same question first. “If I need 10 fc out here, how many lumens am I buying?”
Start with the surface target. Multiply footcandles by area. That gives the raw lumens needed on the task plane before fixture losses, room losses, and maintenance losses start cutting into the package.
Parking deck example
Use a parking deck with a 10 fc design target across 20,000 square feet.
Raw surface lumen calculation:
- Target illuminance: 10 fc
- Area: 20,000 sq ft
- Raw lumens at the floor: 10 × 20,000 = 200,000 lumens
That is only the first number. On an open parking level, CU often drops because light spills outside the drive lanes and stalls, and LLF can take another bite once dirt, temperature, and lumen depreciation are accounted for.
If the combined CU × LLF = 0.50, the fixture package needs to be:
200,000 ÷ 0.50 = 400,000 fixture lumens
That difference matters on bid day. A package that looks adequate at 200,000 catalog lumens can miss the target badly once real operating conditions are applied.
Retail floor example
Now take a sales floor at 50 fc across 5,000 square feet.
Raw surface lumen calculation:
- Target illuminance: 50 fc
- Area: 5,000 sq ft
- Raw lumens at the merchandise plane: 50 × 5,000 = 250,000 lumens
Retail usually gives you a better CU than a parking deck because the ceiling and wall reflectances help, but the target is much higher and glare control gets stricter fast.
Using a sample CU × LLF = 0.64:
250,000 ÷ 0.64 = 390,625 fixture lumens
Round that to a fixture package in the 391,000-lumen range, then check accent zones, shelving shadows, and vertical light on product faces. Floor area math gets you into the right range. It does not finish the layout.
On retail jobs, I watch the vertical surfaces as closely as the floor. A plan can average 50 fc and still feel dim at the shelf if the optics are wrong.
Corridor example
For a corridor target of 10 fc over 1,200 square feet:
- Target illuminance: 10 fc
- Area: 1,200 sq ft
- Raw lumens at the floor: 10 × 1,200 = 12,000 lumens
Corridors are usually easier to control because the geometry is predictable, but spacing and beam spread still decide whether occupants see a smooth run of light or bright spots with dead bands between fixtures.
Using CU × LLF = 0.60:
12,000 ÷ 0.60 = 20,000 fixture lumens
That is the number to compare against a linear run, a row of downlights, or a strip retrofit.
Footcandle to lumen worked examples by space type
| Space Type | Target Footcandles | Floor Area | Raw Lumens at Surface | Sample CU × LLF | Approx. Fixture Lumens Needed |
|---|---|---|---|---|---|
| Parking deck | 10 fc | 20,000 sq ft | 200,000 lm | 0.50 | 400,000 lm |
| Retail floor | 50 fc | 5,000 sq ft | 250,000 lm | 0.64 | 390,625 lm |
| Corridor | 10 fc | 1,200 sq ft | 12,000 lm | 0.60 | 20,000 lm |
These examples show why one-line calculators only get you through the first pass. The conversion from footcandles to lumens is simple. Hitting that target on a parking deck, across a sales floor, or down a corridor depends on how much of the fixture output reaches the working plane after CU and LLF are applied.
Where the Simple Formula Stops Working
This is the part most shortcut articles skip. Footcandles are illuminance, not fixture output, and the field result depends on more than square footage. A basic calculator can tell you the raw lumen target, but it can't tell you what fraction of a fixture's published lumens will arrive where you need them.
A practical lighting design reference puts it plainly. The same lumen package can produce different footcandle levels depending on fixture optics, mounting height, room geometry, and maintenance condition, and real design work often uses effective lumens after applying coefficient of utilization and light-loss factor in the footcandle calculator explanation.
Coefficient of utilization
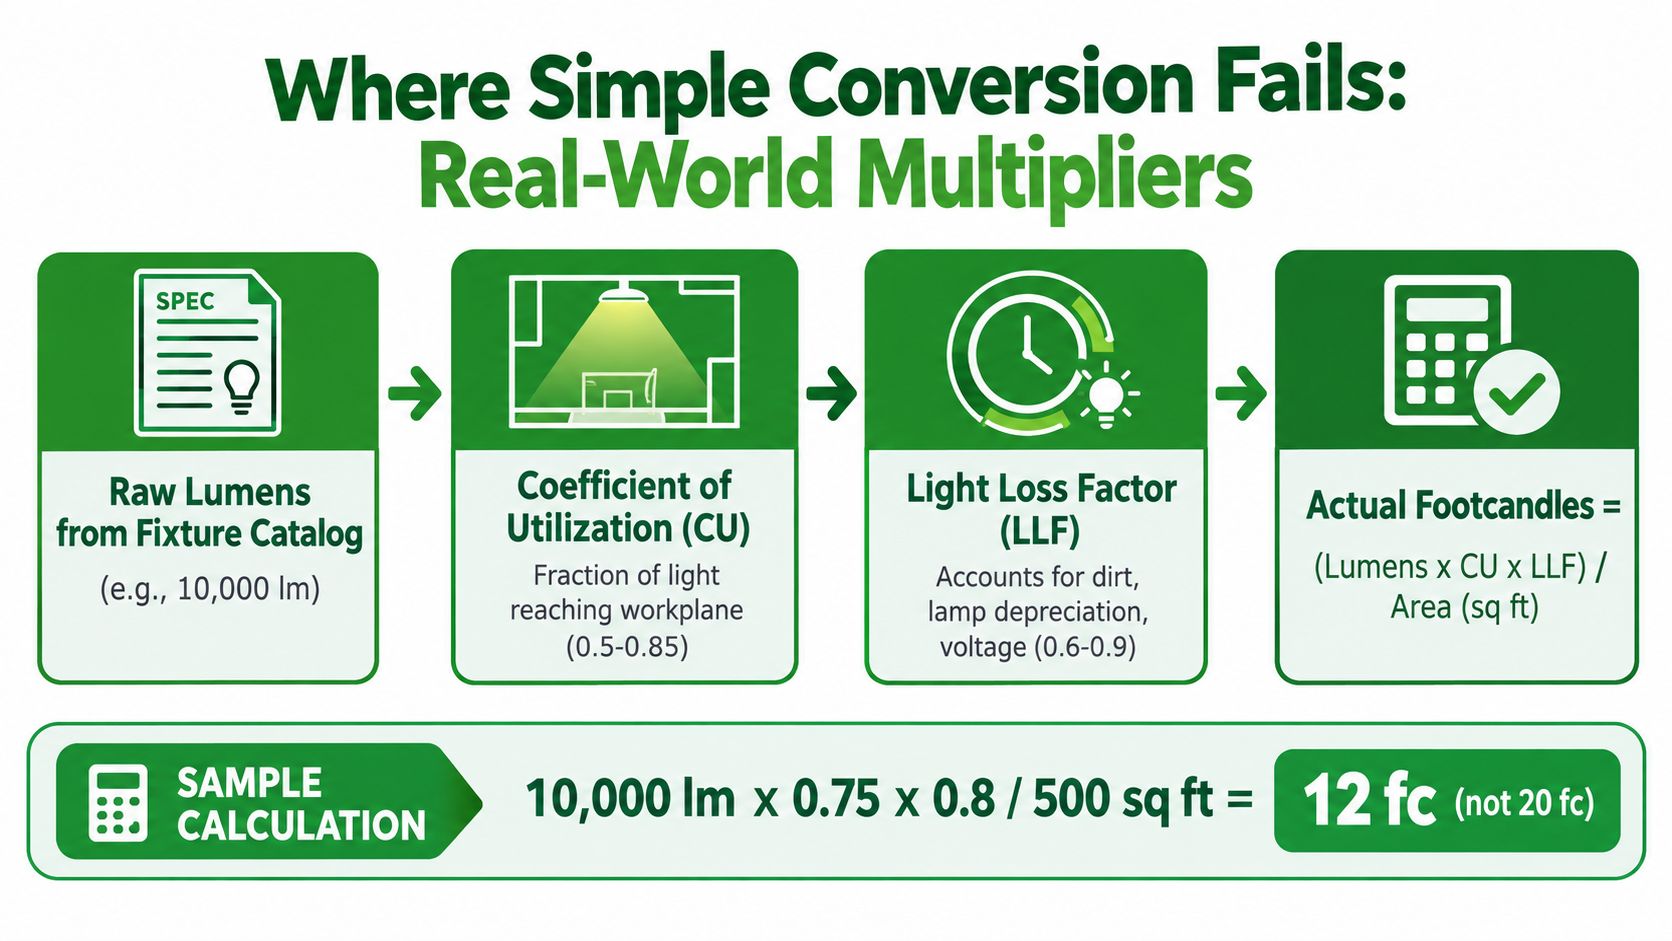
Coefficient of utilization, or CU, is the share of fixture lumens that reach the target plane. It changes with:
- Optics: Wide, narrow, aisle, wall-wash, symmetric, asymmetric
- Mounting conditions: Ceiling height, pole height, setback, spacing
- Room characteristics: Reflectance, obstructions, room shape, surface finishes
A fixture can have a healthy lumen package on paper and still miss the target because too much of that output lands in the wrong place.
Light-loss factor
Light-loss factor, or LLF, accounts for what the system loses over time and operating conditions. In practice that includes things like dirt accumulation, component aging, and thermal conditions that reduce delivered light compared with the nameplate number.
That's why a catalog lumen number shouldn't be treated as a guaranteed field result.
The field formula that matters more
Once CU and LLF are in play, the sizing logic shifts to:
Required fixture lumens = Required surface lumens ÷ (CU × LLF)
That doesn't mean the simple formula was wrong. It means it was incomplete.
If the fixture schedule was built from raw lumens alone, check the losses before you blame the installer or the meter reading.
If the target is strict, pull the IES files, run the photometric layout, and verify the maintained result instead of trusting a lump-sum lumen total.
Fixture Optics and Beam Spread Effects
Two fixtures can publish the same lumen output and still light a space very differently. That's normal. Lumens tell you quantity. Optics and beam spread decide placement, uniformity, and where the light lands.
I see this most often in parking structures and open commercial interiors. A contractor compares two luminaires with matching lumen packages and assumes the fixture count will stay the same. Then the point-by-point layout comes back with different average readings and darker edges.
Why equal lumens don't mean equal footcandles
Beam control changes everything:
- Wide distributions can smooth out a deck or open floor, but they may sacrifice punch at the center.
- Narrow distributions can drive stronger readings directly below the fixture, while leaving wider gaps between rows.
- Mounting height stretches or compresses the light pattern before it reaches the surface.
That's why the same lumen package can work in a low corridor and fail in a tall atrium.
Parking deck beam spread comparison at 10,000 lumen package
| Optic Type | Beam Spread | Fixtures Required | Avg Fc on Drive Lane | Uniformity (avg/min) |
|---|---|---|---|---|
| Wide distribution | Broad coverage | Depends on layout and spacing | Varies by layout | Varies by layout |
| Medium distribution | Balanced coverage | Depends on layout and spacing | Varies by layout | Varies by layout |
| Narrow distribution | Concentrated coverage | Depends on layout and spacing | Varies by layout | Varies by layout |
The point of this comparison isn't to fake precision where a photometric file should do the work. It's to show that fixture count doesn't come from lumens alone.
A practical habit on bid review is to ask for the actual distribution file for the exact SKU, not just the family brochure. The family may include multiple optics under one series name, and the wrong assumption there can throw off the whole deck, corridor, or storefront.
Quick Lookup Table for Common Commercial Spaces
Facility teams often need a fast starting point before a full photometric layout is built. That's where a lookup table helps. It won't replace a point-by-point plan, but it gives you a rough lumen budget so you can sanity-check fixture counts, wattage, and schedule assumptions.
The safest way to use a table like this is as a feasibility screen. If the proposed package looks far outside the expected range for the space, stop and review the workplane, optics, and losses before procurement.
How to use this table on a real estimate
Use the rows below in this order:
- Pick the space type
- Set the target footcandles from the design basis
- Use lumens per square foot as a starting budget
- Apply losses and verify with photometrics
The “loss multiplier range” column is qualitative here on purpose. The actual multiplier depends on fixture type, mounting geometry, and maintenance conditions.
Footcandle targets and lumen budgets by commercial space type
| Space Type | IES Fc Target | Lumens per Sq Ft (Start) | Loss Multiplier Range | Code/Task Risk |
|---|---|---|---|---|
| Parking deck | 5 fc | 5 | Moderate to high depending on layout and maintenance | High |
| Open office | 40 fc | 40 | Moderate | Moderate |
| Retail sales floor | 50 fc | 50 | Moderate to high if glare or accent contrast matters | High |
| Corridor | 10 fc | 10 | Moderate | Moderate |
| Classroom | 40 fc | 40 | Moderate | High |
| Healthcare corridor | 20 fc | 20 | Moderate to high | High |
Use this table to challenge a proposal, not to approve one. If the package pencils out only before losses, it probably won't hold up after commissioning.
A quick lookup is useful during budgeting, tenant improvement pricing, or early retrofit conversations. It stops being enough once fixture spacing, obstructions, or critical tasks enter the picture.
Converting Footcandles to Lux and Lumens per Square Meter
A fixture submittal lands on your desk for a corridor renovation. The photometric plan is in footcandles, the cut sheet is in lux, and the fixture schedule lists metric room dimensions. That mix is common on imported fixtures and cross-border projects, and it causes bad approvals when nobody converts the area basis correctly.
The unit change is simple. The jobsite risk is not. Footcandles and lux both describe illuminance, so the fixture is not producing different light in one system versus the other. The reading changes because the area unit changes.
The conversions that matter in the field
- Footcandles to lux: multiply by 10.7639
- Lux to footcandles: divide by 10.7639
- Lumens per square foot to lumens per square meter: multiply by 10.7639
Here is the quick check I use. If a plan calls for 70 fc, that same target is about 753 lx. If a budget number is written as 20 lumens per square foot, that converts to about 215 lumens per square meter.
What this does and does not tell you
This conversion only changes units. It does not account for coefficient of utilization, light loss factor, mounting height, or optic choice. Those losses still decide whether the installed package will hit target levels on the floor, sales counter, or driving lane.
That distinction matters on real projects. A parking deck target written as 5 fc and 54 lx is the same target. A fixture package that barely reaches that number before CU and LLF are applied is still underdesigned.
For teams that need the metric side laid out in a field-friendly format, Access has a separate guide to convert foot candles to lux.
Applying the Math to LED Retrofits and Code Compliance
Retrofit work is where this math starts paying for itself. On paper, the job looks like fixture replacement. In practice, it's a balancing act between target illuminance, fixture performance, controls, and code paperwork.
The common mistake is to match old fixture lumens one for one. That usually isn't the right approach. LED retrofits often change distribution, control capability, and maintenance behavior, so the better question is whether the new package meets the required illuminance with the actual layout and loss assumptions.
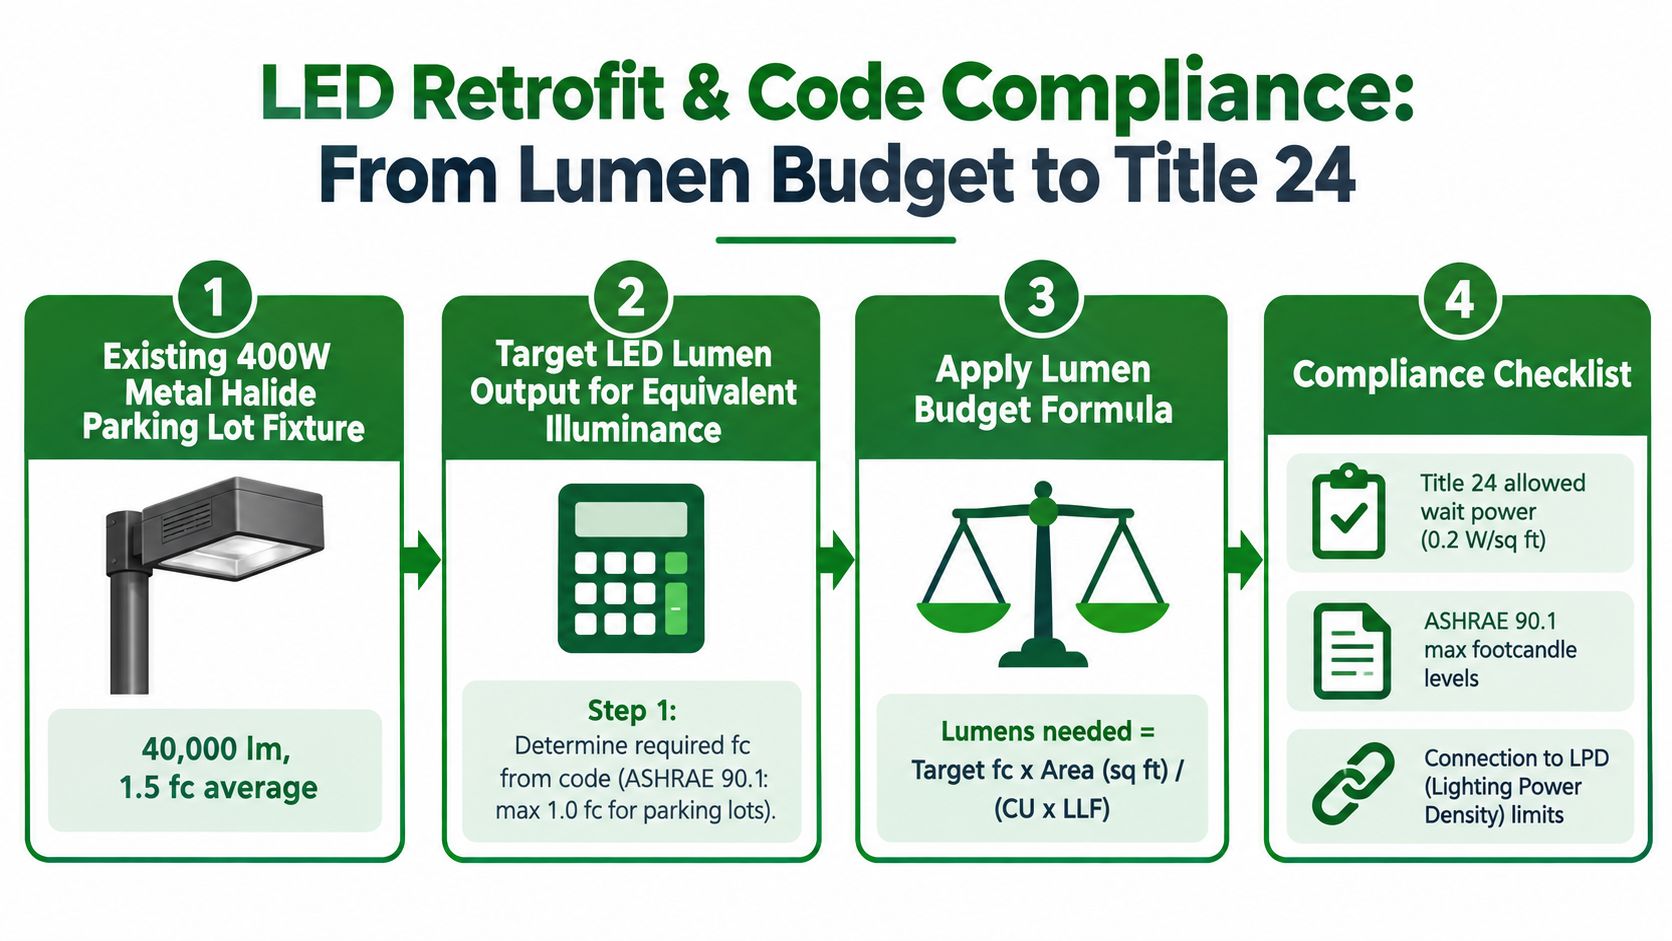
What to verify before ordering
On commercial retrofits, I'd check these items before anyone releases material:
- Target plane: Confirm whether the required reading is on the floor, at task height, or at another defined surface.
- Distribution file: Use the exact optic, not a generic family lumen value.
- Control sequence: Occupancy response, dimming behavior, and scheduling can affect the practical light level the site operates at.
- Field measurement plan: Decide in advance where readings will be taken after commissioning.
Where contractors add value
A good retrofit review ties the photometric result to installation reality. That includes fixture spacing constraints, existing branch circuits, mounting conditions, and how the site will be tested when the work is complete.
For Southern California projects that need installation and compliance support, commercial lighting installation and LED retrofits in Orange County, CA is one example of a contractor service page that bundles retrofit scope with controls and Title 24 documentation. That's useful when the job isn't just a fixture swap, but a full lighting package that has to pass inspection and perform in the field.
The right retrofit question isn't “How many lumens did the old fixture have?” It's “What light level does the site need, and what package delivers it after losses and controls are accounted for?”
Common Conversion Mistakes and How to Avoid Them
Most conversion errors aren't complicated. They're basic slips that survive because nobody stops to check the unit logic.
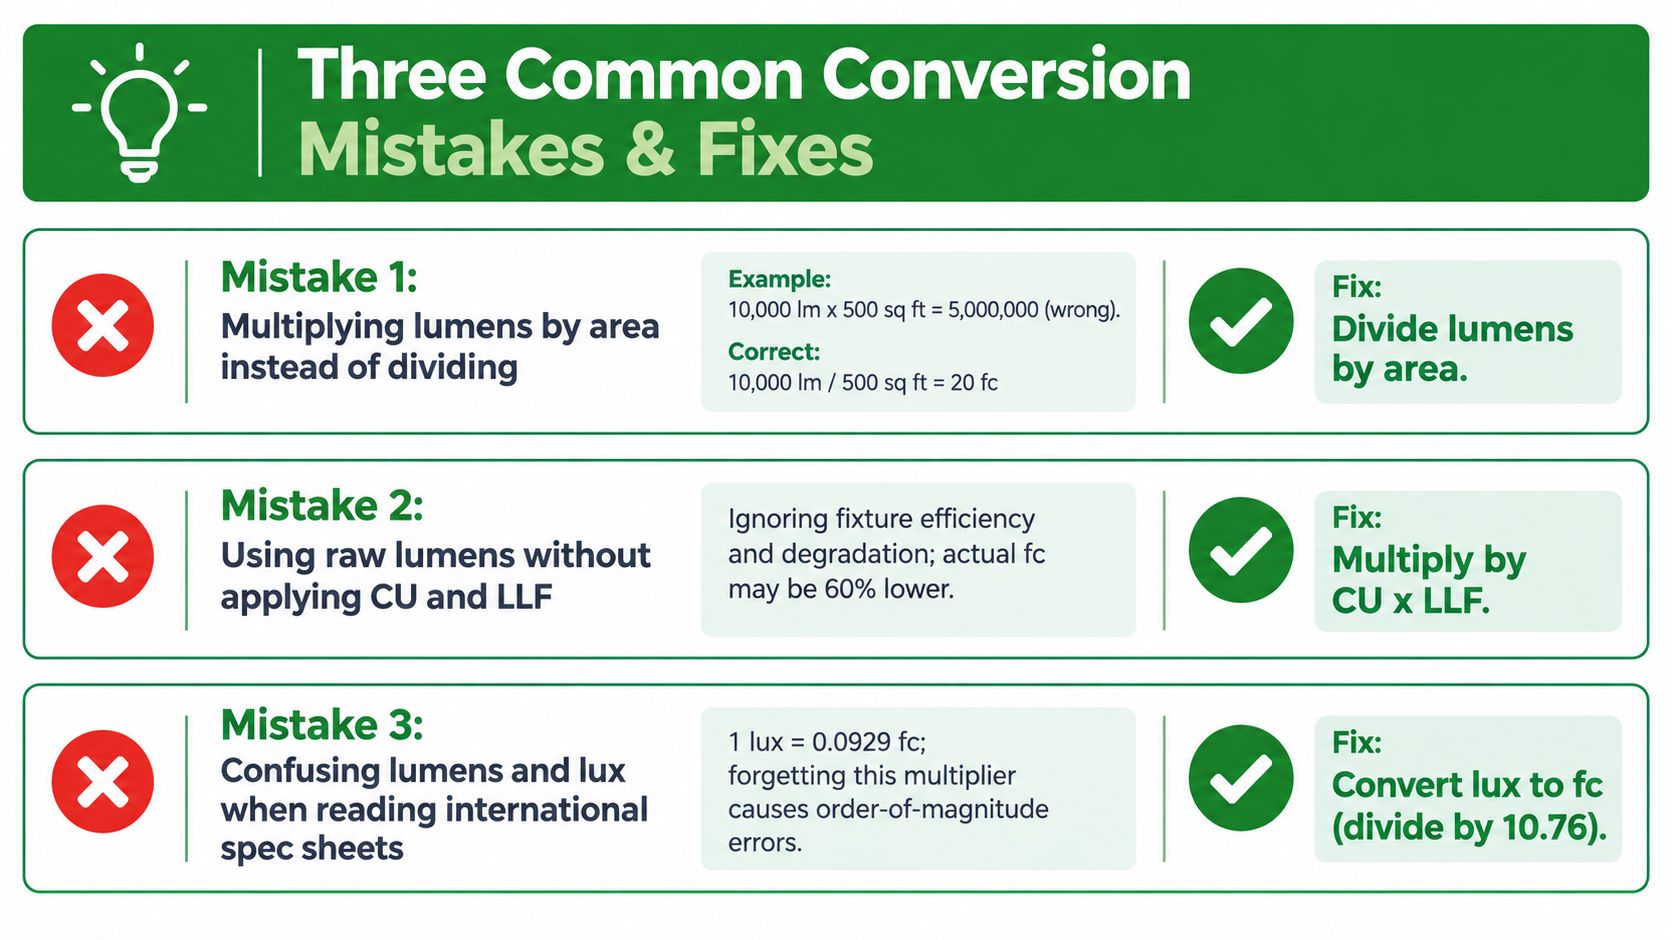
Three mistakes that show up on bid day
Mixing up multiplication and division: If you're finding footcandles from lumens and area, divide lumens by area. If you're finding lumens from footcandles and area, multiply footcandles by area.
Using raw catalog lumens as delivered light: A fixture's published lumen package is not the same thing as maintained illuminance at the surface. Apply CU and LLF before locking the count.
Confusing lux with lumens: Lux is illuminance over area. Lumens are source output. One is what the surface receives, the other is what the luminaire emits.
The fast correction
When a package feels oversized or undersized, run this check:
- Confirm the unit you were given
- Confirm the area basis
- Confirm whether losses were applied
That catches most of the bad math before submittals turn into change orders.
Quick Reference Card for Your Next Project
On bid day, this is the page I want within reach. It gets you from a target footcandle level to a first-pass lumen number fast, while keeping CU and LLF in the math so the fixture schedule has a chance of matching the field.
Field formulas worth keeping
- 1 fc = 1 lm/ft²
- Raw lumens at the work plane = Footcandles × Area
- Required initial fixture lumens = Footcandles × Area ÷ (CU × LLF)
- Maintained footcandles check = (Fixture lumens × CU × LLF) ÷ Area
- 1 fc = 10.7639 lux
Three quick starting rows
| Space Type | Target Fc | Raw Lumens per Sq Ft Start |
|---|---|---|
| Parking | 5 | 5 |
| Retail | 50 | 50 |
| Corridor | 10 | 10 |
Those start values are surface targets, not fixture package targets. A parking deck aiming for 5 fc over 10,000 square feet needs 50,000 raw lumens at the surface. If CU is 0.60 and LLF is 0.80, the fixture package has to deliver about 104,000 initial lumens to hold that target.
The one caveat that saves rework
The simple conversion gives you area math. The job still gets won or lost on losses and distribution.
CU changes with room shape, reflectance, and fixture photometrics. LLF drops with dirt, age, temperature, and maintenance intervals. Beam spread, mounting height, and spacing decide whether those lumens land where you need them or pile up under the fixture and leave dark edges. That is why a corridor, open retail floor, and parking bay can all start with the same formula and finish with very different fixture counts.
If you're planning a commercial retrofit, parking structure relight, tenant improvement, or lighting compliance upgrade in Southern California, Access Electrical and Lighting handles installation, maintenance, controls, and field verification for the systems this math applies to every day. Visit Access Electrical and Lighting to review their commercial electrical and lighting services and see whether their team fits your project scope.