Late on a Thursday in Orange County, a property manager gets two calls at once. The lobby lights are flickering again, a breaker in the main electrical room won't reset, and a tenant is asking whether the HVAC shutoff is tied to the same panel that's been running hot for months. That's usually how a commercial electrical panel upgrade starts, not with a neat capital plan, but with a building telling you it's outgrown the way it was wired.
The common error is treating the panel as a simple replacement part. In commercial buildings, the panel is where load capacity, code compliance, utility coordination, and outage planning all collide. A replacement can solve a nuisance breaker issue, but it can also trigger utility-side delays, permit review, grounding corrections, labeling work, and future load planning for HVAC, lighting controls, EV charging, and tenant growth. The job is making the building ready for what it already runs and what it will run next.
In California, that matters even more because the upgrade isn't just about restoring service. It's about aligning the distribution system with current code, Title 24 documentation, and the practical expectations of occupancy, especially in Southern California where property managers are balancing retail hours, tenant improvements, and after-hours work. A panel that was acceptable when the building was younger can become the bottleneck long before anyone notices a formal failure. That's why this kind of project is less about swapping metal in a room and more about running a controlled transition.
Assess Your Panel and Calculate Loads
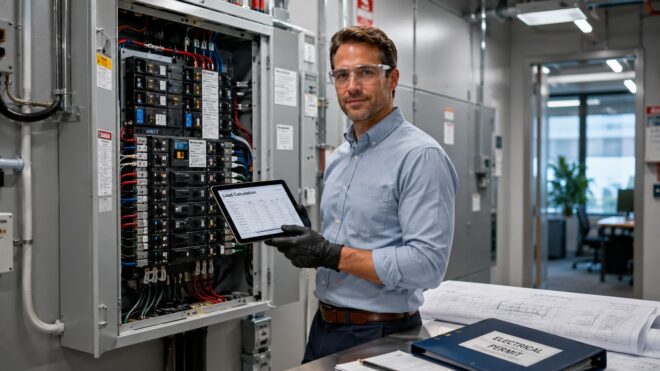
Start with what's installed, not what the drawings say should be there. Open the electrical room, photograph the panel schedule, note the manufacturer, breaker count, visible corrosion, labeling quality, and any signs of heat damage, like discoloration or brittle insulation. If the panel room smells burnt, the cover is warm, or breakers feel sloppy when they reset, you're already past the “watch and wait” stage.
Document the existing system
A useful field review covers panel age, amperage, available spaces, and whether the service is already being stretched by tenant additions or equipment changes. The distinction between a 100A, 125A, and 200A service matters because lower-capacity gear often becomes the quiet ceiling on growth, even when the building keeps adding loads. California electrification planning data shows how common that lower-capacity service still is, with around 30% of homes at 100A, 15% at 125A, and 50% at 200A in one utility service territory, which is a reminder that installed capacity often lags behind demand as buildings evolve (California electrification planning data).
Practical rule: if the panel room documentation is incomplete, assume the next contractor will need to verify everything on site before pricing can be trusted.
Run the load calculation before you price the work
A real NEC Article 220 demand load calculation should reflect HVAC, lighting, receptacles, kitchen or laundry loads where applicable, and any future equipment you already know is coming. That's the point where many upgrades stop being a one-for-one swap and become a distribution redesign. If the building is pursuing electrification, a more detailed sizing review for transformers and service equipment can help avoid underbuilding the system, and a useful planning reference is this transformer sizing guide.
For California properties, Title 24 also changes the conversation because lighting controls, metering, and compliance documentation can affect how the electrical system is organized and verified. Don't let a contractor tell you the panel “has plenty of room” if the issue is that the connected load, code requirements, and tenant fit-out plans no longer fit the service. That's how property teams end up paying twice, once for the upgrade and again for the correction.
Budget for a Commercial Panel Upgrade
A budget usually gets strained before the work starts, because the panel itself is only one part of the job. Commercial upgrades pick up costs from access limits, arc-fault or fault-current requirements, grounding and bonding corrections, permit review, and temporary power if tenants need to stay live. The low bid often skips the items that make the project pass inspection and hold up after turnover.
| Commercial Panel Upgrade Cost Ranges | Cost Range |
|---|---|
| Per panel upgrade | $1,500 to $10,000+ per panel (commercial estimating data) |
| Broader commercial electrical work | $6 to $15 per square foot depending on scope and condition (commercial estimating data) |
Those ranges work as a bidding check, not a final price. An accessible electrical room with clean documentation is one job. A panel swap that needs utility coordination, temporary generation, or after-hours phasing is a different job entirely. Costs also move up when the existing gear needs a higher interrupting rating, a switchboard change, or conductor repairs. Hidden conditions behind the cover, like loose neutrals, failed lugs, or damaged grounding, add real labor and real risk.
Budgeting tip: compare line items, not just totals. If one contractor includes labeling, testing, and permit closeout while another leaves them out, the cheaper bid is not actually cheaper.
On a commercial property, the budget should also include infrared thermography, temporary power rental if the outage window is tight, and commissioning time for the systems that must come back in the right order. A panel upgrade that looks inexpensive can turn costly if the crew has to return for verification, failed restart issues, or utility rework. For Southern California property managers who want the distribution work handled with documentation and service continuity, Access Electrical and Lighting is one option that can coordinate panel upgrades with testing and maintenance.
Hire a C-10 Contractor and Pull Permits
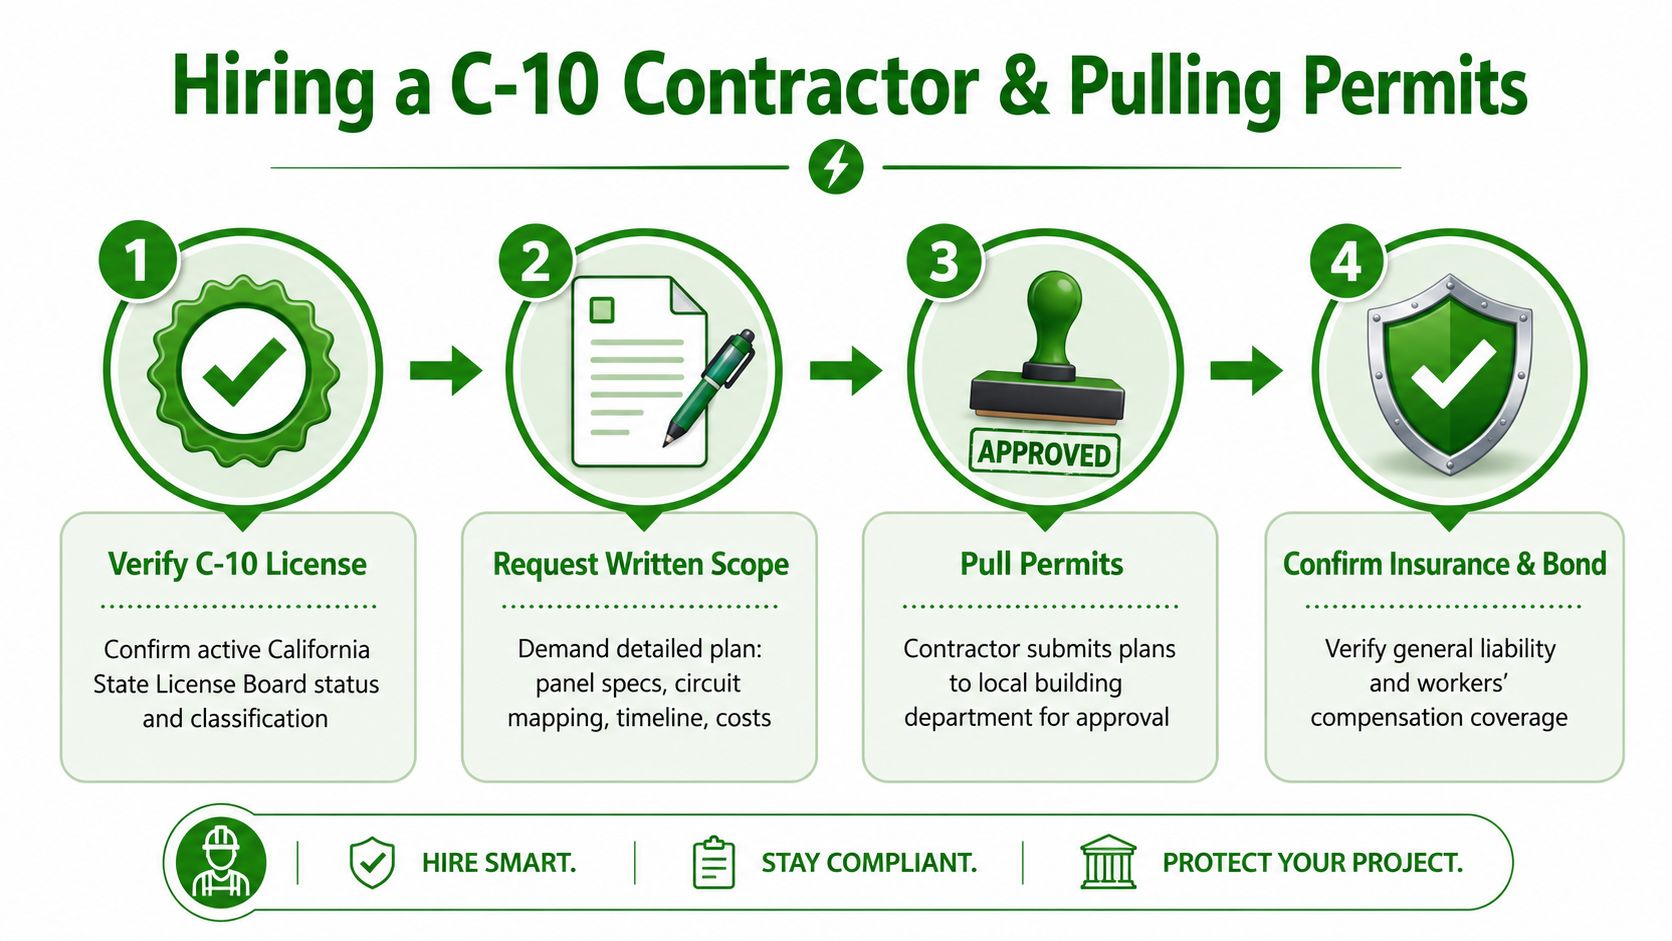
A commercial panel project should be run by a licensed California C-10 electrical contractor with commercial experience, not a handyman with residential habits. Verify the license status, confirm insurance and workers' compensation, and ask for a written scope that names the panelboard, breaker coordination, phasing plan, testing, and permit responsibility. If the proposal is vague, the schedule will be vague too.
Follow the sequence, not the shortcuts
The code-driven workflow starts with the load calculation under NEC Article 220, then moves to utility coordination so the contractor knows the available fault current and service voltage. After that comes permit filing and plan review, then selection of panelboards or switchboards with the correct interrupting rating, or AIC, followed by installation, grounding and bonding, and finally AHJ inspection before energization. That sequence matters because the utility step often controls the timeline, and service-side changes can push a project out by weeks before a single breaker is moved.
A well-run permit package should also spell out labeling, bonding paths, and who is responsible for as-built documentation. The building department wants a paper trail that matches the installed system, and the AHJ won't approve energization until code compliance is verified. If the contractor says the field work is ready but the paperwork is missing, the building still sits dark.
For owners and managers trying to find the right commercial electrician in Orange County, this selection guide is a practical starting point. Use it alongside the permit submittal checklist, not instead of it. The goal is to avoid the common failure point, where the hardware is onsite but the job can't be energized because the utility, inspector, or documentation trail isn't finished.
Schedule Outages and Phase the Work
The biggest risk in a panel swap is rarely the wrench time. It's the coordination around the wrench time, especially when tenants, critical systems, and utility approvals all have to line up before anyone can shut off power. In a retail center, a clean project might happen after hours and zone by zone, with each tenant area isolated, verified, and brought back online in sequence.
Use phased cutovers instead of one big shutdown
Phased execution works because it gives you options. Contractors can use scheduled maintenance windows, section-by-section cutovers, temporary parallel power, or portable generators for critical loads while the main panel work moves forward. That approach also lets operators train before cutover so they know what gets powered first, what stays off, and who signs off on each restart.
What works: staging the work by occupancy zone and keeping a fallback source ready for essential loads.
What doesn't: promising a same-night changeover when the utility side still needs coordination.
One industrial project timeline shows why patience matters. Assessment and planning took weeks 1 to 2, permitting and procurement weeks 3 to 4, offsite fabrication weeks 5 to 8, staging weeks 9 to 10, installation and cutover week 11, and testing and commissioning week 12 (industrial panel upgrade timeline). That timeline makes the bottleneck obvious. Procurement and outage coordination usually drive the schedule more than the physical swap itself.
For Southern California property managers, that means occupancy calendars matter as much as electrical drawings. Night work, holiday closures, and tenant notices should all be locked before the cutover window is promised. If a project depends on utilities, transformers, or service-side changes, build slack into the plan and keep occupants informed early. The building can only go dark once, but the planning happens for weeks.
Install Test and Integrate Building Systems
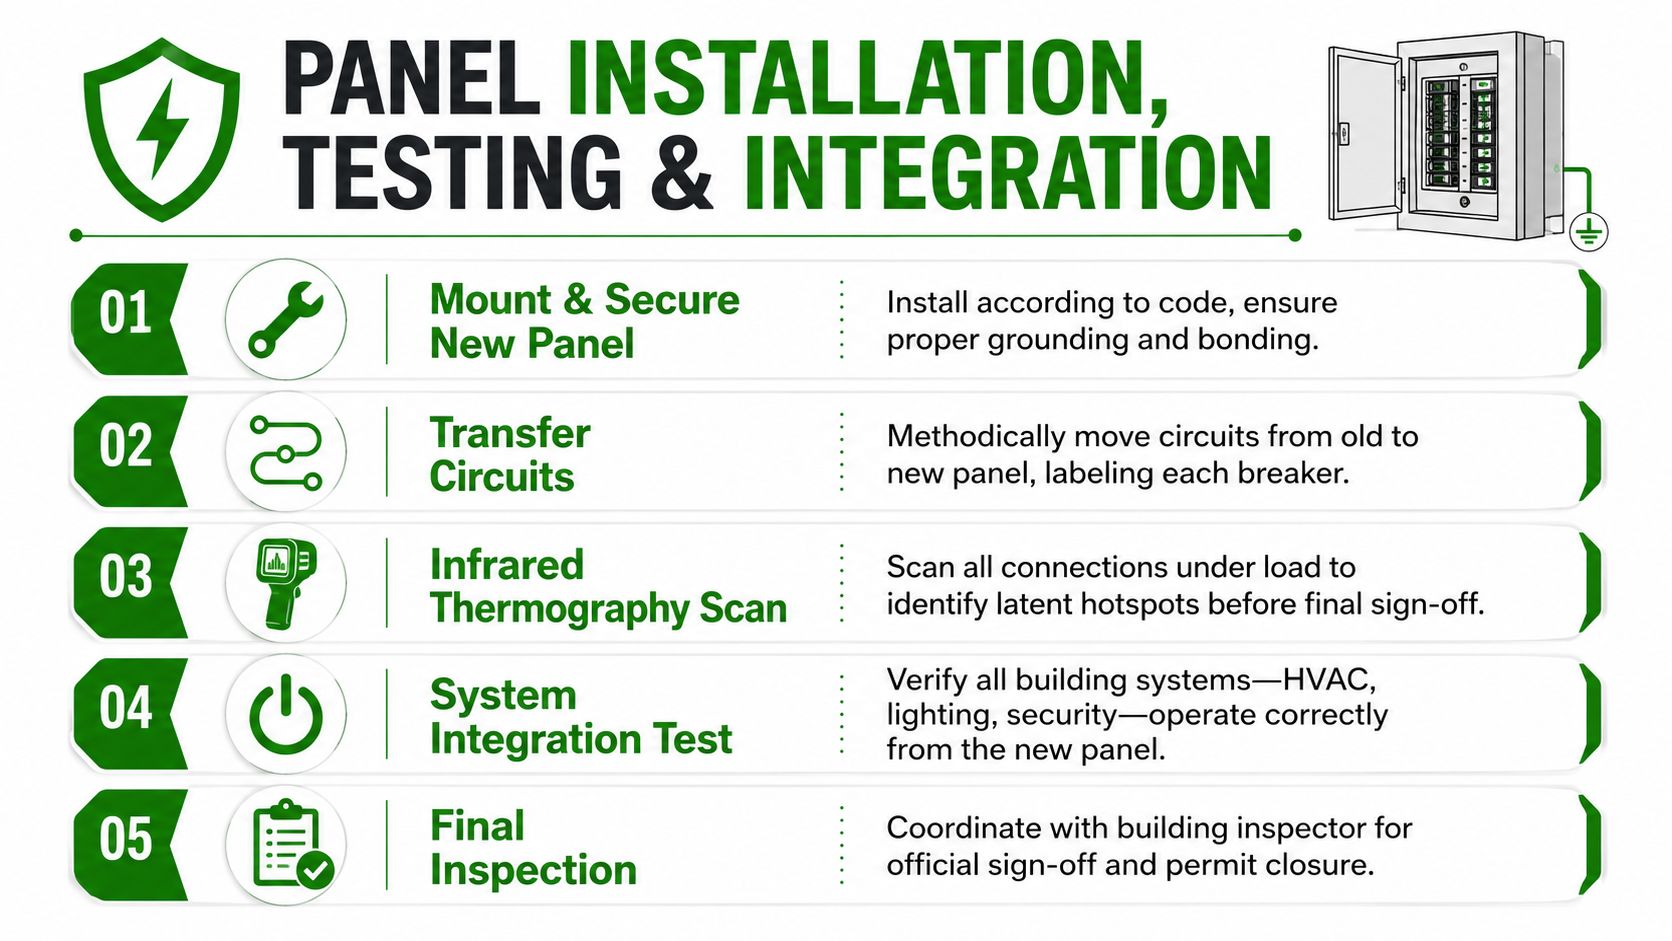
The actual installation should feel methodical, not improvised. The contractor sets the new gear, verifies grounding and bonding, transfers circuits with clear labeling, and keeps the old and new systems separated until each circuit is proven. That's how you avoid the classic mistake where the new panel is installed correctly but the building is left with mislabeled breakers and mystery loads.
Test under load before final sign-off
Infrared thermography belongs at the end of the installation, not as an afterthought. A thermographic scan under load can reveal loose connections, overstressed terminations, or warm spots that aren't visible during a dead-front inspection. For commercial buildings, that check is valuable because a hidden hotspot can turn a good install into a maintenance problem within days.
The integration stage is also where modern load planning shows up. LED lighting controls, EV charging stations, low-voltage systems, and building automation all change how the panel gets used. Independent commercial guidance now treats EV charging infrastructure, future expansion, metering, and documentation as core planning items, not optional extras, because the mistake is upgrading too late and then discovering the new panel still isn't ready for future loads (commercial upgrade guidance).
A larger panel doesn't fix poor coordination. It only gives the building more room to fail if fault levels, ventilation, labeling, and future loads were ignored.
That's why the final walkthrough should include labeling accuracy, breaker directory completeness, thermal scan results, and system-by-system verification for HVAC, lighting, and security. If those pieces aren't checked under load, the project isn't finished. It's just energized.
Maintenance Tips and Final Takeaways
A new panel doesn't stay reliable on goodwill. It stays reliable because someone keeps documentation current, watches for heat, and treats the electrical room like a living system instead of a finished capital project. That's especially true in commercial properties where tenant loads change, lighting controls get revised, and EV infrastructure keeps creeping into the plan.
Keep the paperwork and the infrared history
Schedule periodic infrared inspections and keep the reports with the panel schedule, permit closeout documents, and any Title 24 records. Those reports help show what was checked, what ran hot, and what was corrected before a fault turned into an outage. They also make future service calls faster because the next electrician doesn't have to start from zero.
Staff training matters too. Maintenance teams should know how the panel is labeled, who is allowed to reset breakers, and when a trip needs a documented call instead of a quick reset. Good labeling is cheap insurance, but only if people use it. If the directory is wrong, the whole room becomes a guessing game.
Maintenance rule: document every thermal scan and every breaker change. If you can't trace the work, you can't trust the system.
The bigger takeaway is that a commercial electrical panel upgrade is a planning exercise as much as an electrical one. Assess the load, budget for the full scope, hire the right C-10 contractor, phase the outage, test under load, and keep the records. That sequence prevents most of the avoidable pain property managers deal with after a rushed upgrade.
For ongoing electrical maintenance, infrared inspections, panel upgrades, and Title 24 documentation support, review Access Electrical and Lighting's commercial electrical maintenance services and compare them against your current service history and expansion plan. If your building is starting to outgrow its panel, bring in a contractor early, before the next breaker trip becomes a shutdown.