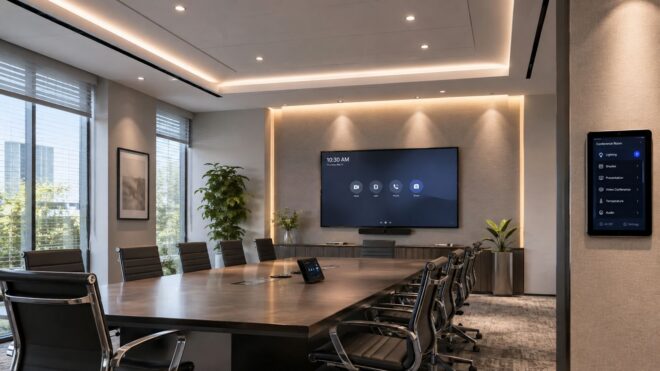
You're sitting in a conference room that looked fine during the tenant improvement walkthrough. Then the first hybrid meeting starts. The presentation screen is washed out, people near the windows are squinting, and the camera shows faces with dark eye sockets and bright foreheads. Someone reaches for the wall switch, the entire room goes dark, and the meeting continues with a laptop flashlight pointed at the table.
That result isn't unusual. Many conference rooms still use lighting designed around one task, general overhead illumination, even though the room now handles note-taking, presentations, video calls, whiteboard work, and face-to-face collaboration. Good conference room lighting has to respond to those behaviors without forcing a remodel every time the meeting format changes.
Why Most Conference Rooms Are Lit Wrong
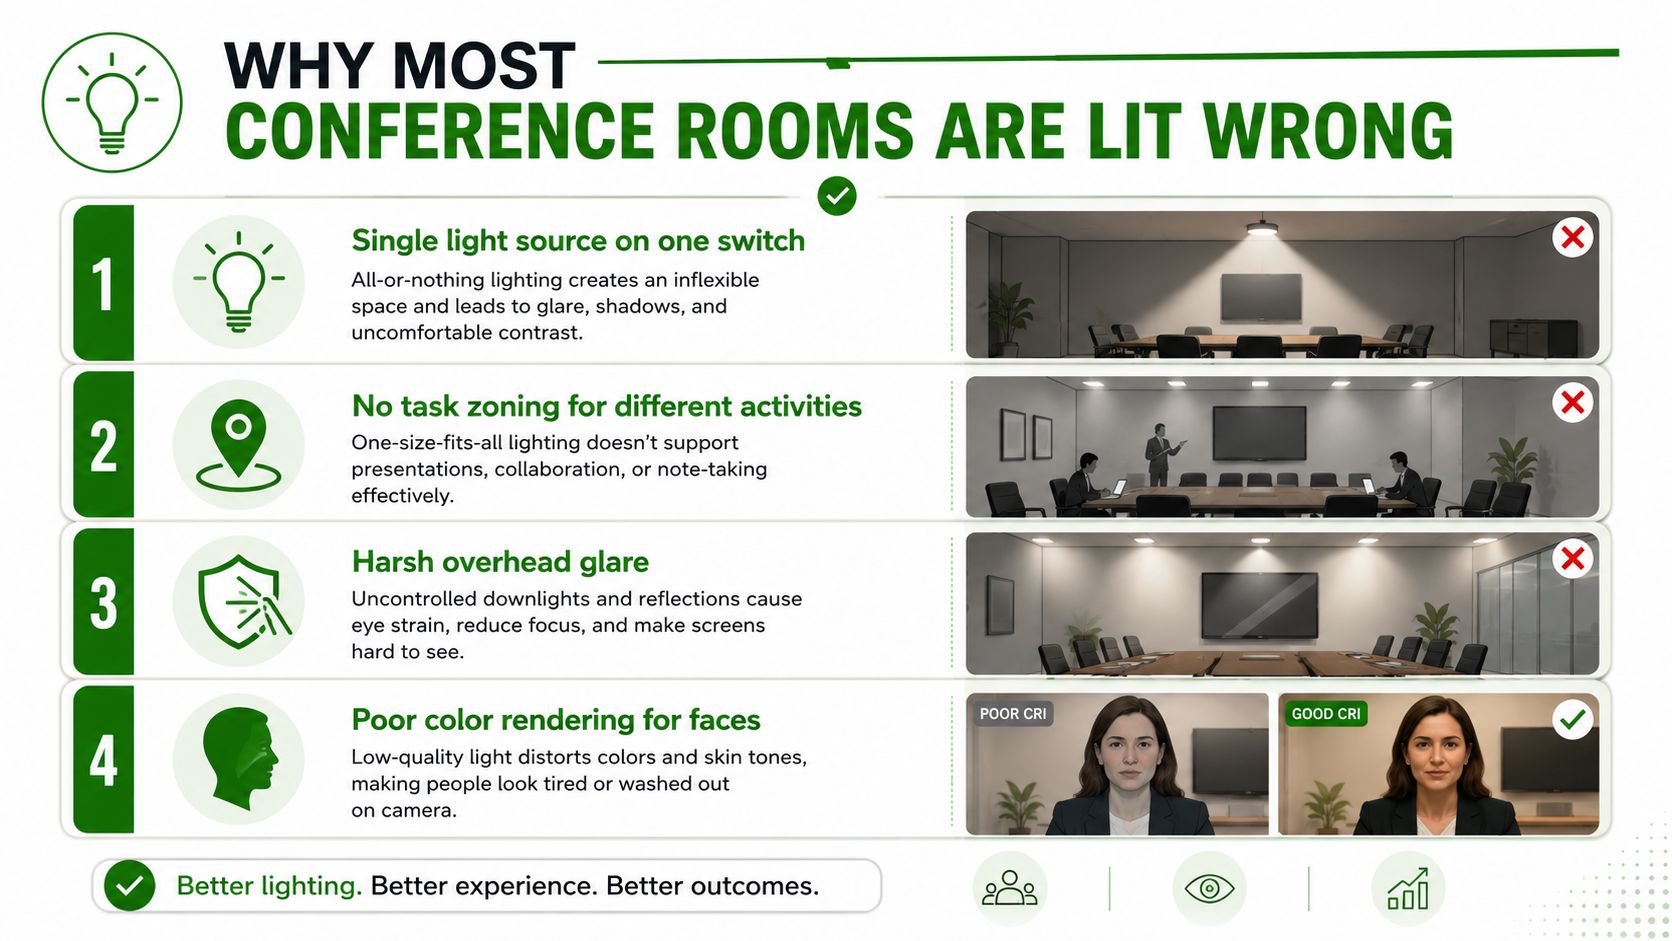
A property manager often inherits the problem after the original design team is gone. The room may have a row of ceiling-mounted fluorescent troffers, one switch at the door, and a projector or display installed after the lighting was commissioned. The electrical plan technically worked, but it treated the conference room like an ordinary office bay.
That approach was defensible when the primary task was reading printed agendas around a table. It becomes a liability when the same room supports a camera, a wall display, and long meetings. One switch can't lower the fixtures aimed at the presentation wall while keeping the table visible. It can't soften the light behind the camera. It can't respond to daylight entering through a glazed facade.
Contractor's observation: If the only lighting control is a single wall switch, the room has one lighting scene, regardless of how many activities the occupants perform.
The first failure is usually glare. Direct LED images, unshielded lamps, bright windows, and glossy tables create reflections that compete with the display. People compensate by closing blinds or turning off fixtures, which solves one problem by creating another. The room becomes dim for writing, faces lose definition on camera, and participants spend the meeting adjusting blinds instead of focusing on the discussion.
The second failure is poor light distribution. A fixture centered over the table may illuminate documents while leaving the presenter's face and the presentation wall underlit. A fixture mounted too close to a wall can create bright scallops, while an untouched wall creates the familiar “cave effect” around a screen.
The third is color quality. Older fluorescent sources and low-quality LED products can make skin tones look flat or gray on camera. The room may appear bright to the eye but still produce an unprofessional video image.
Fixing the room starts with four decisions: establish useful light levels, divide the ceiling into functional zones, select fixtures that control glare and color, and commission scenes against the way people use the room. Energy savings and code compliance matter, but neither makes a bad camera image or an uncomfortable meeting acceptable.
Lighting Levels and Layout That Work
A room can measure bright enough and still fail when the meeting shifts from note-taking to video calls or presentations. Set the design around those changing tasks, then use zones and controls so the room can change with them.
Conference rooms need more light than circulation areas because people read, write, present, and interact with faces and displays in the same space. EN 12464-1:2021 lists 500 lux for conference and meeting rooms, with a Unified Glare Rating of 19, uniformity of 0.60, and color rendering index of 80, as summarized in this conference and meeting room lighting guidance.
Treat that benchmark as a design reference, not a command to run every fixture at full output. Independent office-lighting research reports that occupants often experience the best visual comfort around 150 to 300 lux, while over-illumination, glare, and glazed facades remain common complaints. The research also describes a field study of 1,232 occupants, where 62% reported overall lighting satisfaction, with glare management acting as an important differentiator. The findings are documented in this office visual comfort research.
Match light levels to the activity
Use 500 lux as the primary workplane benchmark. The table should support handwriting, printed material, and laptop work. During presentations, reduce light at the display surface to protect contrast, while keeping enough vertical light on the presenter and enough ambient light for faces on camera.
| Zone | Target Lux | Uniformity (Uo) | Purpose |
|---|---|---|---|
| Conference table workplane | 500 | 0.60 | Reading, writing, laptops, collaboration |
| Presentation wall | 300 | Project-specific | Displays, projection, whiteboards |
| Presenter area | Adjustable | Project-specific | Face visibility and movement |
| Camera-side ambient zone | Adjustable | Even distribution | Balanced faces and reduced backlight |
The 500-lux benchmark and uniformity value come from the EN 12464-1 conference room guidance. The adjustable entries require a photometric model and an on-site camera test, not a guess based on fixture wattage. Commission scenes for at least three operating modes: full work lighting, presentation, and video collaboration.
Build the ceiling around sightlines
Start with the table center, then map the display wall, presenter position, camera location, and windows. Keep high-output downlights out of the camera's sightline and away from angles that create reflections in displays. Linear fixtures over a long table can provide even coverage, but evaluate the lens and suspension height from seated eye level.
Place wall-washers far enough from the presentation wall to spread light without creating bright scallops. The right offset depends on ceiling height, wall finish, fixture optics, and display size. A low ceiling may favor regressed downlights or compact linear fixtures, while a taller room can accommodate indirect pendants or an aimed wall-wash system.
Before ordering, enter the room dimensions, ceiling height, furniture, and fixture photometry into this recessed lighting calculator for layout planning. Then verify the finished room with the actual table, display, blinds, and camera in place. The calculation sets the starting point. The people using the room provide the final visual test.
Fixture Types, Color Temperature, and Glare Control
A conference room may switch from a video call to a presentation, then to note-taking within minutes. The ceiling should support those changes without making the room feel overlit or forcing one fixture to do every job. Select fixtures by visual task, then give each layer its own control path.
Select fixtures by role
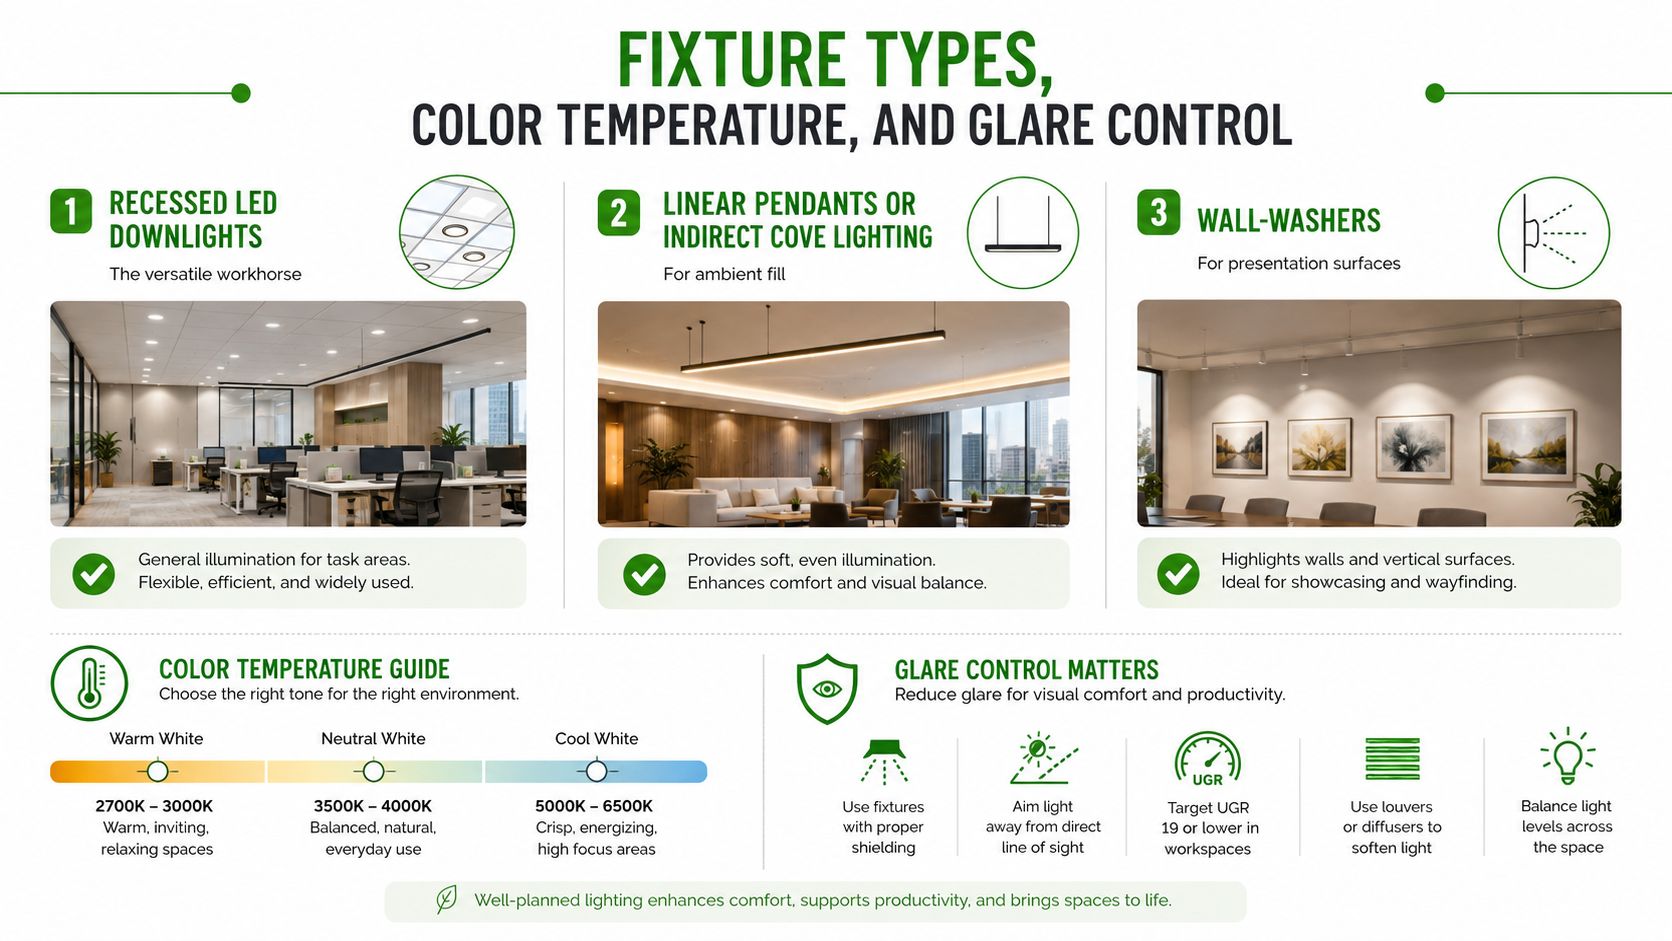
Recessed LED downlights provide dependable light over the table and along circulation routes. Use controlled optics, regressed sources, and dimmable drivers. Wide-open lenses expose bright LED points to seated occupants and often produce distracting reflections on laptops.
Linear pendants or indirect cove lighting add ambient fill and soften the hard overhead character of a conventional ceiling grid. They work well over long tables and in rooms with exposed ceilings, provided the ceiling can reflect the light. Dark or heavily textured surfaces absorb the intended bounce, leaving the room less even than the layout suggests.
Wall-washers serve presentation walls, architectural surfaces, and whiteboards. Set them far enough from the wall to spread light across the vertical plane, while keeping direct views out of seated occupants' eyes. Adjustable accents can help the presenter read clearly on camera, but excessive output creates bright spots on faces and uneven exposure.
Use color and rendering deliberately
For office meeting rooms, 3500K to 4000K is a practical range. It keeps documents, finishes, and skin tones clear without pushing the room toward a cold appearance. A room that changes between collaboration and video work may benefit from a properly specified tunable white LED lighting system, but the drivers, controls, and commissioning must support the selected scenes.
Specify CRI 90 or higher where camera performance matters. Faces, wood, paint, and presentation materials need accurate rendering. CRI does not guarantee a pleasing image, yet poor color quality cannot be corrected reliably with camera software.
Control glare before adding output
Conference rooms need glare control designed around seated sightlines. Keep bright LED points shielded from normal views, and check reflections on the table, laptop screens, glasses, and wall display before approving the fixture schedule.
Frosted or microprismatic lenses, recessed sources, and suitable shielding can reduce direct glare. Window shades belong in the same review. Daylight may improve the room during one meeting and become its brightest glare source during another. Research on adaptable office lighting and occupant control shows why user adjustment matters in changing conditions, as discussed in the research on adaptable office lighting and occupant control.
A reliable specification combines controlled downlights over the workplane, indirect or linear ambient fill where the ceiling allows it, and a separate wall-wash layer. Keep color quality high and provide dimming for each functional layer. Decorative fixtures can work, but their appearance should follow the glare and camera tests, not replace them.
Controls and Zoning for Video, Presentation, and Collaboration
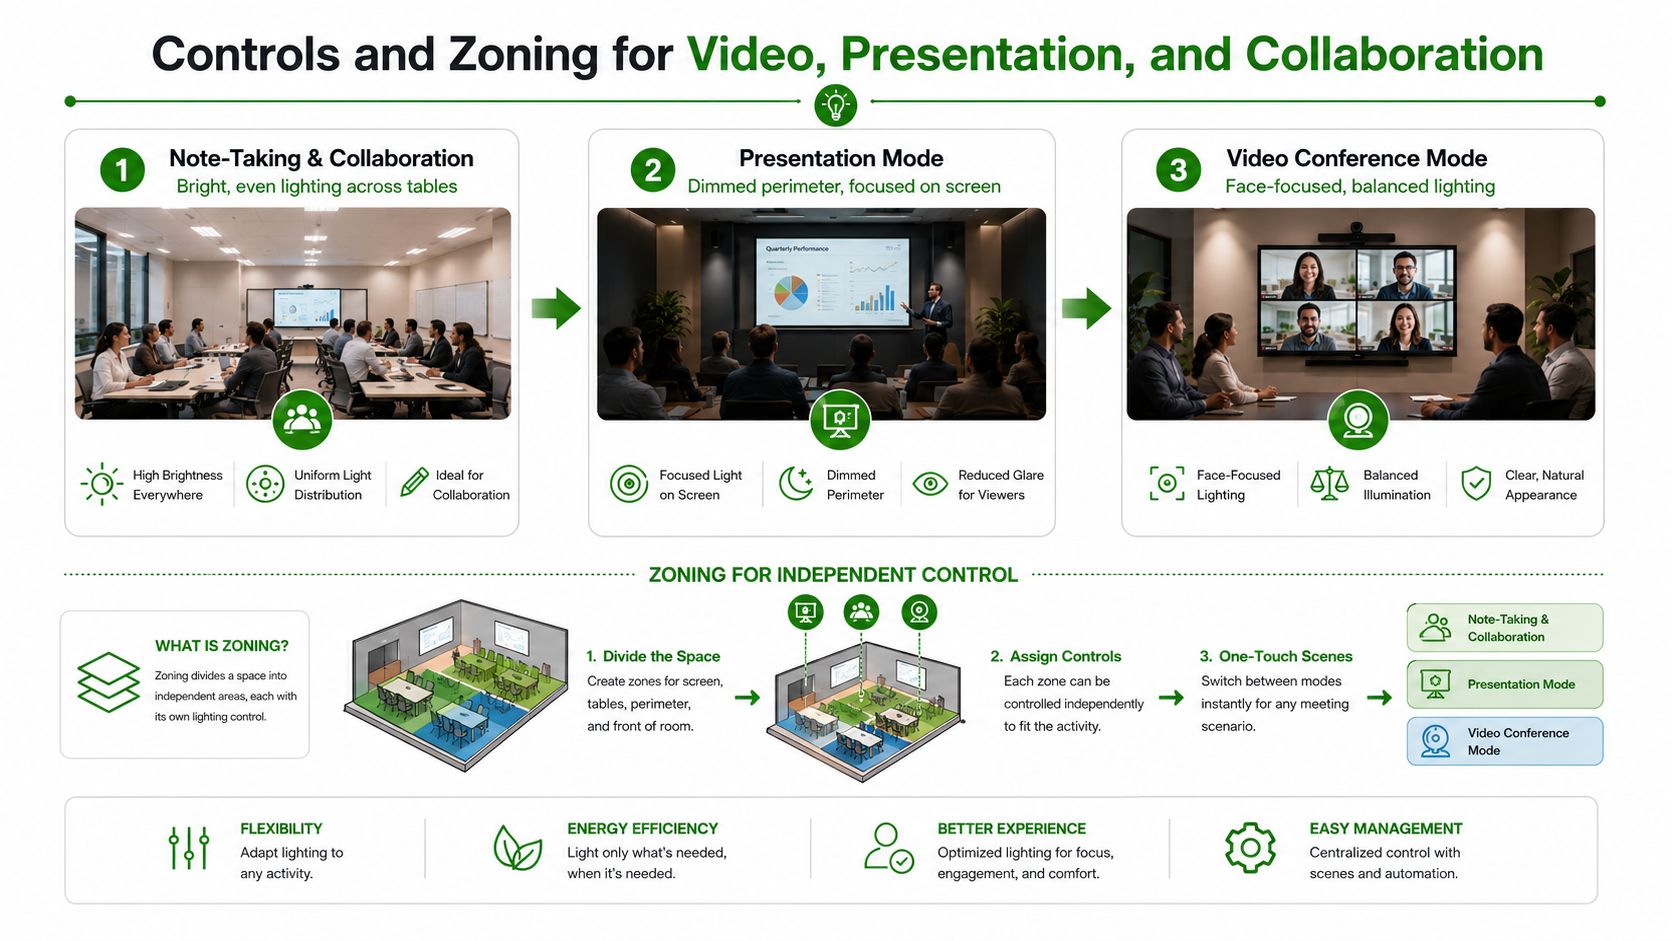
A conference room has at least three operating modes, and each mode changes what “good lighting” means. Collaboration needs an even table. Presentation mode needs reduced light on the display surface and enough light for the speaker. Video calls need balanced facial illumination around the camera without bright sources reflecting into glasses or screens.
A single dimmer can't handle those conditions cleanly. Divide the room into independent zones before you select the wall station.
Give every zone a job
A useful control map includes:
- Table and perimeter zone: Supports note-taking, circulation, and general collaboration.
- Presentation-wall zone: Controls wall-washers or fixtures near the display so the screen can remain readable.
- Camera-side zone: Provides even, low-glare facial illumination and can be reduced when the camera is not in use.
- Whiteboard or accent zone: Adds controlled light to writing surfaces or architectural features.
The camera-side zone shouldn't be treated as a decorative accent. It needs a balanced relationship with the background, the windows, and the people seated at the table. In practice, the right level depends on the camera, lens, furniture arrangement, and room finishes, so the final adjustment belongs in commissioning.
Choose controls that match the project
0-10V dimming is a practical baseline for many commercial LED drivers. It's broadly understood by contractors and provides reliable group control when fixture-level addressability isn't necessary.
DALI makes more sense when the project needs individual fixture addressing, detailed status feedback, or coordinated tunable-white operation. It adds capability, but it also adds commissioning responsibility. Don't specify it just because it appears more advanced.
Wireless systems, including Bluetooth mesh and Lutron Vive, can be useful in retrofit spaces where new control wiring would damage finished walls or ceilings. Evaluate radio coverage, service access, battery requirements, and the owner's willingness to manage another technology platform. An overview of commercial lighting control systems can help frame the available system categories before a contractor develops the submittal.
Program scenes people will actually use
Start with four scenes:
- All-On: Full workplane illumination for setup, cleaning, and detailed collaboration.
- Presentation: Presentation-wall lighting reduced while the table and presenter remain visible.
- Video Call: Even, low-glare light around the camera with controlled background brightness.
- Off: A true off state, subject to required life-safety and code functions.
Occupant sensors and photosensors can reduce waste without making the room feel like a motion-detected grocery aisle. Set time delays and fade rates so lights don't drop out while someone is reading. Require the controls vendor to demonstrate every scene with the display active, blinds open and closed, and occupants seated. Marketing claims about “smart” behavior matter less than whether the room responds predictably at 9 a.m. and during an afternoon presentation.
Energy ROI, LED Retrofits, and Title 24 Compliance
A conference room may look efficient on paper and still waste energy in daily use. The financial case becomes clearer when fixture wattage, operating hours, controls, maintenance, and compliance are reviewed together. Replacing older T8 troffers or CFL downlights with properly designed LED products can produce a realistic 50% to 70% wattage reduction at the same delivered lux. Treat that range as a project assumption to verify with fixture schedules and photometric calculations, not as a guaranteed result from a product label.
Controls reduce load during the hours when the room is empty or only partly occupied. Occupancy sensing, daylight harvesting near windows, and multilevel dimming all have value when their zones match the way the room is used. A sensor that switches lights off during a quiet meeting will lead occupants to bypass the controls, eliminating the expected savings.
Build the comparison before approving equipment
Separate fixture savings from control savings before selecting equipment:
| Scenario | Existing Wattage | LED Wattage | Annual kWh Saved | Estimated Payback |
|---|---|---|---|---|
| Existing fluorescent system | 90 W per fixture | Not applicable | Establish baseline | Not applicable |
| LED replacement | 90 W per fixture | 40 W per fixture | Depends on operating schedule | Depends on utility rate and rebates |
| LED plus controls | 90 W per fixture | 40 W per fixture, dimmable | Depends on occupancy and daylight response | Depends on utility rate, rebates, and controls cost |
A common planning example uses 12 fixtures at 40 watts each replacing 90-watt fluorescent fixtures, with a simple payback often landing at 2 to 4 years. Utility rates and rebate participation can change that result. Recalculate it using the owner's operating schedule, utility tariff, labor cost, and rebate eligibility before approval.
Review the scene settings as part of the financial model. Full output may be appropriate for setup or detailed note-taking, while presentation and video-call scenes can reduce output in areas that do not need the same light. That mixed-use approach protects comfort and camera quality while limiting unnecessary operating load.
The retrofit only works financially if the new system delivers usable light where people work. A lower-cost fixture that produces glare, uneven illumination, or poor camera images can lead to a second installation.
Treat Title 24 as a design requirement
In California, Title 24 planning starts with the lighting layout. Shut-off controls, multilevel operation, daylight response, and acceptance testing must align with the permit and documentation process. Daylit zones require careful review, especially when windows, shades, and presentation surfaces affect how the room is used.
Sequence the work in this order:
- Run the photometric model with furniture, displays, windows, and ceiling conditions.
- Create the fixture schedule and confirm driver compatibility.
- Submit the controls narrative, zoning plan, and sequence of operation.
- Install, test, and calibrate the system.
- Complete acceptance testing and place signed documentation in the permit file.
A local utility rebate program can affect the project calculation, but eligibility should be confirmed before equipment is ordered. Keep the rebate paperwork, fixture data, and controls documentation together with the permit records.
The strongest ROI case includes a commissioning record. It shows that energy savings were pursued without sacrificing video calls, presentations, or everyday collaboration.
Emergency Lighting, Testing, and Commissioning
Conference room projects often focus so heavily on dimming and video that life-safety lighting gets treated as an afterthought. The room still needs a compliant path of egress through the doorway and corridor, with emergency equipment serving the route out of the space.
Egress illumination is generally designed to provide at least 1 footcandle at the floor, and the inverter or unit equipment feeding that path requires 90 minutes of battery backup under the requirements described in the project brief. The exact installation must follow the adopted code, authority having jurisdiction, building configuration, and equipment listing.
Put testing on the facility calendar
Emergency systems need documented testing, not a quick press of the test button when an inspector arrives. The expected cadence includes a 30-second monthly self-test and an annual 90-minute full-duration test. California authorities and other AHJs may request the written log, so keep records accessible to facility staff rather than leaving them in a contractor's truck.
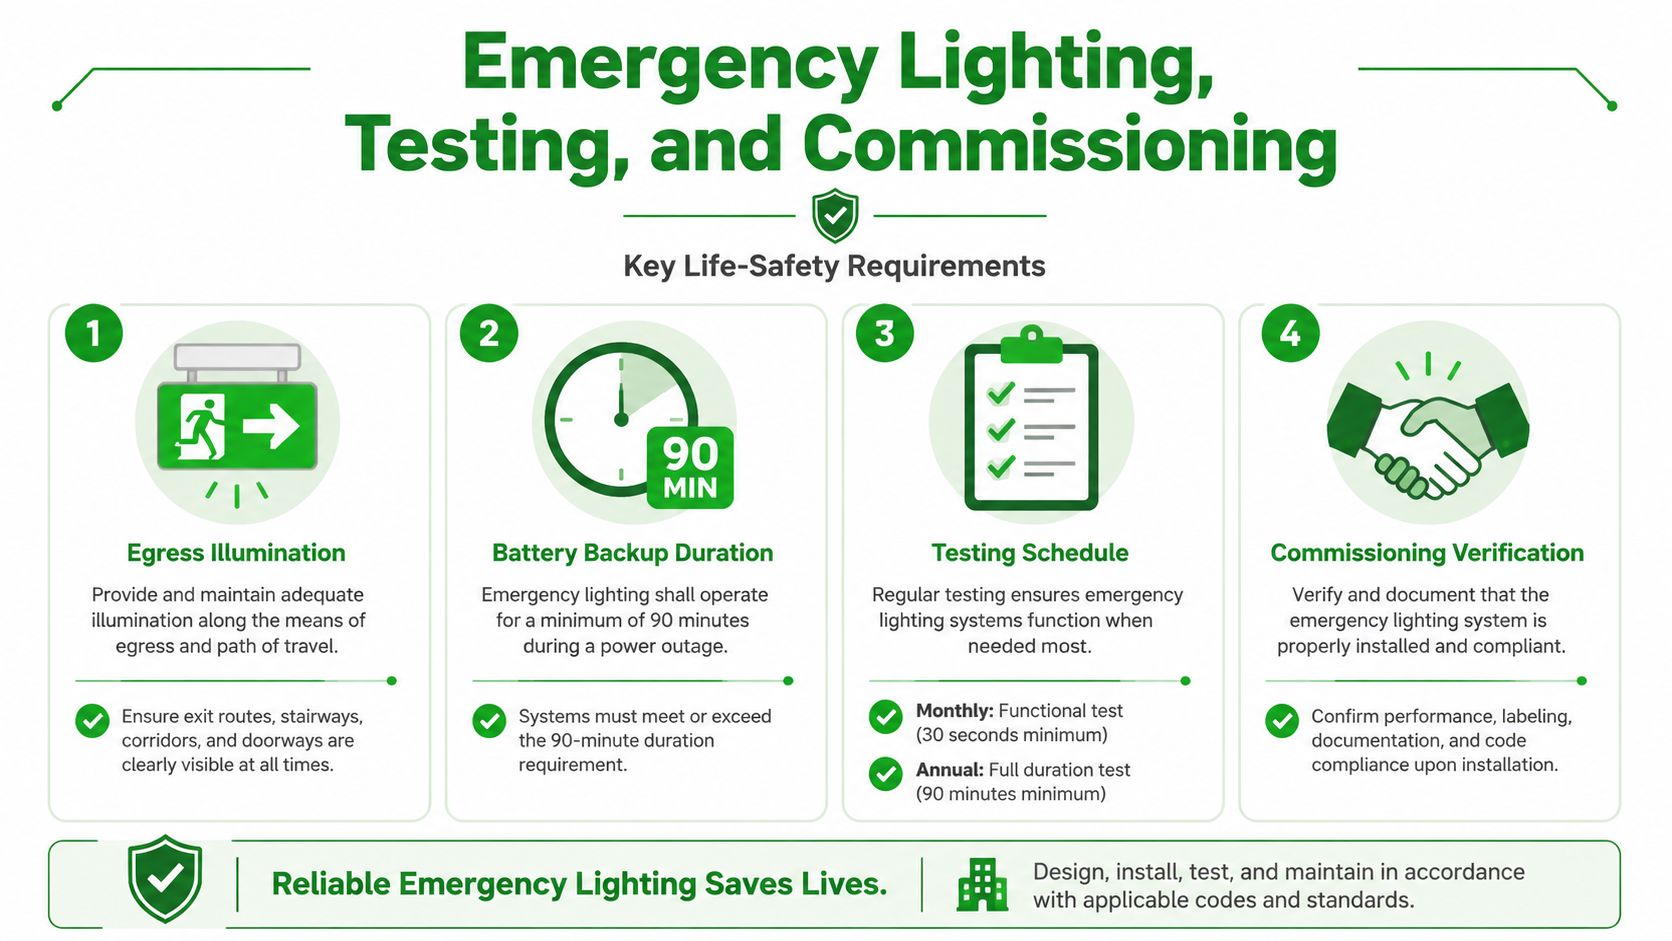
The monthly check should confirm that the unit responds, indicators operate normally, and no fixture or exit sign has been obstructed by furniture or a display installation. The annual test should verify sustained operation for the required duration and identify weak batteries before a power interruption exposes the problem.
Commission the normal system too
A contractor should commission more than the emergency fixtures. Require a closeout process that includes:
- Addressable fixture startup: Confirm every fixture communicates and responds to its assigned zone.
- Scene verification: Test All-On, Presentation, Video Call, and Off against the approved sequence.
- Daylight calibration: Adjust photosensors with blinds, furniture, and finished surfaces in place.
- Camera review: Check faces, backgrounds, displays, glasses, and reflections from the actual camera position.
- Documentation: Deliver control settings, test results, and as-built drawings in a final commissioning report.
Furniture changes can undo good camera lighting. During the warranty walkthrough, have the facility manager test each scene after the room has been rearranged and re-aim the camera if its field of view has changed. That small check prevents a working lighting zone from becoming ineffective because the camera now looks across the room from a different angle.
Choosing a Contractor and Maintaining the System Long Term
The contractor you choose should be able to explain the room's visual behavior, not just count fixtures. Ask for a site visit, a photometric layout, a fixture schedule, and a controls sequence that identifies what happens in collaboration, presentation, and video modes.
A qualified California electrical contractor should provide verifiable C-10 licensing, relevant commercial experience, and a clear commissioning plan. Review conference room projects with similar ceiling heights, glazing, display arrangements, and control requirements. A portfolio full of attractive photographs doesn't prove that the contractor tested glare or calibrated the camera zone.
Use a practical selection checklist
- Verify the license: Confirm the contractor's C-10 status and insurance before reviewing the final price.
- Request the model: Require fixture photometry showing table illumination, presentation-wall treatment, and glare considerations.
- Review controls experience: Ask who will program 0-10V, DALI, Bluetooth mesh, Lutron Vive, or the selected platform.
- Demand commissioning documents: The proposal should identify scene testing, sensor calibration, emergency tests, and as-built drawings.
- Clarify warranty coverage: Separate fixture, driver, battery, controls, labor, and response terms.
- Reject vague lump sums: A quote prepared without a site visit may omit wiring, ceiling access, controls integration, or permit documentation.
Maintenance should follow performance, not just failure. Facility teams can verify table-surface light levels quarterly, review controls firmware annually, inspect LED drivers every three years, and perform a five-year emergency battery discharge test. Those intervals are a practical maintenance rhythm, not universal code requirements, so the equipment manufacturer's instructions and the adopted local requirements still control.
Keep a replacement schedule tied to L70 lumen maintenance projections instead of waiting for fixtures to fail visibly. Log scene complaints, sensor overrides, display changes, furniture moves, and battery results. A room that remains comfortable and predictable will keep its controls enabled, preserve its intended energy performance, and avoid repeated service calls caused by small configuration problems.
Access Electrical and Lighting provides commercial lighting design, LED retrofits, lighting control support, emergency lighting testing, and Title 24 documentation for Southern California properties. If your conference room needs a photometric review, zoning plan, retrofit, or commissioning service, visit Access Electrical and Lighting to discuss the existing conditions and the next practical step.