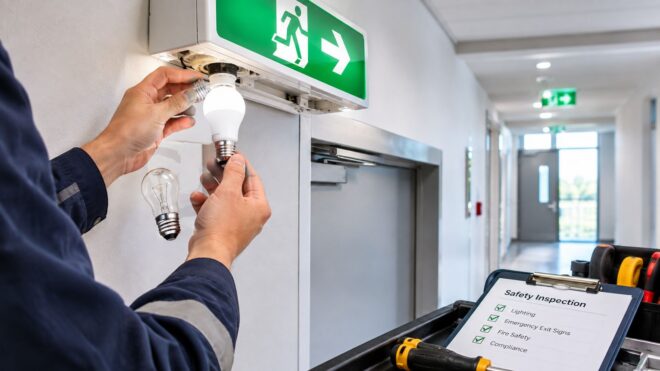
The cheapest exit sign bulb is often the most expensive part of the repair. A lamp can illuminate during a quick walkthrough and still leave the building with an unlisted fixture, an incompatible battery circuit, or a failed emergency-duration test. That's why experienced electricians treat exit sign bulbs as one component in a life-safety assembly, not as ordinary replacement lamps.
The technology has changed dramatically. A U.S. Department of Energy-based analysis estimated that more than 100 million exit signs were in use in the United States in 2008, consuming 30 to 35 billion kilowatt-hours annually at that time. By 2007, more than 85% of exit signs incorporated LEDs, while less than 5% remained incandescent, according to EPA and DOE-era exit sign efficiency guidance. The practical question today isn't which bulb fits. It's which repair or retrofit preserves the fixture's listing, battery performance, illumination, and inspection record.
Why Exit Sign Bulbs Are Really a Compliance Problem
A dark exit sign is not a lamp-replacement ticket. An inexpensive incandescent lamp, screw-in LED, or plug-in replacement may restore the face temporarily, yet still leave the building with an unapproved component or an emergency circuit that fails inspection. The repair must start with the sign's compliance status, not with whichever bulb fits the socket.
A listed exit sign is tested as an assembly. The light source, battery, charger, transfer circuitry, test switch, housing, and legend work together. Changing one part can alter the electrical load, emergency runtime, heat profile, or diagnostic behavior. A self-testing fixture may read a different load as a lamp fault. A charger may fail to maintain the battery properly. A replacement board may light the legend on normal power but deliver inadequate output during the discharge test.
What the inspector is actually evaluating
The visible lamp draws attention, but an inspection covers the complete emergency function:
- Is the fixture properly listed? Internally illuminated emergency signs generally need a UL 924 listing, tying emergency performance to the tested configuration. The emergency-lighting code summary explains how listing, illumination, and emergency operation relate.
- Does the sign transfer to backup power? A bright sign on utility power does not confirm that the battery or transfer circuit works.
- Does it remain illuminated for the required duration? A short push-button test can miss a battery that has lost capacity under load.
- Is the documentation complete? Records should identify the equipment tested, failures found, and corrective work completed.
The lamp is only one part of the inspection record.
Practical rule: If a replacement changes the lamp type, driver, connector, or emergency circuit, verify the fixture's listing before installation.
A cheap swap becomes expensive when a technician must return after hours, repeat testing, replace a battery, or correct an inspection record. A non-listed component can also create a warranty dispute. Start the work order with the fixture model and wiring diagram. Then choose between a listed lamp, an approved retrofit kit, or a complete replacement sign. That decision protects the emergency function and gives the property team documentation it can defend.
A Short History of Exit Sign Illumination
Exit sign technology changed because the operating cost and maintenance burden changed, not because the lamp alone became more convenient. Older signs used incandescent filaments, and EPA and DOE-era guidance put traditional models at about 40 watts per sign. LED replacements could use as little as 2 to 5 watts per face, according to this exit sign efficiency reference. Incandescent heat also accumulated inside continuously operating housings, aging plastic components and discoloring the legend.
Compact fluorescent signs reduced electrical demand compared with many incandescent designs, but they added ballasts, starting behavior, and more failure points. A failed ballast could leave the lamp dark even when the tube appeared intact. Cold conditions and repeated cycling made troubleshooting less predictable than replacing a filament.
LEDs changed the service calculation again. An ENERGY STAR-labeled LED exit sign was estimated at roughly 44 kilowatt-hours per year, compared with about 350 kilowatt-hours per year for an incandescent model, based on the Lighting Research Center's exit sign analysis. The analysis estimated that one incandescent sign could use about eight times more electricity annually than an LED sign.
Exit sign lamp generations compared
| Generation | Wattage | Rated life | Annual kWh | Common failure |
|---|---|---|---|---|
| Incandescent | About 40 W per sign | Varies by lamp design | About 350 kWh annually for an incandescent model | Burned filament, heat damage, darkened legend |
| Compact fluorescent | Lower than traditional incandescent designs | Varies by tube and ballast | Varies by fixture | Ballast failure, starting problems, tube failure |
| LED | About 2 to 5 W per face in older efficiency guidance | Varies by listed product | About 44 kWh annually for an ENERGY STAR model | Driver, LED board, connector, or battery fault |
| Tritium or electroluminescent | No conventional powered lamp | Varies by product and service requirements | No conventional powered operation | Reduced output, product-specific disposal or service issue |
Tritium and electroluminescent signs remain in legacy installations and specialized applications. Photoluminescent signs use stored ambient light instead of a powered lamp, so their performance depends on suitable charging illumination and proper listing.
For a practical explanation of emergency signs within a building's egress system, see this guide to emergency exit signs for Southern California property owners. The historical trade-off still affects today's work order. Evaluate heat, electronics, battery loading, legend condition, and inspection labor alongside lamp wattage. A low-wattage retrofit can reduce energy use while leaving the property team with an aging battery, incompatible electronics, or a sign that requires more troubleshooting than the original fixture.
Code Requirements Behind the Bulb
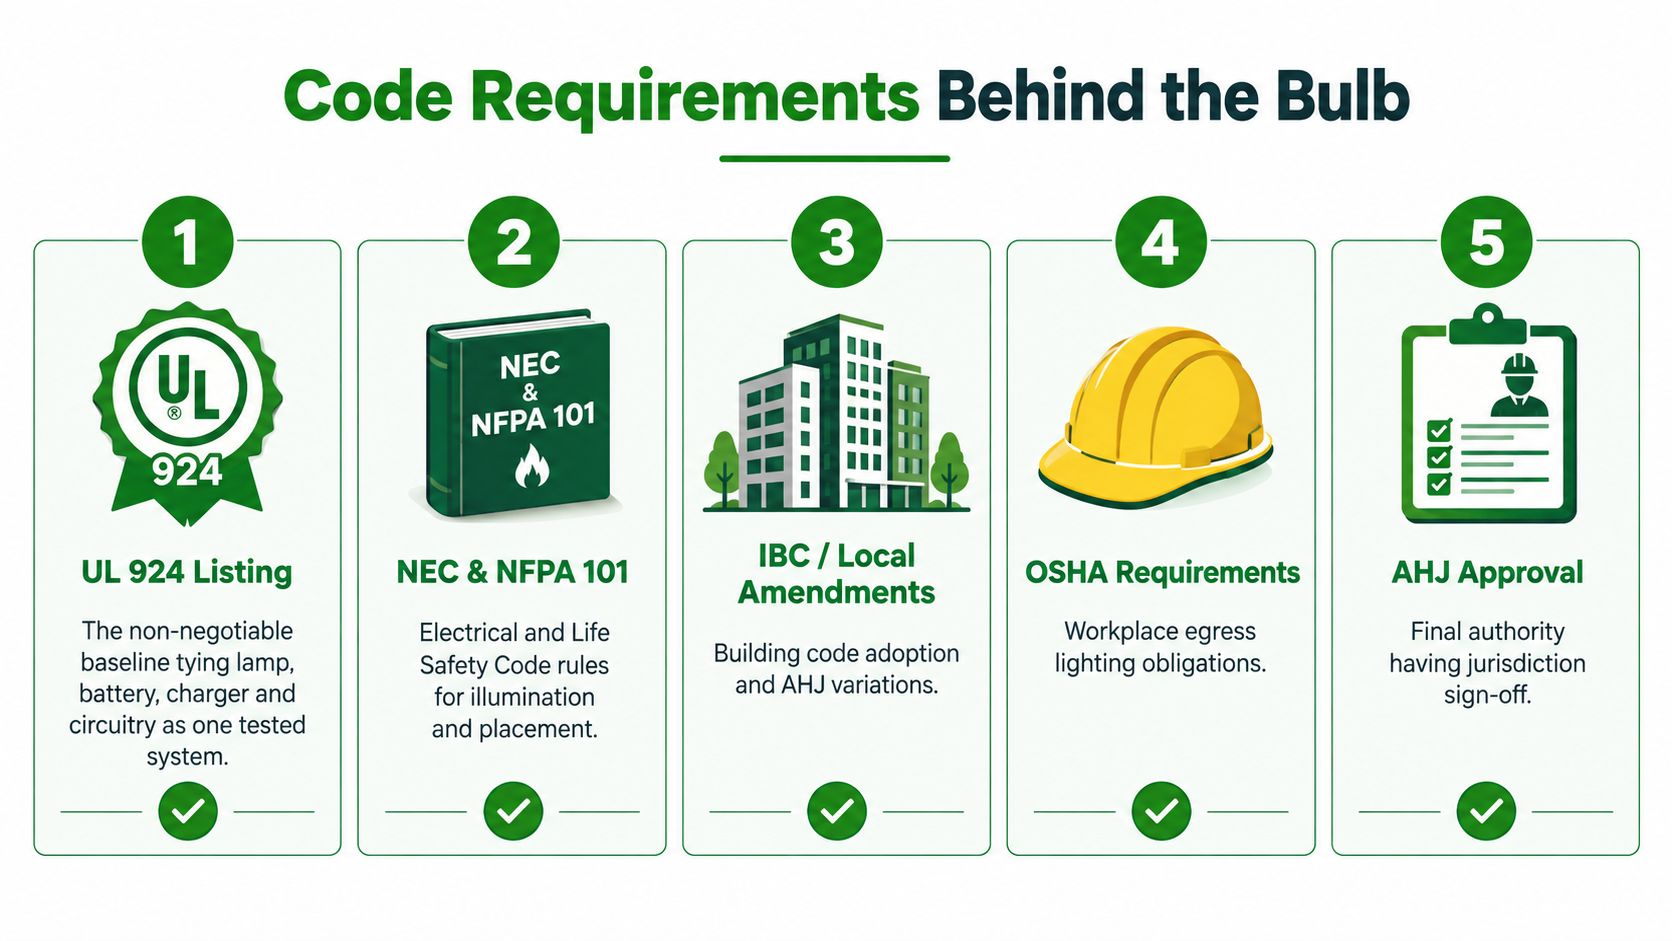
Exit sign work is a compliance decision before it is a lamp decision. Start with the UL 924 listing, which shows that the internally illuminated emergency sign was evaluated for its intended life-safety function. Matching the socket, brightness, or color is not enough. The replacement lamp or LED board must be approved for that fixture and emergency circuit, or installed through a listed retrofit method that preserves the assembly's tested operation.
NFPA 101-related requirements used by building teams generally require exit signs to remain illuminated and legible during an emergency. They address viewing distance, emergency-power duration, and illumination of both exit signs and egress paths. The exact enforcement depends on the adopted code, local amendments, and the authority having jurisdiction. Before approving a retrofit, confirm the requirements that apply to the property rather than relying only on the bulb package.
The compliance stack
Treat the sign as one part of several connected requirements:
- UL 924 listing connects the light source, battery, charger, transfer circuit, and housing to a tested emergency function.
- NFPA 101 and electrical requirements address illumination, placement, visibility, and emergency operation.
- The adopted building code and local amendments can change how the authority having jurisdiction evaluates the installation.
- OSHA duties require workplace exit routes to remain adequately lit and usable.
- AHJ approval determines whether the installed condition and maintenance records satisfy the local inspection process.
The emergency-duration requirement applies to the complete emergency illumination system, not just the plastic housing or battery compartment. A replacement LED board that draws more current can cause the sign to dim during testing. A board that draws substantially less can create compatibility problems with an older diagnostic circuit or charger. Check the fixture's listing, wiring, battery, and replacement instructions together.
California projects also bring energy-code questions. California Title 24 materials describe special treatment for exit signs that meet efficiency conditions, including thresholds for luminous efficacy and power factor (California exit sign efficiency guidance). A repair passes inspection only when the emergency listing, installed configuration, and applicable energy requirements align. Keep the product data and installation record with the property's maintenance file.
Battery Backup and Self-Diagnostic Electronics
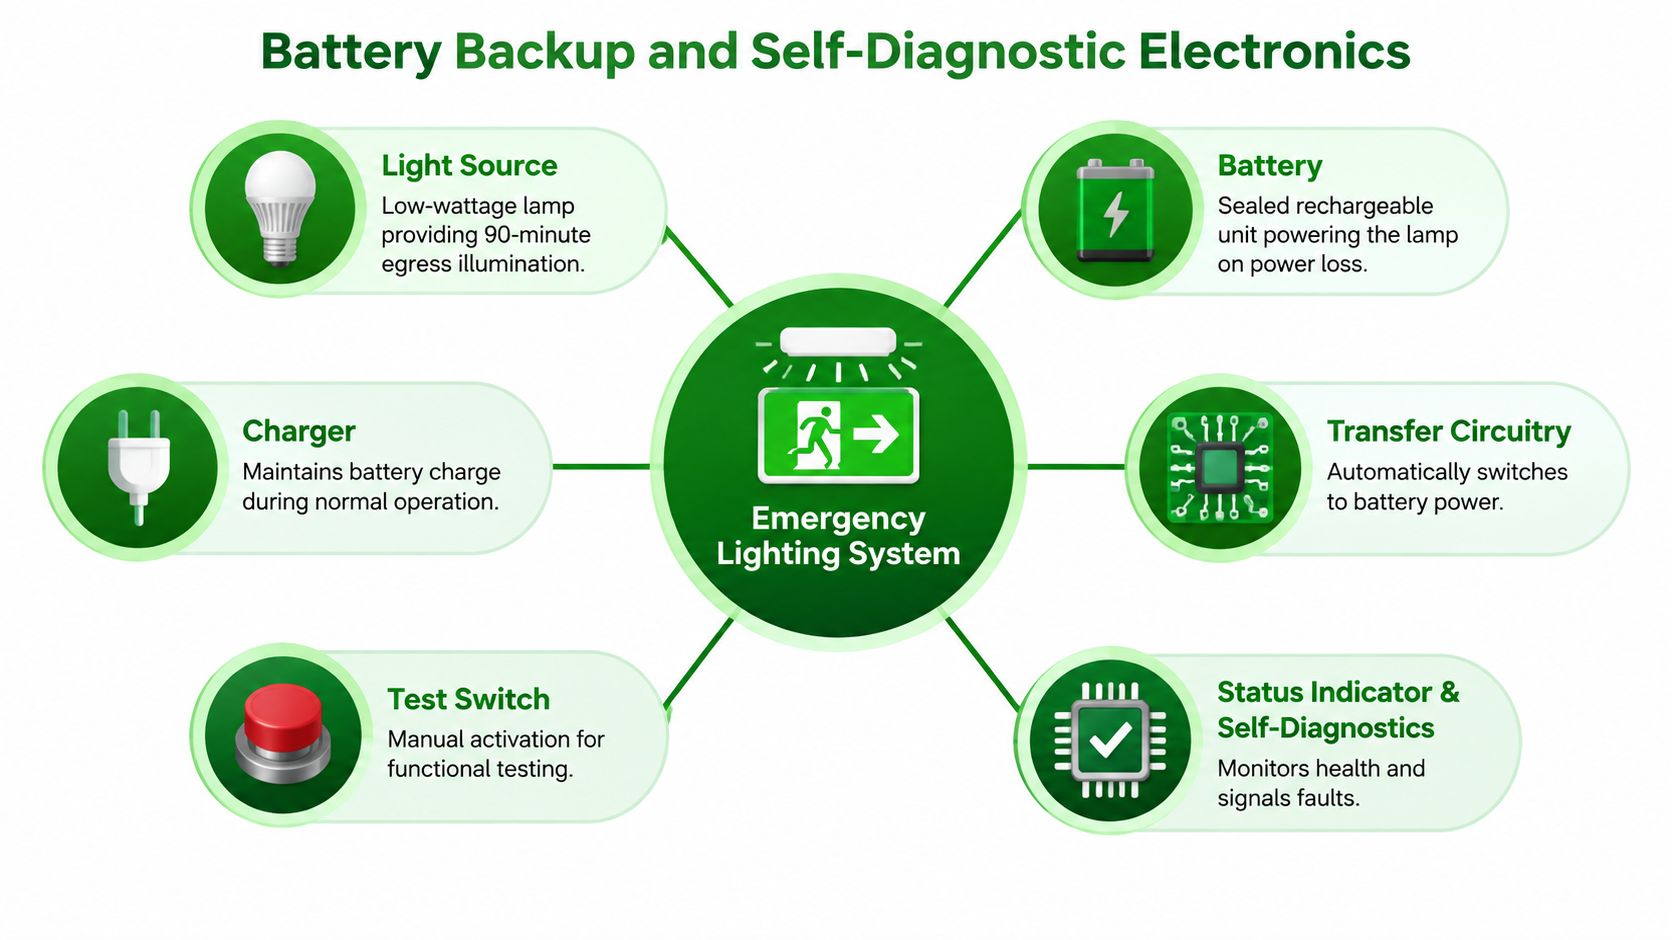
A modern exit sign contains more than exit sign bulbs. Its emergency system usually includes a light source, rechargeable battery, charger, transfer circuitry, test switch, status indicator, and diagnostic controller. Normal utility power keeps the battery charged. When that power drops, the transfer circuit moves the light source to battery operation, and the controller monitors the result.
That sequence explains why a bright sign can still fail. The LED board may be new, but the battery may have reduced capacity. The charger may show a normal voltage while failing to restore the battery properly. A connector may be loose, polarity may be reversed, or the replacement board may not match the driver's voltage and current requirements.
Diagnose the system, not just the symptom
A useful service sequence looks like this:
- Identify the fixture: Record the manufacturer, model, listing information, input voltage, battery type, and wiring diagram before opening the sign.
- Inspect the light source: Check for dim sections, flicker, discoloration, loose connectors, and damaged conductors.
- Check the charger: Confirm that it maintains the battery under normal power and doesn't overheat.
- Test under load: A voltage reading alone can't establish battery capacity. The battery has to support the light source during the required discharge test.
- Verify transfer operation: Use the test switch or approved test procedure to confirm that the sign changes to emergency power.
- Record the corrective part: Log the exact lamp, LED board, driver, battery, or diagnostic-board part number.
Lead-acid and nickel-metal-hydride battery packs have different charging behavior, service requirements, and temperature limits. Use the manufacturer's replacement schedule as the starting point, then replace the pack sooner when a functional or duration test shows inadequate runtime.
Self-diagnostic indicators are useful, but they don't replace written maintenance. A warning light may identify a charging or lamp fault, while a battery can still appear normal until it's placed under load. Infrared inspection can help locate an overheated charger, connection, or battery area, but capacity testing remains the decisive check for emergency runtime.
For properties managing multiple fixtures, keep wiring diagrams, battery models, charger information, inspection dates, and corrective actions together. A documented emergency exit light battery-backup service gives the next technician enough information to troubleshoot the system without starting from the beginning.
Replacement and Retrofit Options Compared
Not every red or green lamp is a safe substitute. Start by identifying what the existing fixture was designed to accept, then determine whether the proposed component is listed for that exact emergency sign. A direct LED replacement can be practical when the housing, socket, driver, battery circuit, and diagnostic system remain compatible. It isn't a universal solution.
A full retrofit kit takes a broader approach. It may replace the lamp, driver, reflector, and battery, and it can sometimes include a new diagnostic board. That makes sense when the housing and legend remain serviceable but the internal electronics are obsolete. The kit still has to match the sign's input voltage, emergency circuit, face configuration, directional chevrons, and listing.
Four paths for a real building
| Option | Scope and performance | Best-fit decision criteria |
|---|---|---|
| Direct LED replacement lamp | Replaces the existing lamp while leaving most fixture components in place | Use only when the lamp and fixture combination is approved and the existing battery circuit remains suitable |
| Full LED retrofit kit | Replaces the light source and related electronics, with some kits also addressing the battery or diagnostics | Appropriate when the housing and legend are sound but internal components need modernization |
| Complete fixture swap | Installs a new sign with matched electronics, battery, listing label, and maintenance information | Usually the most predictable choice when legacy housings are damaged, yellowed, unreliable, or poorly documented |
| Photoluminescent sign | Uses ambient light stored in the sign material instead of a powered lamp and battery | Consider where the product is properly listed, charging illumination is reliable, and the AHJ accepts the installation strategy |
Cheap screw-in and bi-pin LED lamps can create several problems at once. They may produce glare, fail to illuminate the legend evenly, overload or underload the existing circuit, or leave the maintenance file without a defensible listing record. A bulb that looks bright in normal mode may not provide the required emergency performance.
A complete fixture swap also gives the contractor an opportunity to correct poor placement, blocked visibility, damaged faces, and missing directional indicators. Photoluminescent signs can reduce battery maintenance, but they aren't appropriate in dark locations or where the required charging illumination can't be maintained. They also don't eliminate the need for emergency lighting along the egress route.
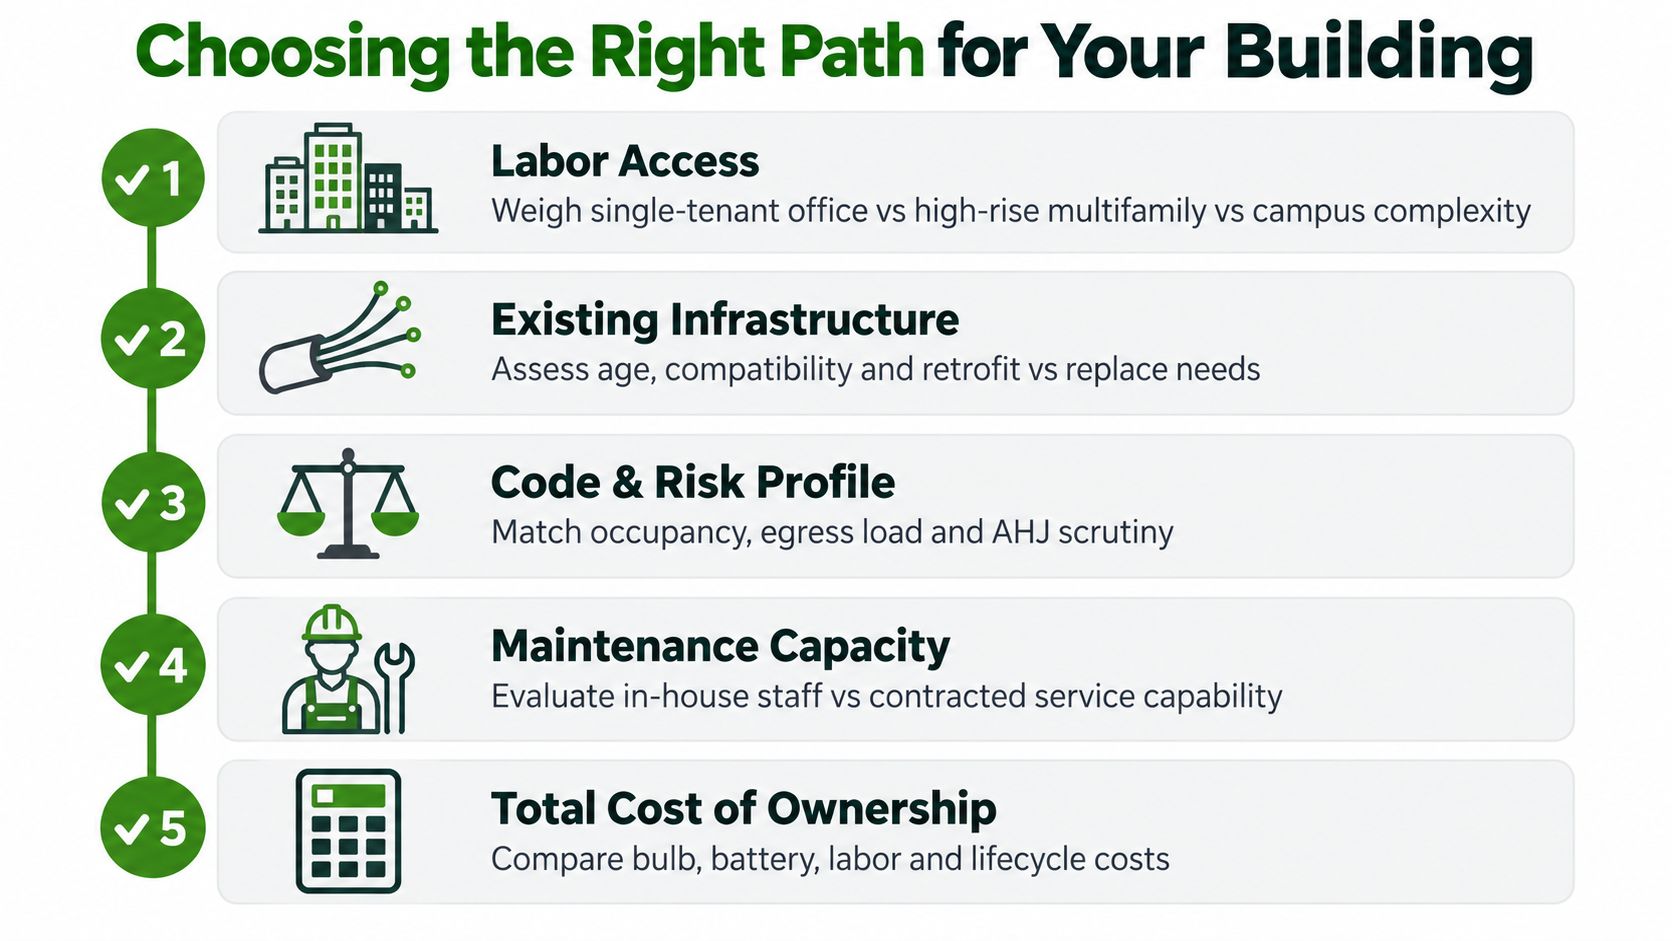
Compare the options using total ownership cost. Include parts, access equipment, labor, after-hours work, battery service, inspection records, old fluorescent component disposal, and the likelihood of another failure. The least expensive item on a supply invoice isn't necessarily the least expensive compliant repair.
Testing, Inspection, and Documentation
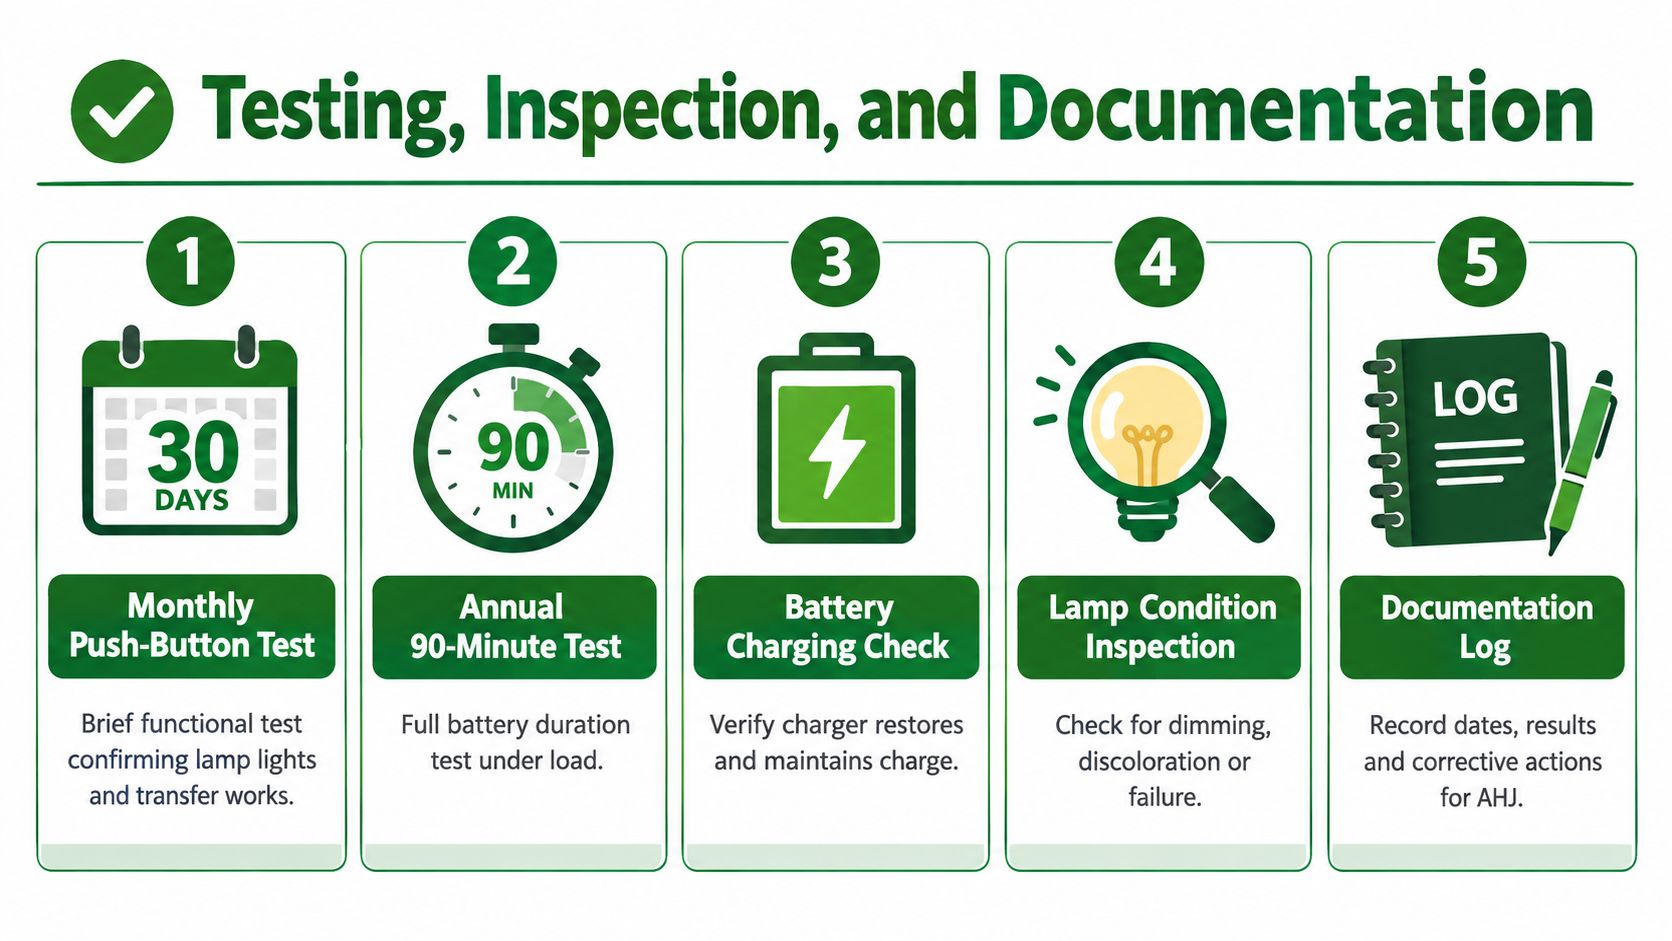
Pressing a test button for a few seconds only answers one question, whether the sign transfers and illuminates briefly. A proper maintenance program checks normal operation, battery charging, lamp condition, emergency transfer, and sustained illumination. The written record matters because a working sign without a traceable maintenance history can still create a compliance gap.
NFPA 101-related maintenance guidance commonly calls for a monthly 30-second functional test and an annual 90-minute test, with written records retained for the authority having jurisdiction. The emergency-lighting inspection checklist also emphasizes that the buying decision involves failed tests, documentation errors, and repeated service calls, not just replacement lamp cost.
Use a repeatable test routine
During the monthly functional test:
- Activate the test switch: Confirm that normal power disconnects and the emergency circuit engages.
- Inspect the legend: Check that the exit lettering and directional chevrons remain evenly illuminated.
- Watch for faults: Note dimming, flicker, delayed transfer, status-light warnings, or a sign that doesn't illuminate.
- Record the result: Enter the location, date, technician, test type, observed condition, and corrective action.
During the annual discharge test, simulate loss of normal power for the full required period. Observe whether the sign maintains consistent output, whether the battery causes early dimming, and whether the charger restores normal operation after power returns. A battery that passes a brief test but fails during the longer discharge needs replacement or further diagnosis.
Build records another technician can use
A useful log includes:
- Fixture identity: Building, floor, room, corridor, sign number, and circuit.
- Test details: Date, monthly or annual test, duration, and tester name.
- Electrical observations: Battery voltage, charger status, transfer behavior, and lamp output.
- Parts installed: Manufacturer and part number for the bulb, LED board, driver, battery, or diagnostic component.
- Closeout evidence: Corrective action, completion date, technician, and dated photograph when useful.
Infrared checks can reveal a hot charger, connection, or battery area that a visual inspection misses. They're a diagnostic aid, not a substitute for a duration test. Coordinate testing with fire inspections, planned outages, tenant access, and construction so technicians can reach every fixture without leaving an occupied egress route unprotected.
A failed test should remain in the history with a clear repair and closure entry. Erasing the failure makes the record less useful and can make a recurring battery or wiring problem harder to identify. Properties can also use documented emergency-lighting testing services to standardize logs across multifamily, retail, and office portfolios.
Working Within Title 24 and Broader Retrofits
Exit sign work is a compliance decision inside a larger lighting project. In California, a retrofit may involve Title 24 Part 6, emergency listings, lighting controls, acceptance testing, and local review. Normal-mode energy performance must coexist with the sign's life-safety function during an outage.
A control system may dim corridor fixtures, respond to occupancy, or participate in demand management during normal operation. It must not interfere with emergency transfer, battery charging, or the illumination required along the egress route. Before commissioning, verify the control wiring, emergency circuit, charger, and transfer equipment as one system.
California guidance identifies efficiency thresholds, including 40 lumens per watt and a power factor above 90%, for special treatment of qualifying exit signs. Those energy criteria do not replace UL 924 requirements. A sign can perform efficiently in normal operation and still fail the project review if its emergency configuration is not properly listed, installed, or tested.
Compare retrofit paths before construction starts
| Retrofit path | Normal-mode efficacy | Emergency listing | Rebate eligibility | Commissioning documentation |
|---|---|---|---|---|
| Direct LED lamp replacement | May improve normal-mode efficiency | Must remain compatible with the listed fixture | Depends on the program and approved equipment | Record lamp identity, fixture compatibility, and test results |
| LED retrofit kit | Designed to improve the complete internal system | Requires a listed kit and matching installation | May qualify when the equipment and project meet program rules | Include kit details, wiring changes, and acceptance results |
| Complete LED sign replacement | Defined performance from a new assembly | New fixture listing establishes the emergency configuration | Depends on product and program requirements | Keep product data, placement records, testing, and closeout documents |
| Photoluminescent signage | No powered normal-mode lamp, but charging illumination is required | Must be properly listed and accepted for the application | Depends on the project and program | Document charging conditions, placement, product listing, and AHJ approval |
Photoluminescent signs may supplement LED signs and low-level egress-path measures when stairwell or corridor lighting is also being upgraded. They do not replace powered emergency lighting where the route requires it, and they depend on reliable ambient illumination during occupancy.
Bundle sign work with corridor, stairwell, parking, and control upgrades while access is available. This can reduce repeated lifts, ceiling access, shutdowns, and tenant disruption. It also gives the electrical contractor one coordinated commissioning window instead of separate visits for each fixture group.
The closeout file should connect fixture schedules, Title 24 documentation, emergency test results, commissioning notes, and AHJ comments. Keep product data and approved substitutions with the record. If a lamp or kit differs from the original schedule, document the installed part and the basis for accepting it. That record helps the owner defend the retrofit during inspection and supports future maintenance.
Choosing the Right Path for Your Building
A direct LED replacement is reasonable only when the existing fixture is structurally sound, the legend is clear, the battery and charger are healthy, and the replacement is approved for that emergency sign. Don't select a lamp because it fits a socket or because its package says LED. Verify the fixture model, voltage, connector, polarity, driver requirements, and listing documentation first.
A retrofit kit is usually the stronger choice when the housing remains usable but the internal lamp, driver, battery, or diagnostic board has become unreliable. It makes more sense for a portfolio with repeated failures in the same fixture family, provided the kit is specifically matched and the installer can document the completed configuration.
Match the scope to the building
- Single-tenant office: A direct replacement may work when records are complete and access is simple. A full fixture replacement is more sensible when signs are undocumented or several components are aging together.
- High-rise multifamily: Standardize the fixture family and battery records across floors. Labor access, resident disruption, and repeated fire-inspection visits can outweigh a small parts savings.
- Retail and shopping centers: Account for high traffic, impact damage, ladders, lifts, and after-hours work. A durable complete fixture may outperform a fragile lamp-only repair in exposed locations.
- Older properties: If the housing is yellowed, cracked, poorly placed, or missing its listing information, replacement is easier to defend than repeated lamp swaps.
For every vendor, request the UL 924 file information, product literature, battery data, warranty terms, and evidence that the product is acceptable for the California application. Confirm who will perform the monthly and annual tests, who retains the records, and whether the contractor understands the local authority having jurisdiction.
Access Electrical and Lighting can evaluate exit signs, battery backup systems, emergency lighting, and related Title 24 documentation as part of a commercial maintenance or retrofit scope. The company also provides infrared electrical inspections and documented testing for commercial, retail, office, and multifamily properties across Southern California.
The right choice is the one that remains compliant after installation, passes the required tests, and gives the next technician a usable record. Price the bulb, battery, labor, access, downtime, failed inspection risk, and documentation effort across the ownership cycle. Once those costs are visible, the cheapest exit sign bulb rarely looks like the cheapest solution.
For an on-site evaluation, emergency lighting test program, LED retrofit, or Title 24 documentation support, contact Access Electrical and Lighting. Ask the team to review the complete exit sign assembly, battery performance, listing documentation, and inspection records before you authorize a lamp-only repair.