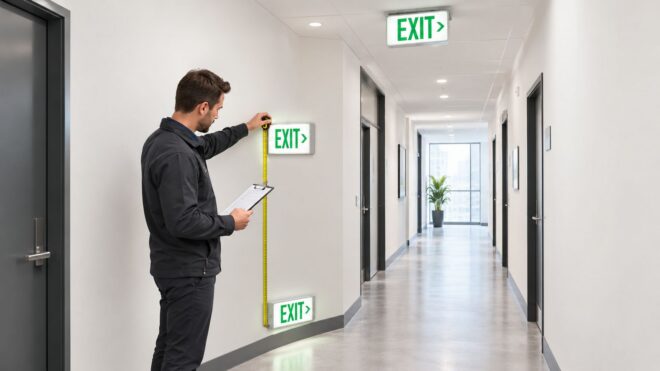
Two days before a fire inspection, a property manager walks a tenant corridor with a tape measure and finds three exit signs at three different heights. One sits above a doorway, another hangs from a ceiling grid, and a third is mounted low on the wall near the discharge route. The immediate question is understandable: which measurement will the fire marshal check?
The practical answer is that exit signage mounting height isn't one universal number. It's a layered system shaped by life-safety codes, sign type, visibility through smoke, accessibility, and the geometry of the building. NFPA 101 and the International Building Code establish the main mounting framework, while the Authority Having Jurisdiction, or AHJ, interprets local amendments and site conditions.
A property manager who measures only from the floor to the center of a sign can miss the actual compliance point. A contractor who repeats one mounting detail throughout a building can create problems at stairs, high-ceiling spaces, altered corridors, and doorway transitions.
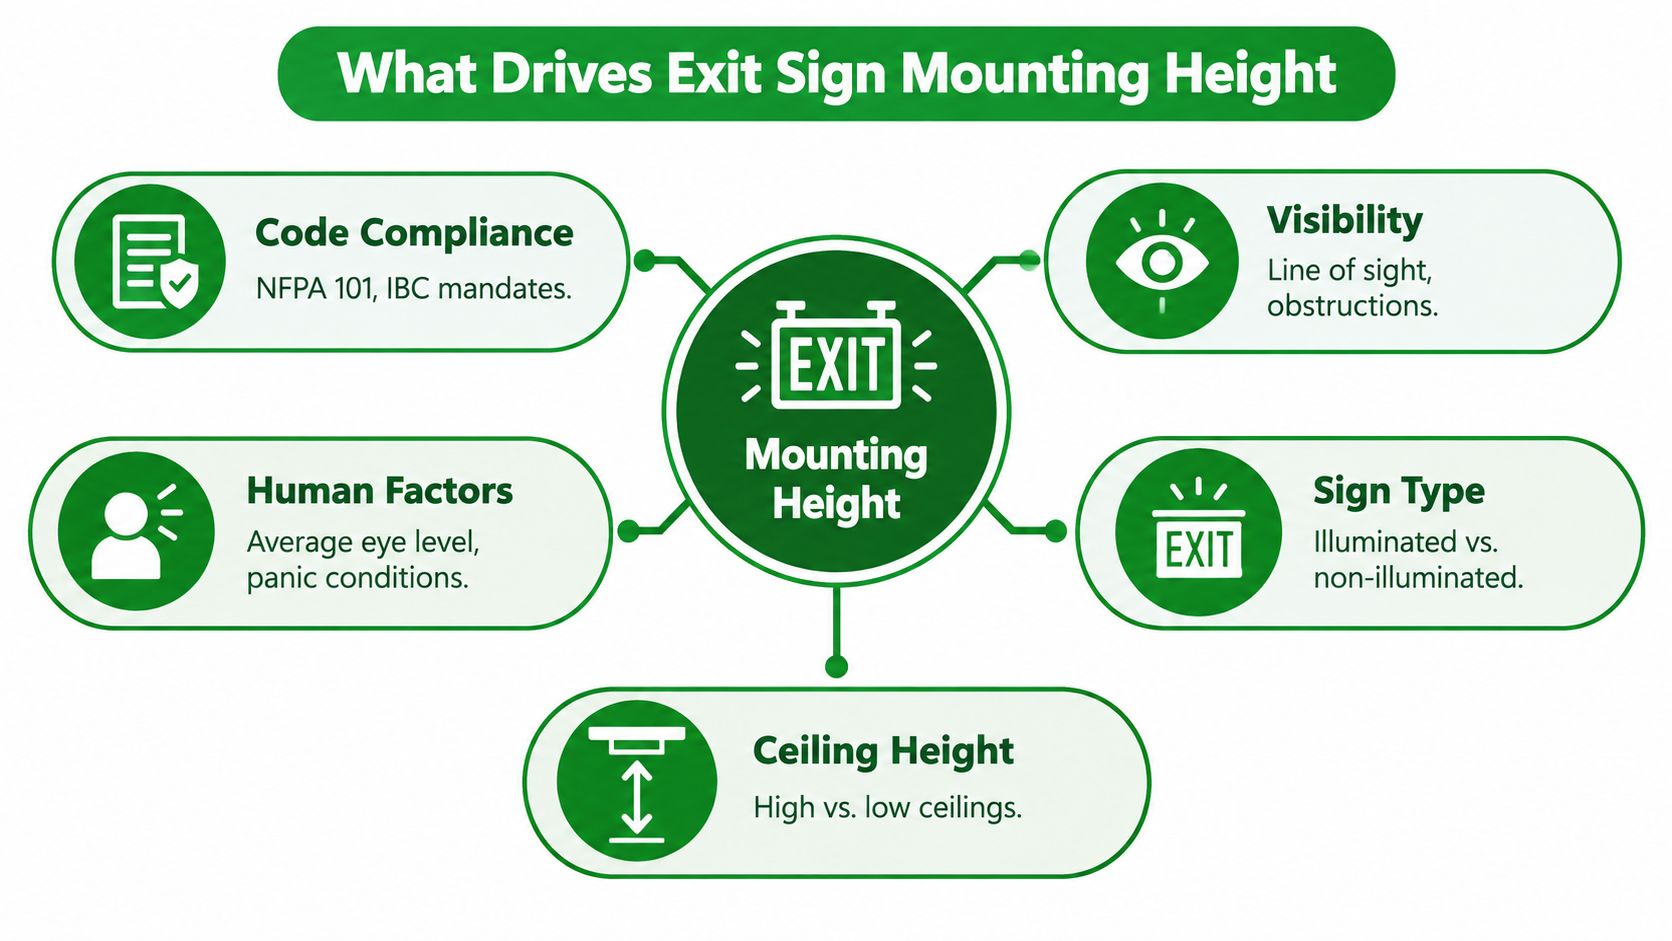
What Drives Exit Sign Mounting Height
An inspector walking a tenant corridor does not check one tape-measure number. The review usually asks whether the sign type, mounting position, visibility, and approved egress path work together. That distinction matters when one sign sits above a doorway, another hangs from a ceiling grid, and a third marks a low-level route near discharge.
Three practical layers shape the installation.
Life-safety codes set the primary overhead placement. Widely adopted guidance generally requires the bottom of a standard exit sign to be no more than 80 inches, or 6 feet 8 inches, above the top edge of the egress opening. Floor-proximity signs use a separate range, typically 6 to 18 inches above the floor. Overhead signs provide general wayfinding, while low-mounted signs help occupants follow the route when smoke collects above the floor. The NFPA 101 exit-sign placement summary describes these placement approaches and their relationship to doorway location.
Accessibility creates a viewing-zone check. A sign may satisfy a doorway or ceiling measurement yet remain hard to read for a wheelchair user or for anyone moving through a crowded corridor. Character height, contrast, viewing angle, and obstructions affect whether the legend can be recognized. An inspector may focus on a blocked sightline, while a property manager faces liability if occupants cannot identify the route during an evacuation.
Building geometry changes the installation
A detail that works above a standard corridor door can fail at a low soffit. Door height, transoms, dropped ceilings, bulkheads, ceiling grids, corridor width, and travel direction all affect the final position. A double-faced sign suspended over a wide concourse addresses a different visibility problem from a single-faced sign mounted above a stairwell door.
Practical rule: Measure the installed sign against the finished floor, the egress opening, and the actual line of sight. One reference point cannot confirm the whole installation.
Review unusual placements alongside this guide to emergency exit signs for Southern California properties. The AHJ has the final interpretation. Local amendments, approved plans, and field conditions can change the result, so confirm atypical installations before relocating equipment.
The 80-Inch Rule and Floor-Proximity Signs
The most common mistake is treating the overhead rule and the floor-proximity rule as competing answers. They address different sign categories.
A standard overhead exit sign is installed so its bottom edge meets the applicable high-mounting requirement. Widely used code guidance places that bottom edge no more than 80 inches above the top edge of the marked egress opening, while related compliance summaries also describe an 80-inch minimum above the finished floor in common applications. The measurement reference matters, which is why the approved construction documents and AHJ interpretation must control when the doorway and finished-floor readings don't align. The code-oriented explanation of exit-sign dimensions and mounting references also distinguishes mounting height from OSHA's emphasis on letter legibility.
A floor-proximity exit sign is a separate, low-level marker. Its bottom edge is generally installed 6 to 18 inches above the floor. This position keeps the legend closer to the portion of the egress path that may remain usable when smoke obscures an overhead sign. It is not a casual substitute for a missing overhead sign, and it should not be installed just because a wall has empty space.
Consider a corridor with a high ceiling and a doorway below it. If the overhead sign sits far above the doorway rather than in the normal relationship to that opening, the approved design may call for a low-level companion sign. In that situation, installing both signs at the same doorway isn't wasteful duplication. The high sign supports normal visibility, while the low sign provides a second visual cue in smoke conditions.
| Sign Type | Bottom-of-Sign Height | Top-of-Sign Height | Typical Location | Triggered When |
|---|---|---|---|---|
| Overhead exit sign | Governed by the applicable overhead placement rule, commonly tied to the 80-inch benchmark | Must remain within the product listing and available construction space | Above a door, on a wall, or suspended from a ceiling | Used for ordinary corridor and doorway visibility |
| Floor-proximity exit sign | 6 to 18 inches above the floor | Determined by the listed sign body | Low on a wall near the egress route | Used where the approved egress design requires low-level visibility, including smoke-layer conditions |
The product listing still matters. A sign's mounting method, face configuration, illumination, and installation orientation must match the manufacturer's instructions and the approved design. Don't move a listed sign higher, rotate it, or change its mounting arrangement without checking whether the revised installation remains acceptable to the AHJ.
Measuring From the Right Reference Point
A self-audit is useful only if the tape measure starts and ends at the same points an inspector uses. The safest approach is to measure the finished installation, not the intended position shown on a ceiling plan.
For the overhead sign, place the tape on the finished floor and extend it vertically to the bottom edge of the sign body. Don't measure to the center of the legend, the bottom of a hanging bracket, or the lower edge of a removable lens if the sign body extends farther down. A raised access tile, threshold, floor box, or unfinished subfloor isn't the finished-floor reference.
For the doorway relationship, measure from the top edge of the door frame, or from the underside of a transom where one exists, to the sign position above. That tells you whether the overhead sign is being used in the expected relationship to the opening. A ceiling-mounted sign can look close from the corridor and still be too remote from the doorway it identifies.
Three tape-measure traps
- Center measurement: Measuring to the center of the sign hides a bottom edge that may be too low or too high.
- Unfinished surface: Measuring before flooring, tile, or raised access construction is complete changes the final result.
- Soffit obstruction: A bulkhead can force the sign into a different listed mounting envelope or create a visibility problem even when the ceiling itself is high.
For a floor-proximity sign, measure from the finished floor to the bottom of the sign. The lower boundary keeps the unit above routine cleaning equipment, carts, and minor impacts, but the sign still needs protection where traffic or equipment makes wall damage likely.
A useful field record includes a photograph showing the tape, the sign edge, and the surface from which the measurement starts. Pair it with the location and date. When a reading is questioned later, a dated photograph gives the inspector and the property team a shared reference instead of relying on memory. The commercial exit-sign installation guidance can help organize that review, but unusual conditions still belong with the AHJ and the sign manufacturer.
How Occupancy and Layout Change the Rules
The same sign height doesn't perform the same way in every space. A narrow enclosed corridor gives occupants a direct sight line, while a shopping concourse may contain columns, tenant storefronts, suspended decorations, and several competing directions of travel.
Enclosed paths and stairwells
Stairwells and enclosed corridors commonly use overhead signs because occupants approach the opening head-on. The sign stays above normal pedestrian traffic and remains visible along the route. A wall-mounted sign above a stair door may be appropriate, while a pendant or flag-mounted sign may be needed where the corridor turns or where people approach from multiple directions.
Doorways and discharge points deserve a closer review. A person standing at the threshold may not see a sign mounted far above or offset from the opening, especially if a door leaf, soffit, or architectural feature interrupts the view. The approved design may therefore pair the overhead marker with a low-level sign near the route.
Open and assembly spaces
Malls, concourses, lobbies, warehouses, and assembly spaces create longer sight lines and wider viewing angles. Installers may need double-faced, pendant, or flag-mounted signs so people approaching from different directions can read the legend. Directional arrows may also be needed when the exit path isn't obvious.
| Occupancy / Location | Typical Mounting Range | Notes |
|---|---|---|
| Enclosed corridor | Above the opening within the applicable overhead placement framework | Check the full line of sight and corridor direction |
| Stairwell door | High-mounted sign near the door | Confirm visibility at landings and through the door approach |
| Doorway or discharge route | Overhead sign, with low-level signage where required by the approved egress design | Review door swing, threshold, and nearby obstructions |
| Mall or concourse | Suspended, pendant, or flag-mounted arrangement | Select face configuration for approaching directions |
| Assembly space | High-mounted or suspended signs with directional information as needed | Coordinate with occupant flow and architectural features |
| Residential sleeping area | Follow the approved occupancy design and local interpretation | Don't copy a commercial corridor detail without review |
Residential occupancies add another layer. Group R-1 and R-2 properties may have approved arrangements that differ from office or retail corridors, particularly at dwelling-unit doors and shared paths. Walk the building room by room, identify the occupancy classification, and match the sign type to the actual route. Repeating one mounting height across every floor is faster, but it often ignores the conditions the inspector will evaluate.
ADA and Accessibility Viewing Considerations
ADA requirements don't provide one universal exit-sign mounting height. They affect whether occupants can read and understand the sign, including people who use wheelchairs or have a lower viewing angle.
That creates an important distinction. Life-safety codes generally drive the overhead placement, while accessibility provisions address character visibility, contrast, finish, and the relationship between the sign and the viewer. A sign can be high enough to avoid heads and smoke while still being poorly positioned behind a beam, too dim, or difficult to read from the approach.
Two viewing questions
First, ask whether the sign is visible from the route of travel. A clear legend above a doorway is of little value if a tenant improvement blocks the approach or if a suspended fixture sits directly in front of it.
Second, ask whether the sign's characters meet the applicable accessibility requirements. Letter height, stroke, contrast, and finish affect recognition. Correct exit signage mounting height won't cure lettering that is too small or a face that blends into the wall.
| Consideration | Life-safety focus | Accessibility focus |
|---|---|---|
| Location | Keep the sign visible along the egress route | Keep the legend readable from the approach |
| Mounting | Apply the overhead or floor-proximity framework | Avoid a position that places the usable information outside the practical viewing area |
| Sign face | Use the correct single-face or double-face configuration | Provide clear contrast and legible characters |
| Obstructions | Prevent smoke, doors, beams, and fixtures from hiding the sign | Check the view from different eye levels and approach angles |
| Supplemental signage | Add low-level identification where the approved design requires it | Give occupants another way to confirm the route when the high sign can't be read |
When the only workable overhead location is high, a supplemental low-level marker may give occupants a closer confirmation point. That doesn't mean the low sign replaces the main sign. It means the egress system uses different visual layers for different conditions.
Accessibility review also needs to include tactile or secondary signs where the project documents require them. Those signs serve a different communication purpose from the illuminated overhead legend. Keep their placement coordinated so one sign doesn't block another or create a new obstruction at the door.
The practical test is simple: stand on the approach path, move to the side a person may use, and check the sign at ordinary and reduced viewing heights. If the legend disappears behind a door swing, column, decoration, or ceiling feature, the installation needs review even if the tape measure reading looks acceptable.
Testing, Inspection, and Documentation Habits
A sign can meet its mounting measurement and still fail during a power interruption. Property teams need a recurring test schedule and a record that lets an AHJ identify every fixture without searching the building.
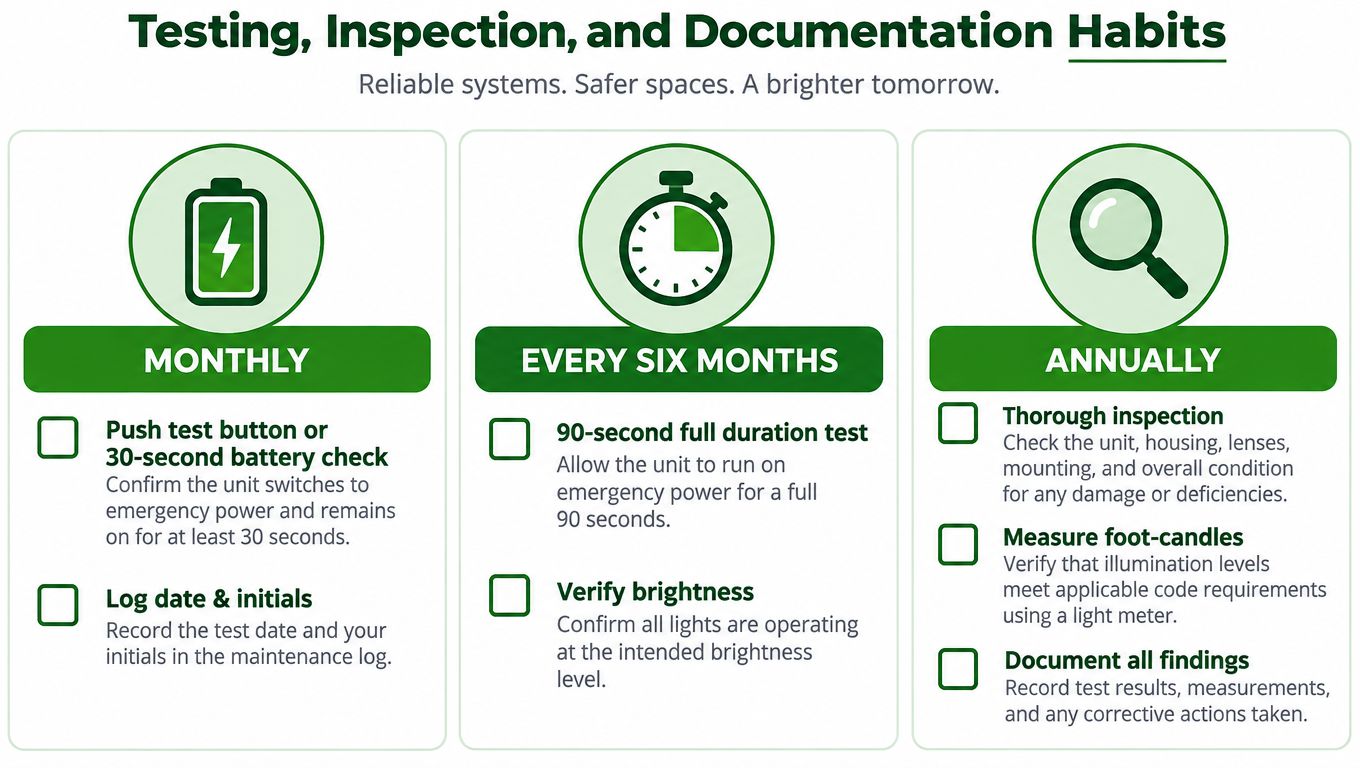
Run the monthly operational check by pressing the test button or switching the unit to battery power for at least 30 seconds. Confirm that the legend remains illuminated, then record the date, initials, location, and pass or fail result. Use the required 30-second check as a consistent field routine, and keep the applicable code and property procedure with the maintenance records.
Use separate records for separate tests
A full discharge test answers a different question. It shows whether the battery-backed unit can sustain emergency operation for the required period, rather than merely lighting when the button is pressed. Record the start time, end time, fixture identification, visible condition, and any dimming, flickering, or early shutdown.
Testing requirements must match the adopted code, local amendments, product listing, and property procedures. Some maintenance guidance specifies a 90-minute full-duration test with annual documentation, while a particular program may set another interval. Confirm the governing 30-second monthly and 90-minute annual cadence with the AHJ, then lock that cadence into the log template so every entry captures start time, end time, and battery condition consistently. For testing, replacement, or repair work, refer to the emergency exit light and battery-backup service information.
Build a record an inspector can use
Keep a binder or digital log with a floor plan keyed to fixture IDs. Each record should include:
- Test date: Enter the date the check occurred, not the later data-entry date.
- Person responsible: Name the technician or employee who performed the test.
- Unit location: Use a room, corridor, stair, or grid reference matching the floor plan.
- Result: Mark pass, fail, or the specific defect observed.
- Corrective action: Record the repair, battery replacement, sign replacement, or follow-up date.
- Supporting evidence: Retain photographs, work orders, and replacement receipts.
Inspectors can verify a keyed log faster than a verbal assurance. The floor plan connects each entry to a physical fixture and exposes missing or untested units.
Replace batteries according to the documented schedule and manufacturer instructions. Do not wait for a failure during an emergency. Keep purchase records with the test log, and update the fixture list after tenant improvements add, relocate, or remove signs. If a different model replaces an existing sign, verify its listing, face configuration, mounting method, and illumination before closing the work order.
Common Compliance Pitfalls Before an Inspection
The most expensive inspection problems often start as small changes. A tenant improvement lowers a ceiling, a dropped soffit hides an existing sign, or a new storefront changes the corridor sight line. The sign still works electrically, so nobody flags it until an inspector walks the route from the opposite direction.
One recurring issue is a dropped ceiling installed after the original sign mount. The sign may now sit too close to the finished floor, be partly hidden by the grid, or lose the clear relationship to the doorway. Another is a retrofit mounted on the wrong side of a door. The legend faces a wall or points people toward a non-egress path, even though the installer used a functioning listed unit.
LED retrofit work creates its own inspection trap. Changing the light source or face assembly doesn't automatically confirm that the housing still meets the required bottom-edge measurement, mounting orientation, or listing. Review the completed installation, not just the product carton.
Walk the route before the inspector does
Use a consistent sequence:
- Start at the exit discharge: Confirm the sign is visible from the approach and that the arrow or face direction matches the actual route.
- Check the overhead layer: Measure from the finished floor to the bottom of the sign, then compare the sign's relationship to the doorway and ceiling.
- Review the low-level layer: Where the approved design calls for floor-proximity signage, check the low sign's height, illumination, protection, and visibility.
- Follow every turn: Look for tenant displays, storage, doors, columns, decorations, and new partitions that interrupt the line of sight.
- Match the plan to the building: Confirm fixture IDs, floor plans, and egress routes still describe the as-built condition.
- Open the maintenance file: Verify that monthly records, full-duration test records, repair tickets, and battery receipts are available.
Documentation gaps can turn a correct installation into a difficult inspection. Missing monthly logs, absent full-duration records, and floor plans that no longer match the installed signs make it harder for the AHJ to confirm control of the system. A property manager should correct those gaps before the inspection rather than trying to reconstruct the history while standing in the lobby.
The final review should involve the electrician, property representative, and, where the condition is unusual, the AHJ. That team can resolve whether a high ceiling needs a suspended sign, whether a low-level companion sign is required, and whether an accessibility concern calls for supplemental identification. The objective isn't to force every fixture to the same height. It's to make every sign work as part of the building's actual egress system.
Access Electrical and Lighting installs, tests, maintains, and repairs commercial exit signs, emergency lighting, and battery-backup systems for offices, retail properties, multifamily buildings, and other facilities. If your property needs a mounting-height review, documented testing, or corrections before an AHJ inspection, visit Access Electrical and Lighting to request service.