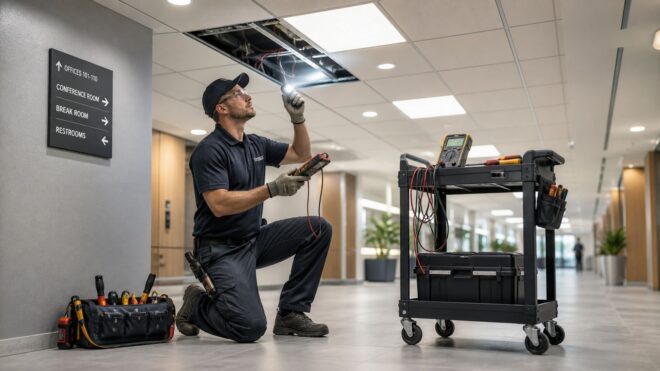
A tenant reports that the corridor lights are pulsing again. The maintenance team has already replaced several lamps, reset a breaker, and confirmed that the fixtures still turn on. By the next afternoon, the complaints return, and the property manager is left wondering whether the problem is a bad lamp, an aging LED driver, a loose connection, or a supply problem affecting the building.
That uncertainty is normal. Learning how to fix flickering lights in a commercial property requires more than changing lamps. The reliable approach is to isolate the affected area, inspect the fixture and control gear, measure voltage under operating conditions, and escalate safely when evidence points toward the panel or utility supply.
Why Flickering Lights Demand a Systematic Approach
Most small lighting complaints start with a reasonable assumption: the lamp is failing. That assumption works often enough in a single-fixture problem, but it becomes expensive in a multifamily corridor, retail center, office floor, or parking structure where several fixtures share circuits and controls.
A repeated complaint from the same hallway can mean several different things. One fixture may have a failing driver. A group of fixtures may share an incompatible dimmer or control module. Lights across several rooms may be responding to a voltage fluctuation, a loose neutral, a heavily loaded circuit, or a large motor starting nearby.
The difference between nuisance flicker and instability
Flicker is commonly associated with short-term supply changes. In office settings, changes as small as a few tenths of 1% can become noticeable, particularly when the fluctuation repeats in the 5–15 Hz range, according to guidance on lighting flicker and occupational lighting conditions. That doesn't mean every visible blink is a dangerous fault, but it does mean the eye can detect electrical variation before a breaker trips or a fixture goes dark.
A deeper voltage event is different. The IEEE 1159 framework treats a voltage sag as a reduction to 10–90% of nominal voltage lasting from 0.5 cycles to 1 minute, as described in the same Canadian Centre for Occupational Health and Safety reference. A technician needs to distinguish momentary visual modulation from a sustained or severe disturbance.
Why LED systems complicate the diagnosis
Older incandescent systems often pointed technicians toward the lamp, socket, or switch. LED systems add electronic drivers, control interfaces, thermal limits, and compatibility requirements. A fixture can look intact while its driver is overheating, degrading, mismatched to the load, or reacting poorly to a dimmer.
Practical rule: Treat the lamp as one component in a lighting system, not as the entire system.
A disciplined sequence starts with the least disruptive checks, then moves toward energized testing and panel investigation. That approach reduces unnecessary replacements and helps identify faults before they become arcing connections, equipment damage, or repeated after-hours calls. For facilities that need documented troubleshooting rather than another temporary reset, commercial electrical troubleshooting services can include circuit investigation, testing, and repair.
Isolating the Scope of the Flicker Problem
The first useful question isn't “which bulb should we replace?” It's how much of the property is flickering? Scope determines the likely fault category and prevents a technician from starting at the wrong end of the system.
Record the locations and timing before switching anything off. Ask whether the flicker appears in one fixture, several fixtures on one circuit, multiple circuits, or the entire property. Note whether it occurs when HVAC equipment, elevators, pumps, refrigeration, or other large equipment starts.
Start with the fixture
If only one lamp flickers, install a known-good lamp or a manufacturer-approved replacement. This is a quick elimination step, not a complete diagnosis. If the replacement behaves normally, the original lamp or integrated fixture may be at fault. If both flicker, inspect the lamp holder contact spring, socket condition, fixture wiring, and control device.
Look for corrosion, looseness, heat discoloration, arcing marks, or a contact that no longer grips the lamp firmly. In integrated LED fixtures, move the investigation toward the driver and its connections rather than repeatedly replacing the visible light source.
Map the circuit
When several fixtures in one area flicker together, identify the circuit that supplies them. Review panel schedules, verify the circuit with a qualified test procedure, and compare the affected fixtures with nearby lights supplied from another branch.
Accessible terminations deserve attention, including junction boxes, switches, fixture whips, and panel connections. A loose connection may pass a basic continuity test while still developing a high-resistance fault that opens or arcs when current flows. Continuity alone doesn't prove that a connection is healthy under load.
A useful isolation sequence is:
- Observe the pattern: Record which fixtures flicker, when they flicker, and what equipment is operating.
- Test the simplest component: Substitute a known-good lamp or fixture where appropriate.
- Inspect visible connection points: Check for heat damage, corrosion, loose hardware, and signs of arcing, with power isolated as required.
- Identify the supplying circuit: Use the panel schedule and safe circuit verification procedures.
- Compare live behavior: A qualified electrician should observe voltage and connections while the load operates, rather than relying only on a de-energized continuity check.
If multiple circuits show the same behavior, stop treating the issue as a fixture repair. A documented electrical inspection report can organize circuit observations, test results, and recommended corrective work for the property record.
Common Commercial Causes Beyond the Bulb
Commercial flicker usually becomes easier to understand when the lighting system is divided into three areas: fixture and control gear, building wiring, and the supply network. Each area creates a different failure pattern.
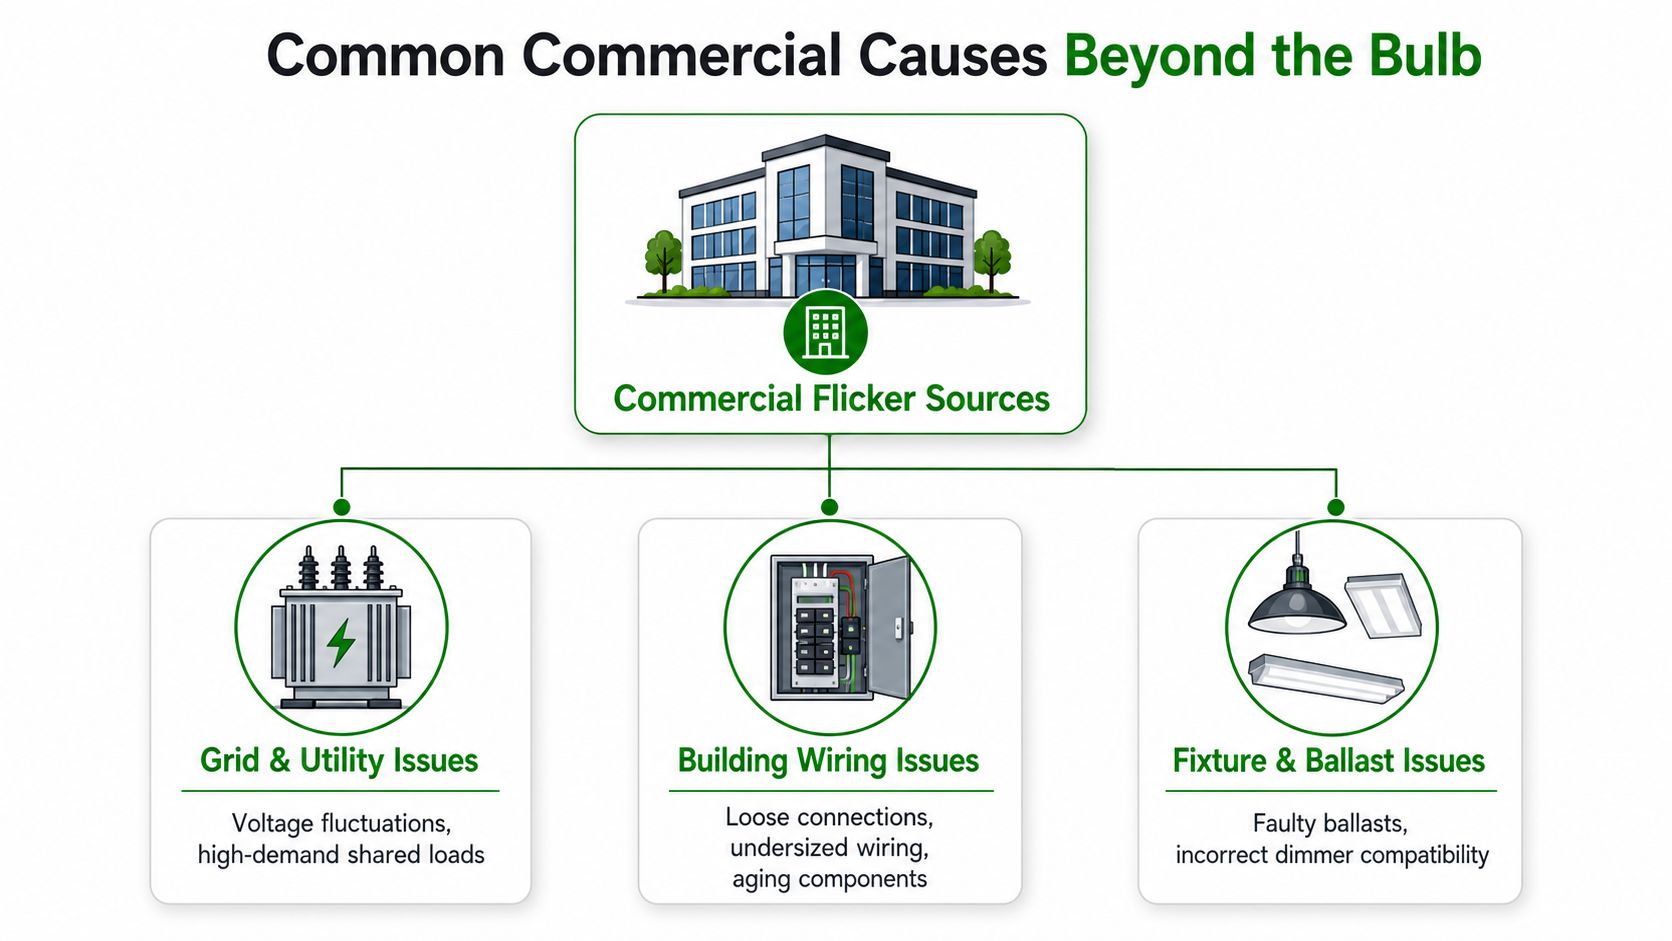
Driver faults and control mismatch
LED drivers regulate current for the light-emitting components. In the field, a driver may flicker as it degrades, overheats, operates beyond its intended capacity, or fails to match the fixture and control system. The visible lamp head can remain clean and physically undamaged while the driver cycles or produces unstable output.
Check the fixture documentation for driver model, output requirements, thermal conditions, and control compatibility. A replacement driver must match the fixture's electrical and control specifications. Installing a component that merely fits physically can create a repeat failure.
Dimmers cause another common problem. A dimmer designed for older incandescent or halogen loads may not operate correctly with an LED fixture, even if the switch appears functional. Compatibility involves the dimmer technology, minimum load behavior, driver design, control protocol, and manufacturer approval. A dimmer that works at full output may still produce shimmer or pulsing at low levels.
Wiring, ballasts, and load changes
Legacy fluorescent systems can flicker because of aging ballasts, lamp connections, or control components. LED conversions can also create trouble when old control gear remains in the circuit or when the retrofit wasn't designed for the existing wiring arrangement.
Loose or corroded terminations at junction boxes, disconnects, panel lugs, and fixture connections can create voltage drop and heat. The broader electrical principle is explained in this guide to what voltage drop means in electrical systems. Technicians should inspect the connection, conductor condition, load, and termination torque rather than treating the lamp as an isolated device.
Large motor starts can produce brief voltage dips. HVAC compressors, elevator equipment, pumps, and other sizeable loads may make lighting respond when they start, especially where circuits or distribution equipment are shared. The timing is valuable evidence. If lights pulse each time a specific motor cycles, capture that correlation and investigate the feeder, load arrangement, and supply impedance.
Panel-Level Diagnostics and Utility-Side Voltage Checks
When lights across several circuits pulse during an elevator start, HVAC cycle, or other building event, replacing fixtures wastes time. Begin at the panel with a calibrated meter, then use a power-quality data logger if the disturbance is brief or intermittent.
Record voltage while the affected lighting operates normally. Repeat the check during the flicker and note equipment starts, weather, tenant activity, and other events at the same time. A spot reading can appear normal after a short sag has ended. Time-based logging provides stronger evidence and helps establish whether the disturbance begins inside the property or arrives from the supply.
Separate internal faults from external events
Internal causes include a loose neutral, overloaded circuits, deteriorating panel components, poor terminations, and motor-related load changes. External conditions can include storms, wind, transformer faults, or wider grid disturbances. Compare readings at the building's main distribution point with measurements farther downstream. The location where the abnormal voltage first appears narrows the investigation.
For a UK-style 230 V supply, the commonly referenced accepted range is 216 V to 253 V, based on a nominal 230 V with an allowed range of +10%/−6%, as described in power-quality guidance on flickering lights. Brief readings within that band do not automatically explain visible flicker. Repeated, load-driven dips can still affect LED drivers and justify power-quality analysis.
| Scope | Likely Cause Category | Key Diagnostic Action | Escalation Trigger |
|---|---|---|---|
| One fixture | Lamp, socket, fixture, or driver | Substitute a known-good lamp and inspect the fixture | Flicker remains after component isolation, or heat and arcing appear |
| One circuit | Dimmer, shared control, wiring, or load interaction | Trace the circuit and observe voltage under load | Loose terminations, repeated equipment-related dips, or damaged conductors |
| Multiple circuits | Panel, neutral, feeder, or shared load | Log supply voltage and inspect distribution equipment | Abnormal readings, neutral concerns, or panel hotspots |
| Whole property | Utility supply or main distribution | Compare panel readings over time and correlate events | Voltage outside the applicable supply tolerance or persistent instability |
LED driver degradation can produce visible modulation even when panel voltage appears stable. If the flicker follows fixtures of the same age, manufacturer, or retrofit batch, compare driver behavior and operating temperature rather than testing only the lamps.
Infrared thermography adds useful evidence. A qualified operator can scan energized panels and terminations for abnormal heat patterns that a visual inspection may miss. A hotspot does not identify the repair by itself, but it can prioritize a connection, lug, breaker, or bus area for controlled investigation. Escalate to a licensed electrical contractor when testing identifies neutral concerns, persistent instability, panel heating, or a condition requiring energized equipment work.
Safety Procedures and Compliance Considerations
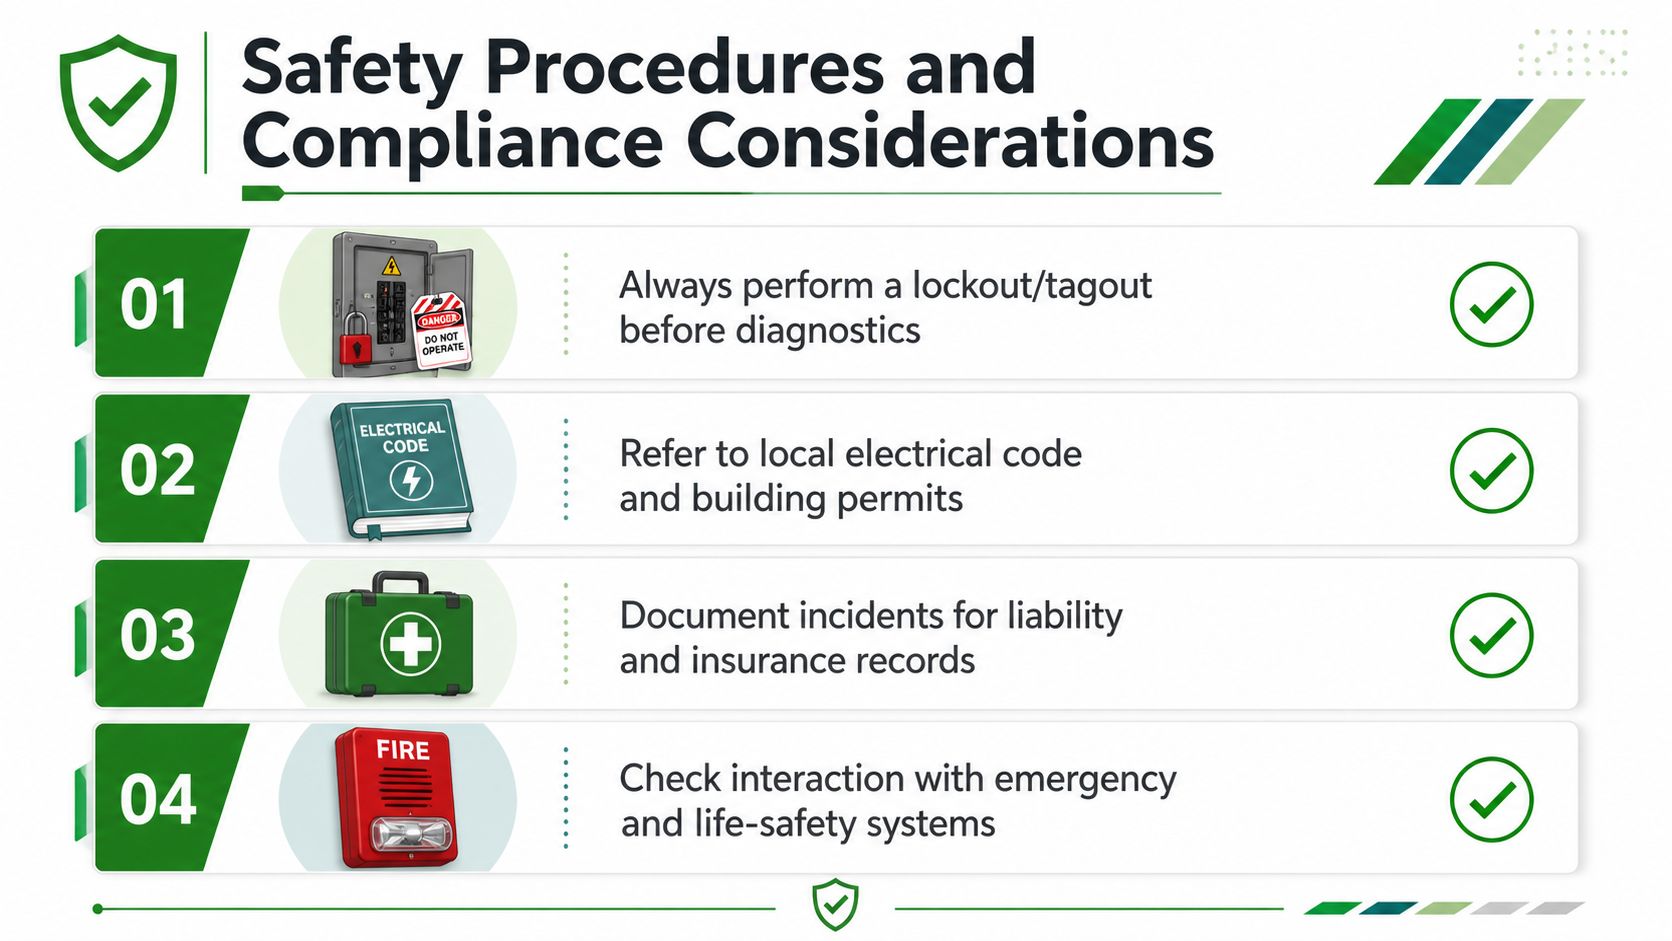
A flickering light in a tenant corridor can become a life-safety concern if the affected circuit supplies emergency fixtures, exit signs, controls, or battery charging equipment. Property teams should identify whether the flicker overlaps with emergency lighting rather than assuming normal and emergency systems are completely separate.
California properties also need to consider Title 24 lighting controls, testing, certification, and documentation where applicable. A driver or dimmer replacement can restore visible output while leaving the control sequence, sensor behavior, or required documentation unresolved. The repair should preserve the intended operation of the lighting system, not merely stop the flicker at one fixture.
Decide when inspection is justified
Recurring flicker deserves a more deliberate maintenance response when it returns after lamp or driver replacement, affects common areas, coincides with equipment cycling, or appears near panel and switchgear work. Infrared inspection is especially appropriate when the property team has evidence of heat damage, unexplained nuisance behavior, odor, buzzing, or inconsistent voltage.
The operational choice is usually between another reactive service call and a documented system review. The second option may include thermal scanning, panel inspection, circuit loading review, driver and dimmer compatibility checks, emergency-lighting testing, and a retrofit plan where repeated component failures indicate a design mismatch.
Safety boundary: Maintenance staff can document symptoms and restrict access. Energized panel testing, termination work, and switchgear investigation belong with qualified electrical personnel using the site's lockout/tagout and PPE procedures.
Before any hands-on work, follow the property's electrical safety program. Lock out and tag out equipment when the task requires de-energization, verify the absence of voltage with properly rated test equipment, use the required arc-flash and electrical PPE, and protect tenants from the work area. Don't remove panel covers or tighten energized terminations as a shortcut.
Keep a usable record
Document the date, locations, operating conditions, affected circuits, observed equipment cycles, meter readings, photographs, thermal findings, repairs, and post-repair verification. This record supports maintenance planning, helps an inspector understand the corrective action, and gives the next technician evidence instead of a vague complaint.
Current guidance increasingly emphasizes documented testing, compatibility, emergency-lighting maintenance, and system-level reliability, as reflected in BREEAM knowledge-base guidance on lighting and flicker considerations. The exact compliance obligation depends on the building, jurisdiction, system, and adopted code, so the responsible electrical professional should confirm the applicable requirements.
When to Escalate to a Licensed Electrical Contractor
Escalate promptly when the flicker affects multiple circuits, continues after a known-good lamp or approved driver is installed, or appears alongside buzzing, burning odor, heat discoloration, visible arcing, or damaged insulation. Persistent readings outside the applicable supply tolerance, suspected neutral problems, main switchgear symptoms, and flicker tied to HVAC, elevator, or pump cycling also require professional investigation.
Emergency lighting and exit-sign circuits deserve a separate threshold. If those systems flicker, fail to charge, fail during testing, or behave differently from normal lighting, take the issue out of routine lamp replacement and arrange qualified testing.
Give the contractor a useful starting package:
- A location map: List affected rooms, floors, fixtures, panels, and circuits.
- A timing log: Record when flicker occurs and which equipment starts at the same time.
- Test evidence: Include voltage readings, meter settings, data-logger records, photographs, and thermal images.
- System information: Provide fixture, driver, dimmer, ballast, emergency-lighting, and control-system details.
- Access constraints: Note tenant schedules, shutdown limitations, high-mounted fixtures, and life-safety coordination requirements.
A contractor that can handle line-voltage work, low-voltage controls, infrared diagnostics, emergency lighting, and Title 24 testing under one coordinated scope can reduce handoffs for property teams. Access Electrical and Lighting provides commercial troubleshooting, lighting repairs, infrared inspections with documented reports, emergency-lighting services, control work, and Title 24 testing and documentation for Southern California properties.
If recurring flicker is generating tenant complaints or pointing toward a panel, driver, control, or utility problem, Access Electrical and Lighting can help your property team test the system, document the findings, and plan the appropriate repair. Contact the contractor to arrange commercial lighting troubleshooting, infrared inspection, emergency-lighting testing, or a coordinated electrical and controls review.