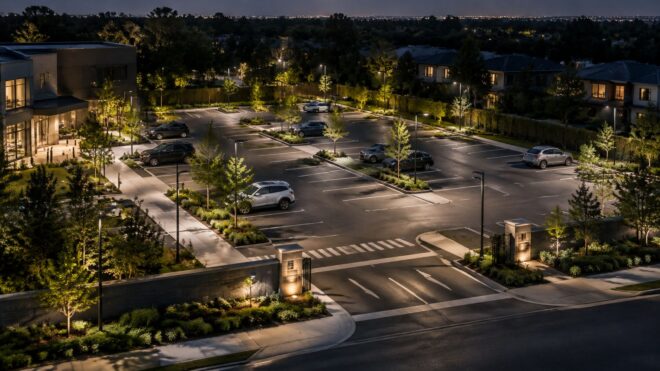
“Replace the old fixtures with brighter LEDs” is popular advice, but it isn't a parking lot lighting design. A brighter fixture can intensify glare, throw light into apartments, and leave the walking route between parked cars poorly lit.
Design the lot around maintained illuminance, uniformity, and adaptive dimming as one safety decision. Then price the system by the output it must maintain and the time it spends in each operating state, not by the wattage printed on a fixture quote.
Illuminance Targets Before You Pick a Pole
Set the maintained-light criteria before choosing poles or fixtures. The design basis should distinguish each zone, state average and minimum illuminance, and define the uniformity test. Those measures work together: a compliant average can still leave dark patches, while excessive output can increase glare and skyglow.
Maintained illuminance targets by parking zone
| Zone | Average | Minimum | Uniformity | What controls it |
|---|---|---|---|---|
| General parking stalls and aisles | 11 lux (1 fc) | 2.5 lux (0.25 fc) | 4:1 avg:min or better | Historical IES parking practice; confirm current IES |
| Entrances and exits | Double the general-area average | Double the general-area minimum | Preserve the historical average-to-minimum criterion | Historical IES transition-area recommendation |
| Owner practical general range | Set a written target using the historical IES reference of 11 lux average | Use 2.5 lux as the historical reference minimum | Meet the applicable average-to-minimum and maximum-to-minimum criteria | Exterior-lighting guidance and owner requirements |
| Pedestrian routes and crossings | Use the historical IES parking reference of 11 lux as a starting value | Use the historical IES reference minimum of 2.5 lux as a starting value | Specify a route-specific criterion | Current applicable guidance and project requirements |
| Parking garage interior | Use the historical IES parking reference of 11 lux as a starting value | Use the historical IES reference minimum of 2.5 lux as a starting value | Specify a separate garage criterion | Garage guidance and project requirements |
The IES parking-facility recommended-practice preview.pdf) describes an 11-lux maintained average, a 2.5-lux minimum, and average-to-minimum uniformity of 4:1 or better, along with the historical recommendation to double the general-area levels at entrances. These are reference values, not proof of compliance with current requirements. The pedestrian and garage entries use them only as starting points, not as dedicated criteria for those spaces.
Turn references into a basis of design
Entrances need separate treatment because drivers adapt between street lighting and the property. Pedestrian routes need their own assessment: seeing pavement from a vehicle does not establish that a person can be recognized or a crossing followed. Garages also need a separate schedule, rather than a copied surface-lot specification.
Have the designer reconcile current IES recommendations, adopted code, and the owner's written requirements before issuing the design. Where project criteria address the same measure, use the stricter applicable requirement, while following mandatory local requirements.
Practical rule: Meeting the average does not excuse a failed minimum or uniformity criterion.
A foot-candle to lux conversion calculator can be used for a unit-conversion check. Keep calculations consistent in the chosen unit system; rounded reference values are not substitutes for the design criteria.
Record the existing lot's average, minimum, maximum, average-to-minimum, and maximum-to-minimum illuminance before selecting replacement equipment. Compare maintained output and uniformity, then account for dimming states and measured operating time when evaluating the result. Reusing pole locations or installing higher-output fixtures alone will not correct poor light distribution.
How to Place Poles and Check the Grid
Work from a scaled site plan, an exact fixture photometric file, and the operating-zone schedule. Don't let an existing pole pattern become the design just because reusing it looks inexpensive.
The U.S. Army exterior-lighting guideline provides a practical general-parking benchmark of approximately 1–2 foot-candles, with 15:1 maximum-to-minimum uniformity or better, and describes common pole heights of about 20–50 feet or more. Those are starting references, not a universal pole-spacing formula.
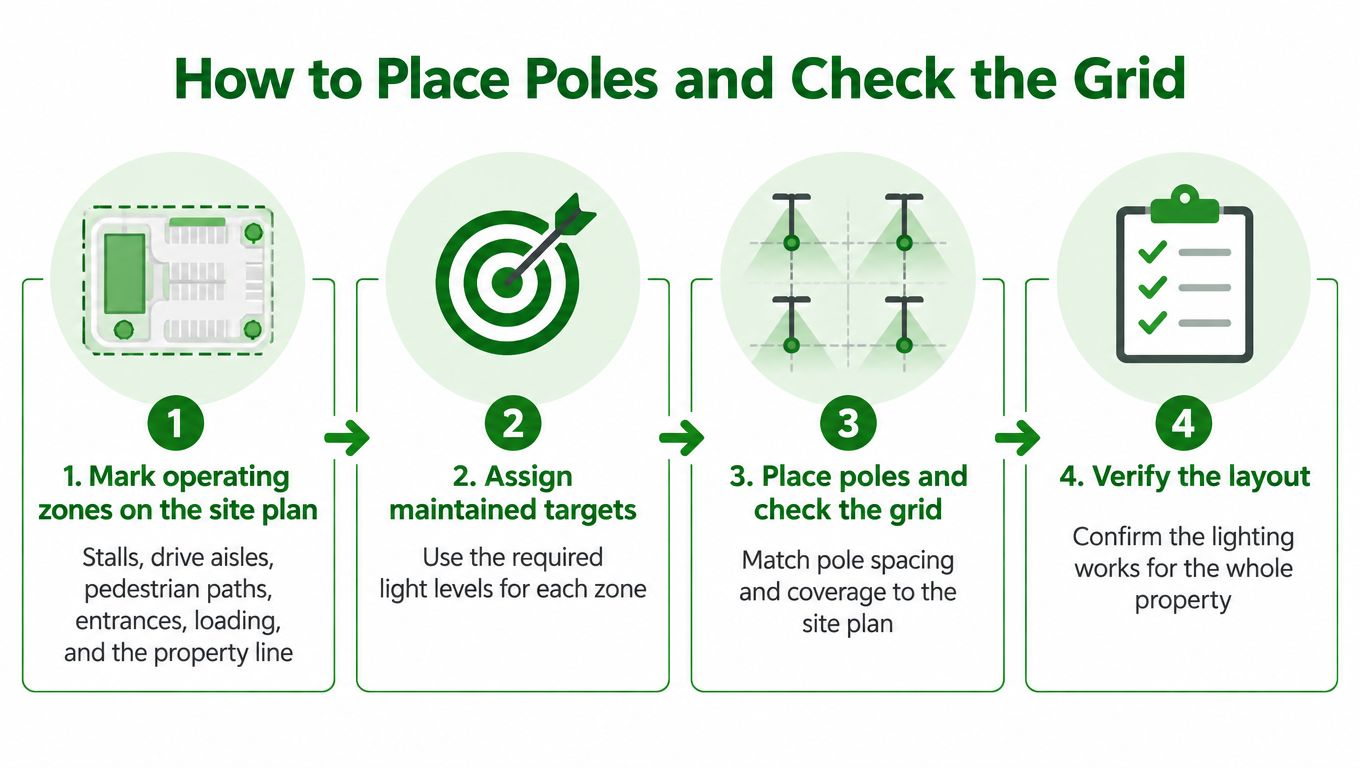
Build the layout in a controlled sequence
Mark operating zones. Draw stalls, drive aisles, pedestrian paths, entrances, loading areas, and the property line. Include places people walk, not just the painted route.
Assign maintained targets. Attach a criterion to each zone before selecting equipment. Give the entrance its transition-area treatment rather than averaging it into the parking field.
Choose height and spacing together. Test alternative mounting heights against coverage, local height restrictions, nearby windows, and servicing access. Taller poles can change coverage, but they also change structural requirements and viewing angles.
Select the optic before modeling. Use a downward distribution appropriate to the pole's position. An interior pole and a perimeter pole shouldn't automatically receive identical optics.
Build a calculation grid across the usable area. Include stalls, aisles, walks, entrances, and perimeter edges. A calculation that samples mainly beneath fixtures hides the areas most likely to fail.
Read every result, not just the average. Review average, minimum, maximum, and both uniformity ratios for each zone. Reject a layout that produces a bright center while leaving an occupied edge under-lit.
Inspect what the grid doesn't fully explain. Check driver glare, spill, pole shadows, signs, trees, and light entering neighboring property. Add a shield or visor where needed, then recalculate because shielding also changes coverage.
Rerun with maintained output. Document the light-loss assumptions for dirt and lumen depreciation. Initial output is useful for checking opening-day conditions, but it isn't the performance basis for an aging installation.
Test contrasting properties
Consider a retail pad with frequent vehicle turns and customers crossing the entry aisle. An owner may choose the upper end of the general-parking benchmark for the parking field, while the entrance receives its separately established transition criterion. Concentrate usable light on the conflict points instead of lifting output across every stall.
A multifamily lot with homes across the drive needs a different distribution strategy. Keep perimeter optics directed inward, test the window-facing view, and use additional coverage where necessary rather than increasing every fixture's output. The minimum must still pass, but residential adjacency changes how you achieve it.
Ask for a fileable photometric package containing the scaled plan, exact fixture configurations, mounting heights, aiming, calculation grids, maintained-light assumptions, and zone-by-zone results. Include the criteria used and identify any exception requiring owner or jurisdictional review.
Optics CCT and Shields That Limit Glare
Brighter, whiter LEDs aren't automatically better for the night environment. An outdoor-lighting review published by the City of Tucson reports that, lumen for lumen, 3000K LED light can produce approximately 50% more skyglow than baseline high-pressure sodium lighting. Color temperature alone therefore isn't a dark-sky strategy.
Choose the scenario that fits the property's visual tasks and neighbors. The following are specification recommendations, not universal compliance settings.
Three parking-lot lighting strategies
| Strategy | Best fit | CCT and optic | Shielding |
|---|---|---|---|
| Maximum illuminance | Busy retail entries and owner criteria at the top of the approved range | Cooler white only if justified by the task; full-cutoff distribution aimed down | Visors where drivers face the fixture |
| Balanced visibility | Multifamily, office, and hospitality stalls | Warm-to-moderate white cutoff lighting; uniformity over peak brightness | House-side shields near windows |
| Dark-sky adaptive | Lots beside homes or with trespass complaints | Warmer CCT, strict downward distribution, and task-appropriate output | Perimeter shields paired with a suitable vacant state |
“Maximum illuminance” shouldn't mean maximum available output. It means designing to the higher approved criterion where activity warrants it, while still controlling glare and spill. A retail entrance doesn't justify washing a neighboring bedroom wall with light.
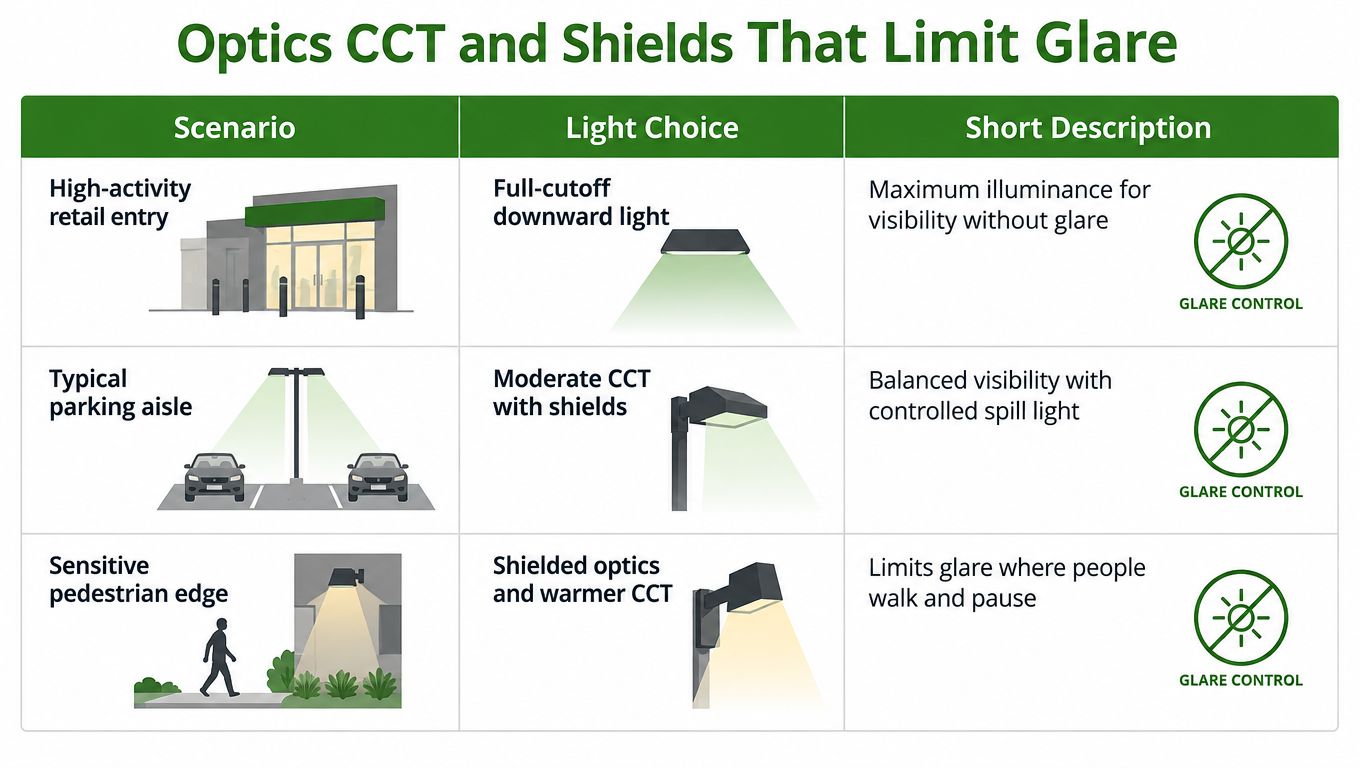
Judge the light from the driver's position
Read backlight, uplight, and glare, often grouped as BUG, as separate design questions. Backlight matters at a residential boundary. Uplight matters for skyglow, while glare matters when a driver or pedestrian looks toward the luminous surface.
Keep fixtures aimed down. Uptilting a fixture to reach a distant stall can expose the light source to drivers, windows, and cameras. A house-side shield is useful at the boundary, but it isn't a substitute for choosing the right distribution in the first place.
Specify where light must not go as carefully as where it must go.
Account for the actual pavement scene
Wet asphalt can reflect a bright source into a driver's sightline. Parked trucks can interrupt a beam that looked unobstructed on the plan, and tree canopies can cast shadows across a walking route. Dirty lenses change both delivered light and the maintenance burden.
Security cameras need a field check too. Review recorded images with headlights present and people moving between bright and dim areas; don't assume a hot spot beneath a pole improves recognition.
Lock distribution, CCT, shielding, aiming, and maintained output into the specification. Require substitutions to demonstrate equivalent site performance, not merely similar watts or nominal lumens.
Dimming Schedules That Stay Safe at Night
Controls are an operating plan, not a savings sticker. Start with recorded fixture input power, actual operating hours, the electricity tariff, maintenance history, and when each part of the lot is occupied.
The DOE/PNNL field evaluation of bi-level outdoor lighting documented 234 W LED high-state operation and 74 W low-state operation, compared with original 495 W high-pressure sodium and 470 W metal-halide fixtures, with 73% annual energy savings for the evaluated system. Those results belong to that installation, not to every retrofit using a dimming driver.
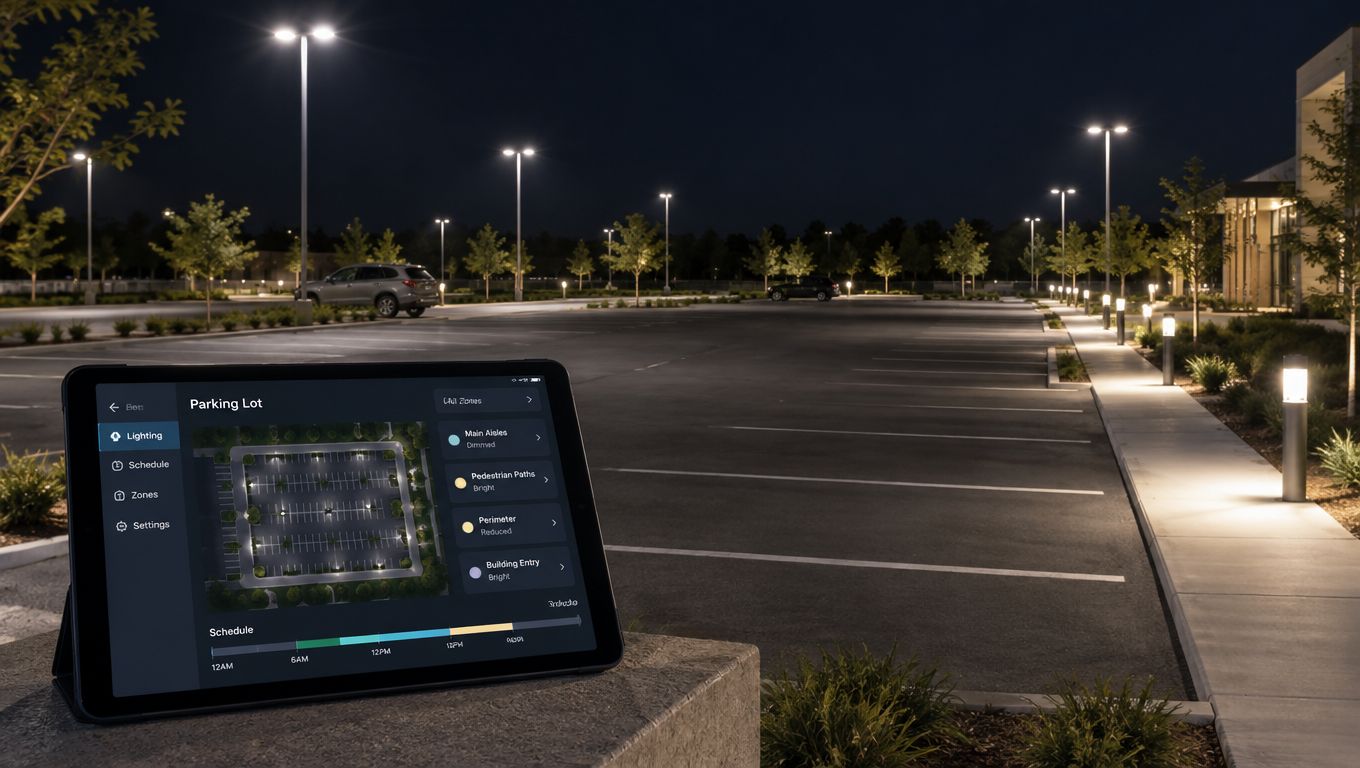
Give each zone a defined operating sequence
Set the high state to satisfy occupied-period criteria, then establish a vacant state that preserves the approved low-activity conditions. Select the sensor timeout from how people use the space, not from the most aggressive energy-saving option in the software.
Separate pedestrian paths, entrances, loading areas, parking rows, and security-sensitive corners. A person approaching from the sidewalk should trigger useful transition lighting before entering a reduced-output bay. Don't put the whole property on a sensor that only detects cars near the driveway.
Define the operating sequence in writing:
- Daylight response. State how the photocell or astronomical schedule enables and disables normal operation.
- Occupancy response. Identify which fixtures rise together and which neighboring zones provide transition coverage.
- Timeout. Explain when the zone returns to its vacant state and how continued activity extends that period.
- Failure response. Specify and test an appropriate high-state fallback for sensor or communication faults, subject to the approved design.
- Manual override. Provide an accessible event or maintenance mode, with a defined return to normal operation.
A review of automated lighting controls is useful when translating these requirements into a control narrative. The important deliverable is the sequence, not merely a list of sensors.
Commission after dark
Measure representative high- and low-state illuminance with a calibrated light meter at the documented grid locations. Check minimums and uniformity in each state, then walk and drive the sensor boundaries.
Test slow pedestrian movement, a vehicle entering from each access point, and activity behind parked vehicles. Confirm that delays don't leave someone standing in a reduced-output area after the sensor loses detection.
Commissioning test: A dimming percentage is a control setting, not evidence that the pavement still meets the design criteria.
Give maintenance staff the setpoints, zone map, timeout settings, override procedure, and fault behavior. Keep measured mode runtimes so the energy calculation reflects what the system does.
Title 24 Checks on California Parking Lots
For a California commercial or multifamily property, make compliance review a defined design task before procurement. A national lighting recommendation isn't a substitute for the energy-code review associated with the project's permit.
Have the responsible designer establish the applicable code edition, project scope, and local requirements. Use a Title 24 lighting requirements checklist to organize the discussion, but obtain the project-specific determinations from the professionals responsible for compliance.
Assemble the permit inputs in review order
Start with the site classification and measured hardscape plan. Ask the designer to identify the applicable outdoor lighting zone, the area used in the calculation, and the power allowances that apply to the proposed work. Don't approve a wattage total copied from an unrelated property.
Next, reconcile the fixture schedule with the power calculation. Adjustable-output fixtures need a documented design setting so the installed configuration matches the submitted schedule.
Then review controls as a sequence rather than a collection of components. The compliance package should identify the applicable daylight, scheduling, occupancy-response, and reduction requirements, including any exceptions the designer is relying on. Avoid assuming that a photocell alone resolves the project's control obligations.
Resolve Southern California operating conflicts
A mixed-use lot beside apartments may need quieter perimeter operation while the main entry remains active. A retail center with late tenants needs a schedule that follows those tenants' access needs without keeping every parking row at its occupied setting.
At a resort, guests may continue arriving through the drive after most stalls are empty. Separate control zones let the designer address those activities without treating the entire property as continuously occupied.
Keep required emergency and egress functions distinct in the control narrative. Normal parking-lighting commands must not defeat required life-safety operation; have the responsible designer verify shared equipment and overrides.
Before permit submission, confirm the package contains:
- Lighting zone and area. The classification and hardscape measurements used for the calculation.
- Power reconciliation. Proposed fixture input power checked against the applicable allowance.
- Control sequence. Zone boundaries, operating states, scheduling, and applicable exceptions.
- Optical information. BUG or cutoff documentation and any local spill or aiming requirements.
- Acceptance responsibility. Required forms, testing scope, and the person responsible for each signature.
Don't leave acceptance ownership until inspection. Assign it while the drawings, controls, and equipment schedule can still be changed without replacing installed hardware.
When Lots Fail After the Lights Are On
Drivers squint at the poles, neighbors complain about bedroom windows, or tenants say the lot feels wrong after dimming. Treat each complaint as a diagnostic lead, not an automatic request for more output.
Post-install parking lot lighting failures and fixes
| Symptom | Likely cause | Fix |
|---|---|---|
| Glare in drivers' eyes | Tilt, high output, or no cutoff | Aim down, add visors, and lower the high state only if criteria still pass |
| Light in neighboring windows | Backlight and no house-side shield | Shield perimeter poles and review vacant output |
| Lot feels unsafe after dimming | Low state or timeout too aggressive | Remeasure at night and raise the minimum or overlap sensor coverage |
| Sensors leave a dark bay | Coverage gap or failed node | Overlap zones and implement the approved high-state fallback |
Separate proven opportunity from promised savings
The U.S. Department of Energy's LEEP campaign summary reports that participating projects were saving 137 million kWh annually by February 2018, equivalent to approximately $14.79 million in electricity costs. That demonstrates the scale of the opportunity across participating parking facilities, not a forecast for a particular property.
Diagnose a disappointing bill by checking actual operating states, overrides, tariff changes, and whether the baseline included failed fixtures. A comparison against a partially dark existing installation can make a successful lighting correction look like an energy failure.
Don't promise a dramatic reduction to a lot that already has efficient LEDs and limited vacant hours. Its best improvements may be better sensor zoning, reduced spill, fewer complaints, or more reliable operation. Price those outcomes instead of forcing every project into an oversized energy-savings claim.
Budgeting Energy and Maintenance Over the Lighting Life
Build the budget from measured hours in each control state. For every zone, multiply measured input power in kilowatts by annual hours in that state, then add the results. Apply the site's tariff, including relevant time-dependent energy and demand charges rather than a generic electricity rate.
Use the same operating assumptions for each proposal. Otherwise, an apparently cheaper fixture package may assume more dimming or fewer occupied hours than the competing design.
Separate recurring costs from corrections
| Budget line | What to include | Basis for approval |
|---|---|---|
| Annual energy cost | High-state, vacant-state, and other operating energy; applicable tariff charges | Logged runtime and measured input power |
| Annual maintenance cost | Cleaning, inspections, driver or fixture replacement, access equipment, and troubleshooting | Site conditions and actual maintenance history |
| One-time corrections | Shields, visors, added sensors, control revisions, and installation adjustments | Defined scope and contingency |
Set lens-cleaning intervals from observed dirt accumulation, not a generic calendar. Plan compatible driver or fixture replacements, and have qualified personnel assess pole condition and determine appropriate integrity testing. Keep nighttime complaints in a log with the relevant operating state and weather conditions.
Compare this budget with actual invoices for the existing system, including lift access and repeat callouts. Fund likely optical and sensor adjustments during installation so they aren't treated as unplanned disputes after occupancy.
The comparison is cost for maintained performance, not purchase price per fixture. A low bid that depends on unverified output or unrealistic vacant hours isn't the lower-cost design.
Book a Night Survey Before You Buy Fixtures
Don't order poles from a wattage quote. Book a night survey that records existing illuminance, poorly lit stalls, property-line spill, visible glare sources, pole condition, and the hours each area is occupied.
Bring a marked site plan and identify the places that generate complaints. Include neighboring windows, pedestrian shortcuts, loading activity, and the route used by the last tenant or employee to leave.
Ask for a usable decision record
- Written readings. Identify measurement locations, operating conditions, and the equipment state during the survey.
- A marked plan. Connect deficiencies to specific stalls, routes, fixtures, and boundaries.
- A defined scope. Include photometric review, control-state verification, and applicable permit and acceptance work.
For Southern California projects, put compliance coordination in the same scope as the lighting changes. That keeps the owner, designer, installer, and acceptance personnel working from the same equipment schedule and operating sequence.
At Access Electrical and Lighting, our complimentary lighting surveys assess the property and recommend energy-efficient improvements. Bring your marked plan to the survey and request the findings in writing before authorizing fixture purchases.
Access Electrical and Lighting offers lighting controls, LED retrofits, parking-lot repairs, and Title 24 certification, testing, and documentation. Visit Access Electrical and Lighting to request a complimentary lighting survey and discuss a scope that connects measured light levels, operating hours, and the work needed at your property.