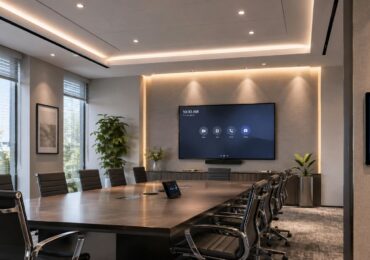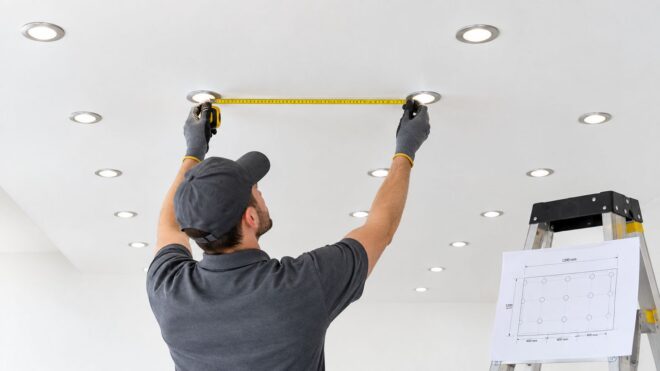
You're standing under a ceiling full of downlights, yet the corridor still has dark patches between doors. In the office, the fixtures near the conference table create glare while the perimeter looks dull. The original layout followed a neat grid, but neat spacing alone doesn't guarantee useful light.
So, how far apart should recessed lights be? A reliable starting point is roughly half the ceiling height, with the first row about half that distance from the wall. From there, the layout has to respond to beam angle, fixture output, room function, controls, and the light levels the space needs. The following guide applies that basic rule to commercial, office, multifamily, and retail conditions where a bad hole location creates expensive rework.
Why Recessed Light Spacing Matters More Than You Think
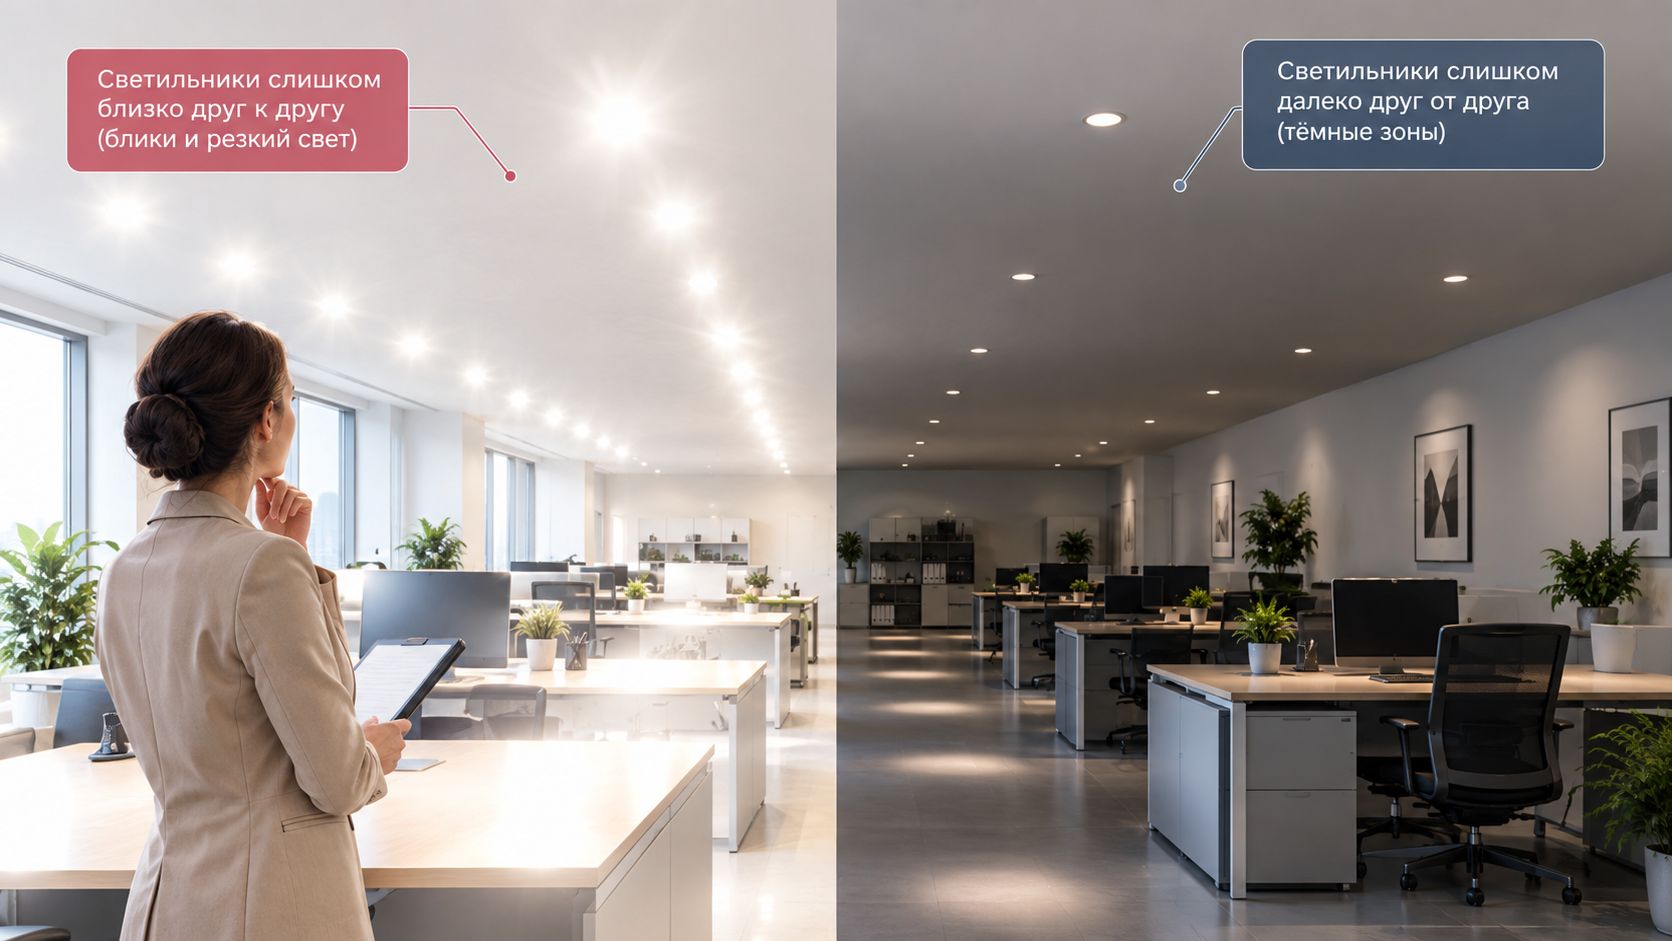
A downlight doesn't illuminate a room as a collection of isolated circles. Each fixture produces a beam that spreads across the ceiling, walls, floor, and furnishings. Good spacing lets those pools overlap enough to create consistent coverage. Poor spacing leaves either bright hot spots or gaps that occupants notice immediately.
When fixtures are installed too close together, the ceiling can look crowded and the light can feel harsh. Employees may see reflected glare on monitors, residents may complain about uncomfortable brightness, and facility teams end up dimming an entire zone to solve a problem created by a few badly positioned fixtures. Moving lights too far apart creates the opposite issue, with dim areas between fixtures and shadowed corners that make a property feel unfinished.
The grid is only the starting point
On a commercial job, the first question isn't how many fixtures fit on the reflected ceiling plan. It's what the light needs to do.
An open office usually needs a stable ambient field, while a kitchen or break room needs more attention on counters and work surfaces. A corridor may need continuous visual guidance, while a retail wall may need adjustable accent light rather than a uniform ceiling pattern. A multifamily lobby may combine downlights with decorative pendants, wall sconces, and indirect illumination.
That's why the half-height rule works best as a baseline, not a final answer. It gives the installer a sensible first grid, then the designer or foreman adjusts the spacing for the fixture's distribution and the room's purpose.
Field rule: A symmetrical grid can still be a poor lighting design if the beams don't overlap where people work, walk, read, or look.
Before drilling, check the ceiling height, fixture photometric data, beam spread, lumen output, wall conditions, furniture plan, and control zones. A quick sketch and a light-level review can prevent a large amount of patching and relocation work.
The Simple Math Behind Recessed Light Spacing
Start with a working grid, then verify it against the fixture and the job conditions.
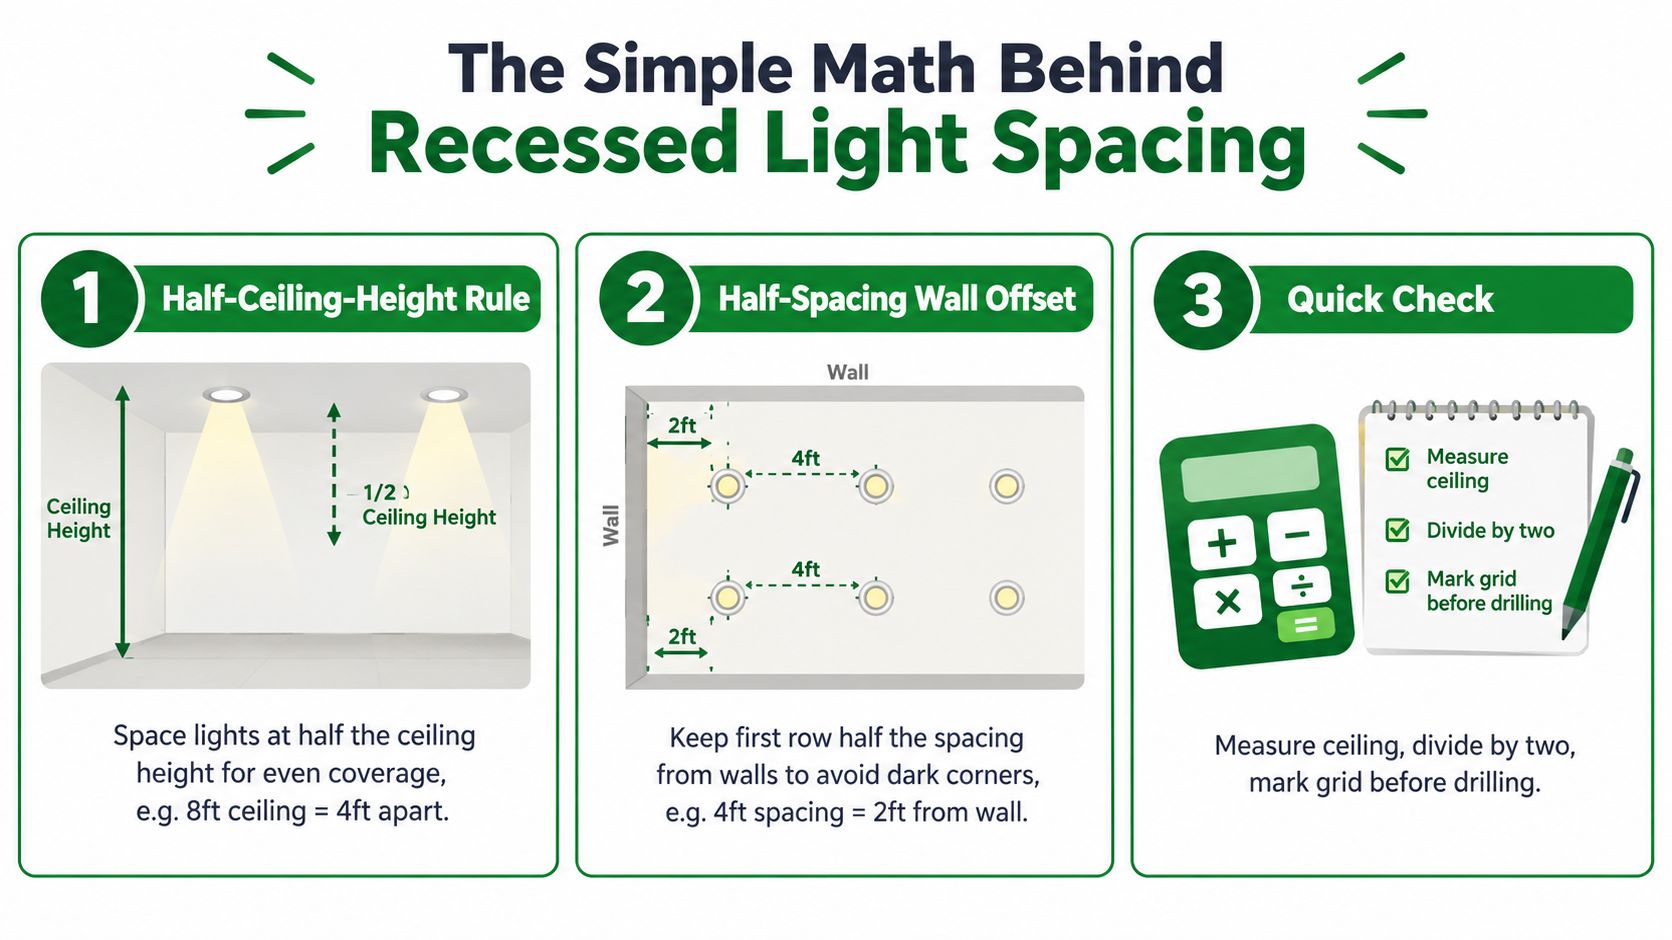
Inter-fixture spacing = ceiling height ÷ 2
For an 8-foot ceiling, that gives about 4 feet between fixtures. For a 10-foot ceiling, it gives about 5 feet. This half-ceiling-height method is a practical first pass, as outlined in recessed lighting layout guidance.
The reason is simple. A higher ceiling gives the beam more distance to spread before reaching the occupied plane. Scaling spacing with ceiling height helps adjacent pools overlap instead of leaving isolated bright spots. In offices and multifamily corridors, use this as a starting grid, not an approval of the final layout. Beam distribution, lumen output, ceiling finish, controls, and Title 24 requirements still need review.
Set the perimeter before the interior
Keep the first row off the wall. A common starting point places it about half the fixture spacing from the wall, then centers the remaining grid within that boundary.
- 8-foot ceiling: about 4 feet apart, with the first row about 2 feet from the wall. See the height-based spacing and wall-offset guidance for this method.
- 10-foot ceiling: about 5 feet apart, with the first row about 2.5 feet from the wall.
- Metric planning: a 10-foot ceiling is commonly laid out at about 1.2 to 1.5 meters between downlights, with an edge offset of about 0.6 to 0.9 meters.
Apply the grid to a rectangular room
Draw the room to scale, mark the usable area inside the wall offsets, and divide it into equal bays. Do not set the first fixture and work outward by eye. Center the grid so opposite margins match, adjusting nominal spacing when necessary.
A long office may require several rows. Lay out the perimeter first, divide the interior into balanced fields, then check each fixture against ceiling tees, joists, diffusers, sprinklers, access panels, and pendant locations. On a multifamily project, coordinate the grid with corridor geometry and unit entry conditions before drilling.
The formula locates fixtures. It does not confirm that the room has enough light for its use. Review the target level in foot-candles and the fixture photometric data. A practical explanation of what foot-candles measure helps property teams define the requirement before installation.
How Beam Angle and Brightness Change Your Layout
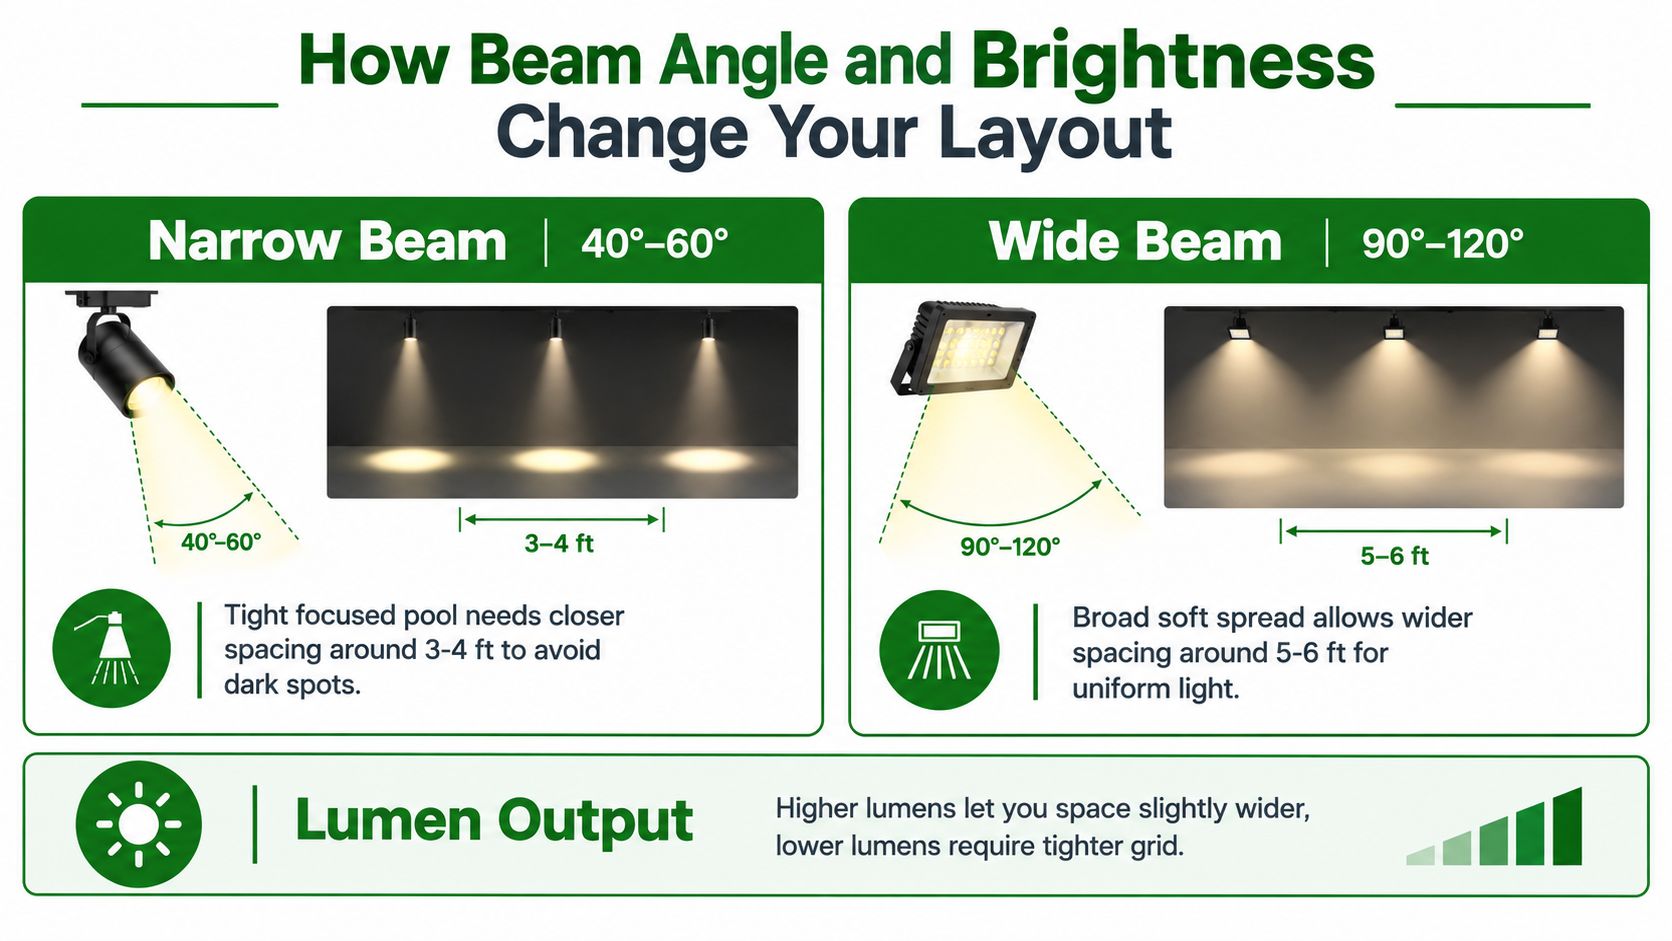
A half-height grid can look correct on paper and still fail in the field. Beam angle, lumen output, trim design, ceiling finish, mounting height, and the task below each fixture determine how far apart the downlights should go.
A narrow beam concentrates light over a smaller area. It suits a feature wall, display, or architectural detail, but can leave dark bands between fixtures when used for general lighting. A wide beam spreads light across more of the ceiling and occupied plane, allowing a more open layout when its output is sufficient. In offices and multifamily corridors, that choice affects both uniformity and the number of fixtures required.
Use the spacing criterion carefully
Manufacturer photometric data often gives a spacing criterion as a multiplier of ceiling height. Eaton describes values between 0.5 and 1.5, multiplied by ceiling height to establish a product-specific maximum distance between fixtures. Its example uses a 6-inch light with a 1.5 spacing criterion under an 8-foot ceiling, producing a maximum spacing of 12 feet, as shown in its recessed LED spacing guide.
Treat that result as a photometric limit, not an automatic ambient layout. It applies to the selected product and criterion. A commercial or multifamily grid may need tighter spacing to control dark spots, support vertical illumination, and meet the intended use. The half-ceiling-height rule remains a starting point, then beam distribution and lumen output determine whether the grid can open or must tighten.
What changes on the job
Set fixtures closer when the beam is narrow, the ceiling is high, the surface absorbs light, or the task demands clear coverage. Kitchens, work counters, conference tables, and corridor decision points need more deliberate placement than inactive storage areas.
A broad flood distribution or higher-output fixture may allow wider spacing. Higher lumens alone do not solve poor layout. A bright downlight placed too far from its neighbor can create hot spots beneath each fixture and weak vertical illumination between them. Check the actual occupied plane, wall surfaces, and corridor travel path. For California projects, also verify the selected controls and fixture arrangement against applicable Title 24 requirements before finalizing the grid.
The practical test is uniform light where people work and move, not evenly marked ceiling tiles.
A lighting calculation tells you whether the fixture arrangement performs. The tape measure only tells you where the fixtures are.
Spacing by Room Type and Real World Examples
The same ceiling height can require different layouts in different spaces. A break room with counters, cabinets, and reflective appliances behaves differently from an open office. A corridor needs continuity along the travel path, while a retail area may need flexibility for changing merchandise.
Use this table as a starting framework, then verify the selected fixture's beam distribution and output against the room's lighting requirements.
| Space Type | Ceiling Height | Suggested Spacing | Wall Offset Tip |
|---|---|---|---|
| Kitchen or break room | 8 feet | Start near 4 feet, then tighten around active work areas as needed | Use about 12 to 36 inches, depending on counters and wall wash |
| Open office | 8 to 10 feet | Start near half the ceiling height for a balanced ambient grid | Keep opposite margins consistent and avoid monitor glare |
| Multifamily corridor | 8 to 10 feet | Lay out for continuous coverage along the walking path, not just a square grid | Use the wall offset to prevent dim door zones and corners |
| Lobby or reception | 8 to 10 feet | Begin with the height-based grid, then coordinate pendants or sconces | Shift fixtures to support reception desks, seating, and vertical surfaces |
| Retail sales floor | 8 to 10 feet | Use a flexible ambient pattern and reserve adjustable fixtures for displays | Set the edge based on merchandise walls and desired wall illumination |
Kitchens and break rooms
Counters expose bad layouts quickly. If the downlights sit behind the person working at the counter, the worker's body can cast a shadow over the surface. Coordinate the row with the usable counter line, cabinets, sinks, and appliances instead of blindly following the room perimeter.
Under-cabinet lighting, pendants, or a dedicated task layer can reduce the pressure on the recessed grid. That often produces better visual comfort than adding downlights everywhere.
Offices and lobbies
Open offices benefit from uniformity, but fixture placement must also respect screens, conference tables, return air, sprinkler heads, and ceiling modules. Dimming zones should follow how the space is occupied, not merely how the fixtures line up.
Lobbies can tolerate more visual variety. A centered ambient field may handle general circulation, while pendants or sconces provide identity and vertical brightness. That layered arrangement can make a dense recessed grid unnecessary.
Corridors and retail
Corridors should be judged from the walking path and adjacent doors. A mathematically centered row can leave doorways, elevator lobbies, or intersections visually weak. Parking structures and other safety-sensitive areas also require code-aware design and controls, so spacing must be reviewed with the complete electrical and life-safety scope.
Retail lighting needs change more often. Fixed downlights may provide general coverage, but adjustable fixtures offer better control for displays and feature walls. Keep the ambient system stable and use accent layers where the merchandise demands attention.
Laying Out Your Grid Without Mistakes
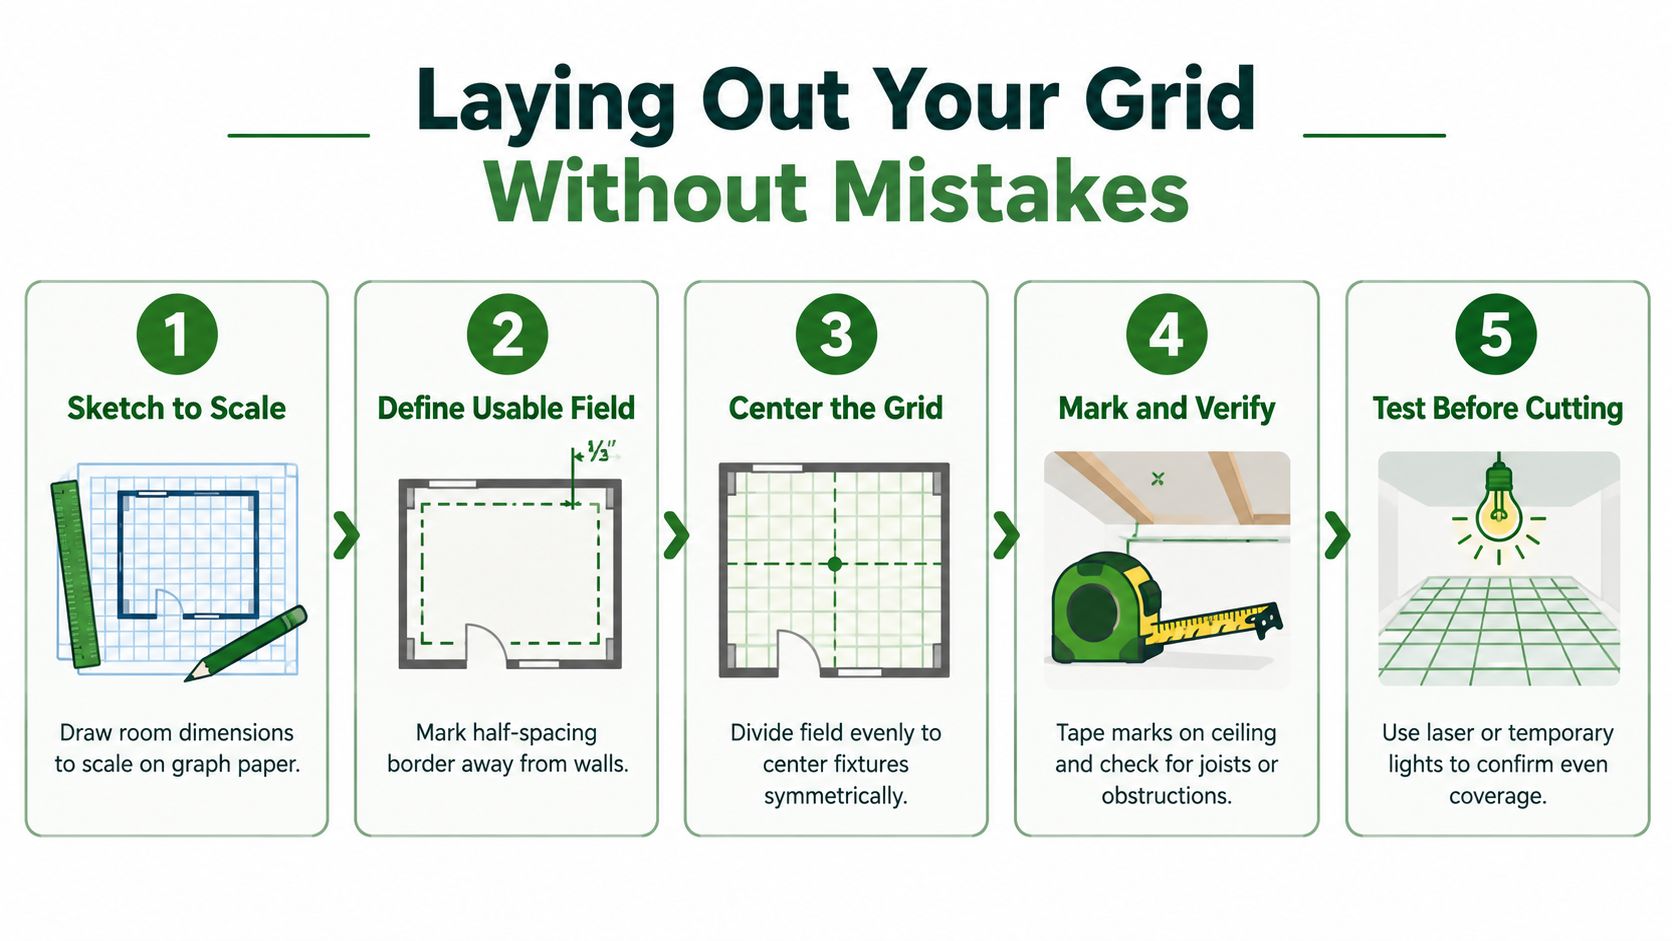
The most reliable layout starts on paper, not on the ceiling. Draw the room to scale, include fixed obstructions, and mark the areas where people work or move. A scaled sketch reveals problems that disappear when someone measures from the nearest corner and repeats the distance by eye.
Follow the field sequence
- Sketch the room: Draw the walls, ceiling elements, furniture, counters, doors, diffusers, sprinklers, access panels, and equipment locations.
- Define the usable field: Apply the planned wall offset around the perimeter, then identify any areas that need separate task or accent treatment.
- Center the grid: Divide the usable field into balanced bays so opposing margins match. A slightly adjusted spacing pattern is usually better than a visibly off-center grid.
- Mark and inspect: Transfer the positions to the ceiling with a laser or tape measure. Check joist locations, conduit, plumbing, insulation, fire-rated assemblies, and existing wiring before cutting.
- Test before cutting: Use temporary fixtures, a laser layout, or a mock-up to confirm that the beams land where the plan expects them to land.
Don't stop at equal measurements
The most common failure is a grid that looks perfect on the ceiling but doesn't provide the required light level. Spacing alone ignores lumen output, beam shape, surface reflectance, furniture height, and the difference between ambient and task lighting.
Use a recessed lighting calculator to organize the initial layout, but treat the result as a planning aid rather than a substitute for fixture photometrics or field verification. Review the fixture cut sheet and confirm the proposed arrangement with a lighting calculation when the project has demanding tasks, high ceilings, or inspection requirements.
Coordinate installation constraints early
A fixture location can be optically perfect and physically impossible. On renovation work, locate joists and existing branch circuits before the crew arrives with hole saws. In insulated ceilings, confirm the fixture's insulation-contact rating and required clearances. In rated assemblies, use an approved assembly and detail the penetrations correctly.
Controls also belong in the layout conversation. California projects may require Title 24 controls, dimming, occupancy response, daylight response, or documentation tied to the specific space and equipment. The control strategy can affect fixture grouping, switching zones, sensor placement, and commissioning, so it shouldn't be added after the ceiling is closed.
High ceilings and parking structures introduce access and maintenance issues. Make sure the owner understands how lamps, drivers, trims, sensors, and emergency components will be serviced before the fixture pattern becomes permanent.
Getting Even Light That Lasts and Passes Inspection
The practical answer to how far apart should recessed lights be is to begin with half the ceiling height, place the perimeter row about half that spacing from the wall, and then modify the pattern for beam angle, output, task requirements, and obstructions. That baseline is useful because it scales with the room rather than forcing every ceiling into the same fixed grid.
The better modern design often uses recessed fixtures as one layer, not the entire lighting system. Sconces can brighten walls and corridors, pendants can handle counters or reception points, and indirect sources can soften the ceiling. Quality dimming and compatible controls let occupants use only the light they need instead of operating every fixture at full output.
For Southern California commercial and multifamily work, bring in a licensed C-10 contractor when the layout affects Title 24 documentation, control sequences, emergency lighting, fire-rated construction, or an existing electrical distribution system. Review the applicable Title 24 lighting requirements before the installation plan is finalized, especially when the project combines new fixtures with retrofit controls.
Don't commit to ceiling cuts until someone verifies the field layout, fixture photometrics, obstructions, and expected light levels. A short pre-installation review is cheaper than relocating a finished fixture, repairing the ceiling, and explaining uneven illumination to tenants or building occupants.
Access Electrical and Lighting provides commercial recessed-lighting layout, installation, controls, maintenance, and Title 24 support for office, retail, and multifamily properties. Visit Access Electrical and Lighting to discuss your ceiling plan, verify the fixture grid, and schedule a professional lighting review before work begins.